
Table of Contents
How to Clean Climbing Gear – The Complete Guide
Your climbing gear and equipment are expensive. But with proper transport, storage, inspection, and care, you can accomplish the maximum lifespan of your gear.
Keep in mind that each part of your gear undergoes a rigorous and strict testing process to make sure it serves its purpose in an emergency and that you can count on it 100%. To maintain its reliability for a very long time, this guide covers the most important information and tips for the maintenance and care of your climbing equipment.
Is It Important to Clean Your Gear?
Apart from making your gear look amazing, your gear will work better and last longer if you always keep it clean. Apart from germs, removing grime and dirt from your gear is something you must be doing at least once every year. Other gears could be cleaned more often.
For instance, if your rope is oily or dirty, it will not be as smooth going through the anchors or belay device. Recall how your rope felt the first time you start using it. You must feel like that whenever you use it. That’s why we suggest cleaning your gear each season or once every year.
What of your Climbing Gear Be Cleaned?
Are you still not certain what type of gear you must clean? Feel free to look inside your climbing bag. Everything should be disinfected and cleaned at the same time, except for things that hold weight like rope and harness as well as slings etc. NEVER touch your rope or harness with disinfectants or other aggressive chemicals! Other than rope, all should be cleaned, that includes your carabiners and brush.
However, each of those items needs a different method of cleaning. Therefore, every piece of climbing gear must be cleaned carefully and individually to make sure it’s cleaned properly and does not get ruined.
Are you a smart climber like us? Then you probably have a first-aid kit or something like that. Even though that kit does not to be disinfected, you must take a few minutes to clean out any of those band-aid leftovers from the previous year and add anything that should be replenished.
Cleaning Climbing Rope
Rope bags or no rope bags, even the cleanest of climbers cannot prevent a bit of dirt, dust, or stench from tarnishing their favorite climbing ropes. Whether you like it or not, learning how to properly clean your rope is an unavoidable task you must experience.
Many rope manufacturers believe that caring and washing your rope guarantees better handling and can boost its lifespan. Fortunately, there is an easy method for people who want to clean their rope the good old-fashioned way. That simple approach is about as basic as it gets and to be the sure-fire and low-impact way to end up with an intact and clean climbing rope.
What you need to clean it
– Shower or bathtub
– Water
– Clean tarp, big bag, or towel
How to clean your climbing rope
Here are the necessary steps you need to do to make your rope clean again in no time.
1. Fill the tub with water
The first step you need to do to clean your climbing ropes is to fill up a bathtub with enough water (that ranges from cold to barely warm) to cover the wet rope. That does not require much.
2. Plop in the rope
For the second step, put your dust and dirt-filled rope into the tub. Shake it around and let it sit in the water for several minutes.
3. Stroke it clean
That might be the only technical aspect of your endeavor. Get the one end of the rope and start flaking it. Rub each area clean with a rope cleaner as you go along. Of course, you will be stroking your rope. That step offers you an excellent opportunity to evaluate the health of your rope. You can use a rope brush in this step.
Make sure you also assess for soft or weak spots that might signal that it is time to retire it. Further, you need to make sure to take a few minutes to celebrate your soon-to-be-clean rope.
4. Wash the rope with a rope cleaner
After you make it all the way through the rope’s other end, give it another wash in the shower. Your rope’s sheath will be psyched.
5. Let it dry
You can utilize the tap to take your rope somewhere where you can neatly hang it to dry. If you don’t have access to outdoor space, you can spread a couple of towels out on the ground. Flake your wet rope into the towel, being extra careful to spread out the rope as much as possible.
Remember that it might take a few days to completely dry the rope. You can also flake the ropes over the shower curtain if it is blurry or utilize a heavy-duty drying rack if there are any. Metal gear shelves could be an excellent option for drying and flaking too.
Cleaning Carabiners
As you can visualize, the functionality of your carabiners is vital to a safe descent or ascent. As such, it is integral to get rid of any oil or grime that could be limiting or obstructing the full functionality of your gear.
What you need:
– Hand soap
– Warm water
– A bowl
How to clean your carabiner
To keep your clean carabiners in good working condition, make sure you do the following steps:
1. Wash your carabiner more often
You can use lukewarm water at least 30 degrees Celsius and pH neutral washing-up detergent or liquid. Regular cleaning eliminates grime and dirt that might stop your carabiners from closing properly or else interrupt their proper operation.
After you wash it, wash every carabiner sticky gate off and leave it to dry carefully in a dry, well-ventilated area that is out of direct sunlight. Sunlight, humidity, and heat can lessen the working life of your carabiners. On top of that, you should not put your carabiners in a tumble dryer or washing machine.
2. Lubricate all the moving parts
Lubricating the internal mechanism of every carabiner will keep your equipment working perfectly. In this step, you can use an oil-based silicone and prevent products containing sulfur.
Dry any excess oil with a paper towel or damp cloth. Finally, open and close the carabiner several times to guarantee it is completely lubricated.
3. Check your carabiner occasionally
Keep in mind that period inspection of your carabiner gate guarantees that they’re in great condition and safe to utilize. Inspect gear and create a formal inspection and maintenance schedule to ensure your carabiners are not falling into disrepair any time soon.
Cleaning Climbing Cams
Do you notice a grinding sound when using your climbing cams? Do you notice their performance starts to decline? Do the cams’ mechanisms feel slow, gritty, or sticky?
If your cams are constantly utilized in dusty environments, it would no hurt to perform a seasonal cleaning even if they are not presenting any signs of degradation.
If you climb at sea-cliffs or your cams are exposed to salty air even for only one session, you should remember that they deserve a rinsing. That’s especially true if you cannot do a full-on clean, as salty water is corrosive even to the steel components.
What you need
– Drying rag
– Mild dish detergent
– A soft-bristled brush
– Hot water in a pot or basin
– Hairdryer or compressed air
– Scrap to catch more lube
How to clean a cam
1. Wash the cam in a warm water
That could be in a pot or basin of sitting water or under the hot tap. Opening and closing the cam heads into the hot water will help loosen all the dirt and grime. As to the temperature, you like the water to be hot but not scalding.
The ideal temperature would be 50 degrees Celsius, which is hot enough that it feels hot, but it does not make you cringe or jump when testing it.
2. Add the mild cleaner into the water
Swish the cam lobes around into the soap water, open and close it. You can also utilize dabs of soap straight on the springs, axels, lobes, and heads. Your goal here is to properly clean the cams like you are washing a dish.
Make sure you get soap in every crevice where dirt and debris might be hiding.
3. Remove extra grime and gunk with a brush
You can utilize a bouldering brush or toothbrush and softly but carefully brush the cam’s head on the inside, outside, and in every crevice. However, you should prevent heavy pressure as that could dislodge the cam springs from their perfect spot.
4. Wash it with fresh water, closing and opening the heads
Your goal here is to get every soap off so the lube will properly stick. Are your cams gritty after washing? You can repeat steps one to four.
5. Use a damp cloth or rag to remove the big water droplets
For the step, your cam should be completely dry before applying the lube. After you wipe away the remaining water, just let it sit for several hours so the small crevasses might dry entirely. For faster drying, you can use a hairdryer, compressed air, or no heat fan.
6. Apply the lubricant
You can use any lube, such as silicon, Teflon, or wax lubrication which is all under ten bucks. You can apply that to the axles, springs, and between the side plates. You can also work the lube in by squeezing the cam trigger a little bit.
Make sure you prevent getting on the sling. For added safety measures, you can cover the sling in a plastic bag or newspaper. It might also be useful to apply the lube over a newspaper, a paper towel, or other scraps to prevent unnecessary lube dripping and spreading it to other unwelcomed areas.
7. Wipe off all the excess cam lube
Typically, that’s done with a rag, and its purpose is just so it does not spread to undesirable areas like the sling and other important equipment.
Cleaning a Climbing Harness
You should do a common practice to inspect equipment on a regular basis. For instance, it might be time to retire it, especially if you notice fraying or discoloration in it. Do not forget that structural materials will degrade over time—and your ultimate safety is not something you like to compromise on. Right?
Believing that everything is fine, you can proceed washing it. The strange shape of your climbing harness might lead you to think that they are challenging to clean, but that is far from the truth.
Your harness is one of the crucial pieces of equipment that helps you stay safe, and as such, you must maintain it as clean as possible, so it can last as long as possible. In scenarios where it should be disinfected or particularly dirty, you can use the following steps.
What you need
– A soft brush
– Hand or dish soap
– Warm water
– A clean storage tub, bathtub, or sink
How to wash your harnesses
1. Hand wash it with a mild detergent and hot soapy water
It’s important that you don’t toss your harnesses into the machine drum or wash it with strong chemicals like bleach. A bucket of luke warm water with mild soap will do just fine.
You should give your harnesses a decent soak and wash them several times with clean water. There’s no need for you to use a brush. Nonetheless, you must clean it with a soft-bristle toothbrush, especially if you are one of those who have the urge to brush the shit out of your harnesses.
2. Air-dry it
After washing, hang your harnesses to air dry. You can hang it somewhere close to a window where it’s breezy but keep that away from direct sunlight. Do not dry your harnesses under the sun.
Take note as well that harness materials like polyester and nylon are subject to slow deterioration by the chemical impact of UV rays.
3. Store it after
After you wash it, ensure your harnesses are totally dry before you keep them in a dry storage area. Don’t store wet it.
4. Prevent buckle corrosion in your harness
Buckle corrosion is one of the major reasons why your harness is retired away earlier than it must. Most climbers get corrosive substances in their brand new harness only after more than a year of use. That’s why you should learn how to deal with that problem.
Climbing at crags close to the sea or climbing topless in humid or hot environments with your harness soaking up a sweat is one of the reasons that lead to having corrosive materials.
There are various types of harness buckles. Others are more prone to corrosive substances than others. A good common practice to lessen the chance of buckle corrosion is to wash your buckle and connect the nylon strap with a tap after every climbing session.
That’s especially true if your harness is extremely soaked with swear. That will help to remove any corrosive materials such as your sweat from the buckle itself.
How to clean your Climbing Shoes
When we talk about cleaning your climbing shoes, the objective is associated with shoe stank, which is essential. Imagine this—you have been wearing your new climbing shoes for the past few months, and they have become your favorite possession.
They have broken in smoothly and have molded to your feet like a second skin. Nonetheless, there’s a major problem. Your friends do not like to sit next to you because your feet and shoes stink. Now, machine wash them in the washing machine, machine-washed them, and the problem is immediately solved. Right?
This is where a more serious problem comes in. They have shrunken, and the rubber is flaking like a 3rd-degree burn. The traumatic experience and extreme heat you have subjected them through indicates they’ll never be the same again.
So, how can you prevent such a frightening mishap? How can you clean your shoes without ruining them?
Climbing shoes truly smell bad. They are warm from your feet and damp from all the sweat. That makes for the ideal breeding ground for bacteria such as the corona virus. If you’re desperate to fix those smell shoes, you should be extra careful with this essential piece of climbing equipment.
What you need
– Hand soap
– Warm water
– Soft brush
– A piece of clothes line
How to clean your climbing shoes
For many climbers, hand wash is the best way to go. Here are the tips you need to do when cleaning your shoes and removing dirt.
1. Get your cleaning tools
Like most synthetic shoes, they tend to absorb a huge amount of sweat and stink excessively. Despite letting your shoes air dry after each session, it has reached the point that you feel bad for anyone who comes within your close vicinity. Your flat now has a strange smell, which is not ideal either. It is time for a wash.
Grab a soft brush to clean your shoes. If you’re cheap like me, an old toothbrush works fine. A toothbrush is a perfect shape to get right to the footbed’s bottom. You can also have a cloth handy. You can use that to rub the more delicate areas of the shoe, such as the logo.
2. Clean with a running warm water
When we talk about washing your shoes, you should have warm water, preferably in a sink or shower. Do not use hot water or boiling water, as you will only run the risk of ruining your shoes.
We have heard many climbers using rubbing alcohol for washing their climbing shoes. Something that I could not suggest. Rubbing alcohol can break down the adhesives that help the glue to hold your shoes together to dissolve.
Start flushing your shoes with water and gently brush its footbed and the upper’s inside. You’ll be either disgusted or amazed at how brown the water is at first. Do your shoes have a padded tongue? Ensure you provide them a gentle wash and squeeze it properly. Continue gently scrubbing the shoe’s outside and inside until the water begins to run clear.
3. Dry your shoes
After your shoes are clean, it is time to air dry those babies. With a microfiber cloth or towel, don’t forget to give them a fast wipe down. You can then stick a clot inside the shoe and offer it a gentle press. That will help absorb the excess water from the inside and lower the drying time.
Now that your pair of shoes is not dripping wet, stuff them with a microfiber cloth or paper to help them dry out and retain their natural shape. Open them up to let air flow and put them somewhere warm.
You should keep it away from direct sunlight. That will melt the glue, misshape shoes, and cause rubber degradation, too. On top of that, extreme sunlight and temperatures are the natural enemies of your equipment, especially shoes.
4. Enjoy your sand and sweat-free shoes
After several hours, your shoes will be complete and ready to be used again for climbing. Would you like to speed up the entire drying process? You can utilize a hairdryer. Just make sure it is on a low-heat setting and keep the device away from your shoes.
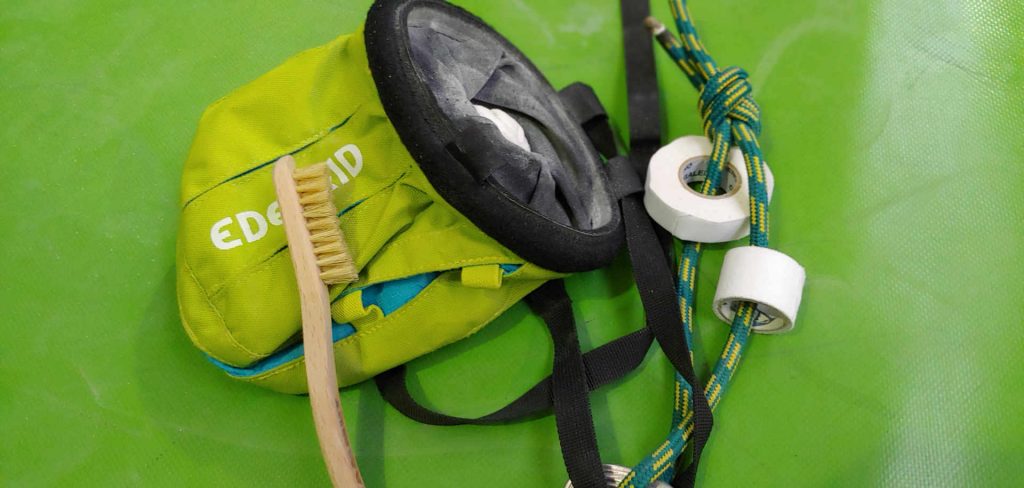
How to clean the Chalk Bag
Have you ever reached in your bag and discovered your chalk had covered most equipment? Maybe your chalk has gone lumpy or dry. You have probably had that sense of regret that you did not store your chalk bag properly.
The concept of cleaning your chalk bag might appear like a nightmare, obliging you to remove all the remaining particles of chalk to clean it. It is not that challenging to do and does not take too long.
On top of that, it is a hygienic thing to do. Just imagine all the dirt your gear gets on the fingers when you’re climbing out. Are you always kind and let other climbers use your chalk too? Then expect there to have lots of bacteria.
What you need
– Hand soap, mild soap, or body soap
– Bowl of warm water
– Somewhere to store your chalk while you are cleaning your bag
How to clean your chalk bag
1. Empty out all the contents of the chalk bag.
2. Add a mild detergent or body soap to the water and give it a good mix.
3. Clean the outside and inside of your chalk bag by hand
4. Dry out the chalk bag with a towel
5. Let it chalk bag air dry and stay out away from direct sunlight.
Would you like to machine wash your chalk bag in the machine? That will be fine. However, that could ruin your chalk bag if washed often in the machine. If you plan to use such, ensure you turn the chalk bag inside out, so the bag inside gets a decent clean.
How to clean your Climbing Crash Pad
Cleaning your pad might come at some point.
What you need
– Damp rag
– Coldwater
– Large bucket or bathtub
How to clean your crash pad
1. Wash and get rid of the dirt
Use a wet cloth to wipe off the soil and other materials from your equipment. If your pad is skunked, don’t worry. Open the Velcro seam and get rid of the landing foam inside. Take note that the order of foam is essential here.
With the shell empty, you can fill your tub with cold water or another big bucket with water and a tiny amount of dish soap. Wrestle the shell for a little while until it gets clean.
2. Dry the shell
Go ahead and wipe all the closed-cell foam off if it’s soiled. But we don’t suggest getting the open cell wet at all. Once everything is completely dried, wrestle the foam back inside the shell.
Climbing Rope Bag
It can be somewhat difficult and stressful to get your rope and other gear organized, especially if you’re just a beginner. That’s why it’s an excellent idea to have a decent rope bag that must come with enough space for
your rope. You might go years without cleaning your rope bag. However, sooner or later, you would like to get the dirt and debris out of it.
How to clean your rope bag
1. Vacuum the seams and crevices in the pockets
Do so after you empty the bag. Gently vacuum all the way inside the main body to remove loose soil, sand, or any crumbs.
2. Remove the shoulder straps or hip belt if your pack allows
Make sure you wash those with a sponge and dish soap or stain remover. Rinse well under running water.
3. Wash it
Fill your tub or big sink with at least six inches of lukewarm water. You can then utilize a hand soap. Submerge and swish the pack rigorously, sponging off the interiors and brushing the exterior areas. Pay close attention to other sites that come in contact with skin.
4. Drain
Fill the tub with clean, cool water and rinse it well. You can rinse it two times if needed to get rid of all soap residue.
Cleaning Belay Devices
Did you know that belay device are unique than most gear, as there are a lot of types of belay devices with different mechanisms, different shapes, and others are made with all-metal? However, they could all be cleaned similarly.
For cleaning your belay devices with moving parts or grigri, you should not take apart the device itself. Instead, make sure you clean the device like you would the single-piece belay devices with the following instructions.
Keep in mind that when a belay has made sharp edges on the body, it must be retired right away. The popular manufacturer of the Grigril, Petzl, suggests retiring any metal products that have wear that is greater than one millimeter deep on the body.
What you need
– A soft brush
– Hand soap
– Warm water
– A bowl
How to clean your belay devices
1. Remove all the dust and soil with a soft brush
2. Fill the bowl with good warm water.
3. Mix in the hand soap in the water.
4. Wash your belay device in that water bowl.
5. Wash the device with clean water.
6. Dry your belay device as much as you can with a towel.
7. Then let it sit out to dry and do not dry it in direct sunlight.
For further warning, make sure you don’t use harsh cleaners, stain removers, or acid when washing your belay devices. On top of that, we don’t recommend using WD 40 type degreasers as those products get rid of lubricants, and their abrasive effect could quicken wear.
Specific belay devices have some plastic components too. Ensure you only utilize body soap or household face soap. For instance, other cleaning products such as degreasers, stain removers, solvents, and others are too strong and not compatible with plastic materials.
Keep in mind as well to avoid using high-pressure water sprayers, as they can eliminate lubricants and cause damage to the joints. If lubricating is needed, you should use only lubricant with fluid oils or graphite powder.
Once done, clean all the oil residue with a cloth to prevent oil on ropes or slings.
Cleaning a Climbing Helmet
Oftentimes, your climbing helmet stays clean than other climbing gear you have.
Nonetheless, with constant use (handling it with your sweaty or infected hands, or if you incidentally dropped it in a puddle of mud), cleaning is always a smart idea.
What you need
– A soft brush
– Hand soap
– Warm water
– A clean bathtub or sink
How to clean your climbing helmet
1. Remove dirt or any visual oil or mud with a soft brush.
2. Fill your sink or bathtub with warm water that is enough to cover the helmet.
3. Mix in the hand soap into the water.
4. Wash the helmet with clean water.
5. Dry it as much as you can with a towel.
6. Let it air dry. Make sure you do not place it under the sun and do not store it while it is still wet.
7. The shell of your ABS helmet could be cleaned and sanitized with a cloth moistened with rubbing alcohol. Remember that you should not drip it directly in alcohol.
We also suggest that you utilize only household body and face soap. Other cleaning products such as degreasers, stain removers, and solvents are not compatible with nylon, polystyrene, or polycarbonate and can weaken the helmet itself. Make sure you also avoid using a high-pressure water sprayer.
Other Gears You Need to Clean
Everything inside your gear bag should be thoroughly cleaned. However, some of them might not need as many instructions for cleaning. Here are a few items that you still need to clean, but it’s possibly a lot easier than others.
Grip trainer
We often don’t see climbers cleaning their grip trainer very often. However, consider cleaning them more often than once per year as they’re continuously being gripped by your sweaty and dirty hands.
Depending on the trainer’s material, you can utilize hand soap and warm water. Does your device have a lubricant? It will help if you use a cloth with soap to go over the regions your hand touches and prevent contact with the lubricant.
Water bottle
Each gear bag has a water bottle, and you must know how to clean it. That’s more of a reminder that you must clean it, even if you only utilize it for drinking.
You can wash these water bottles in the tap rock of your dishwasher. If the bottle is not safe for it or you don’t have a dishwasher in your home, you can always use dish soap and warm water to hand wash it carefully and dry it with a towel or let it to air dry.
Belay Glasses
Belay glasses are one of those items you often touch or get dirty on them. Thus, keeping them clean can’t only lessen the chances of you getting sick but also improve their visibility.
Belay glasses could be cleaned like how a normal pair of glasses are cleaned. Make sure you clean the prisms first and get rid of any excess cleaner to make sure there are no dry marks left behind. Moreover, you can use a glass cleaner to clean the regions going around your ears and nose.
Most optometrists suggest you use spray glasses with a microfiber cloth rather than using a glass cleaner wipe. These wipes have been known to scrape the prisms when dust or soil is wiped off.
Storage Tips for All Your Climbing Gear
After cleaning all your gear, you are now wondering how you can properly store it. Lucky for you, there are many approachable climbing gears store ideas and systems you can take your space from frightening to serene.
In this section, we will teach you how to achieve that. So, let’s get you out there in that mountain air, working up a sweat and loving that fresh scene no car air freshener can recreate. Below are the important tips you must know on how to organize your gear like a professional, even if you are a complete beginner!
How to properly store your climbing gears
But before we jump into the specifics of how to arrange your gear, let us talk about the basics first.
You should not believe what those arrogant climbing dudes tell you. There is no one right way to store all your gears. Nonetheless, you will find some rules of thumb you need to follow. Extend the life of your gear by keeping it in a place that is away from direct sunlight, dry, and clean.
Further, other gears such as harnesses and ropes are not intended to last forever. You must switch them out as it wears it. You can consider keeping the old ones in another storage bin to use for other purposes.
Finally, you may like to keep another bin of climbing extras ready to go any time you need it. Consider a blanket, water bottles, a first aid kit, and shelf-stable snacks. That will make it a lot simpler to pack up and go no matter where you are ready for a climbing trip.
As long as you are keeping your gear clean, dry, and out of the sun, there are different ways to personalize your storage solutions. Here are ideas for you to try:
· Wall cabinets
Wall cabinets come in different styles, allowing you to pick the number of cabinets and drawers to fit your collection. You can also add clear drawers and bin organizers to make it simpler to know where everything is.
· Shoe rack
A standard shoe rock is another useful way to store your climbing shoes. Put it right under your wall storage for a climbing gear HQ that will offer you some butterflies.
· Wall panel
Wall panels provide the best personalization, enabling you to install hooks and bins right where you need them. You can make the wall panel as tall and wide as you want it to be and load it up, so you have smooth access to carabiners, harnesses, and ropes.
· Overhead hanging rod
A basic wooden rod will do the magic, especially if you’re short in space. You can install it to save space and keep your carabiners, ropes, and harnesses accessible. You can also hook your shoes and helmets to the road, keeping all the gear together in a simplified order.
· Pegboard
A pegboard is an excellent way to make a custom storage rack. That enables you to put pegs no matter where you like them.
Final Thoughts
Overall, as long as your gear is clean, dry, and kept away from direct sunlight, there are no guidelines for how you must store it. Make sure you clean and thoroughly check all your climbing gear regularly, as they will and can degrade in the long run.
With regular cleaning and storage practices, you can guarantee you get the most out of your gears while still being extremely safe
Did you enjoy this guide? We hope you find it informative and useful at the same time! Enjoy your climbing trip!
More articles and reviews: