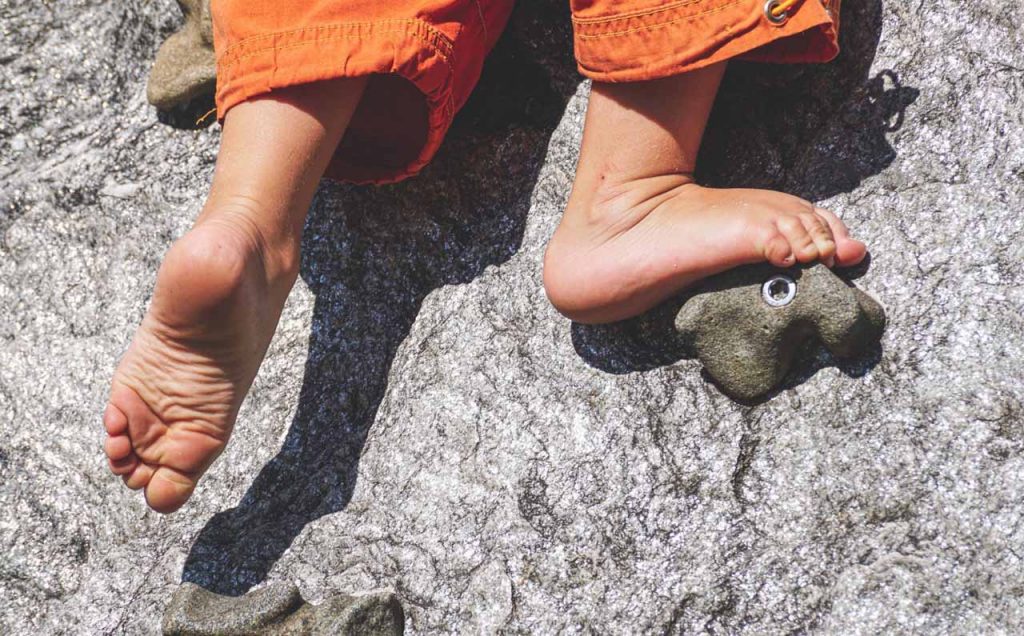
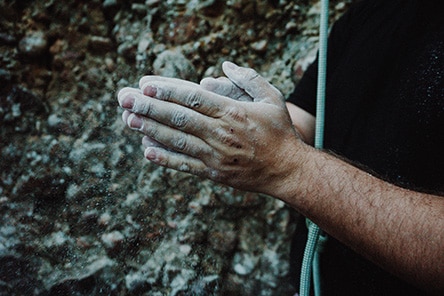
Climbing is a sport where you need lots of finger strength. The same goes for bouldering and alpine climbing. No matter what you do exactly, your fingers will usually be sore if you’re new to climbing. There are actually findings that show that climbers fingers and hands actually adapt to the short, intense stress climbing exposes them to. Others claim climbing can lead to early Osteoarthritis, so is climbing badly for your fingers?
No climbing is not bad for your fingers, at least not when done right. Improper technique can lead to injuries, but proper climbing strengthens the tendons in hands and fingers, but over a long period of time. If you’re prone to arthritis, you should take extra care warming up properly and work on your finger flexibility.
Does Climbing Increase Chances to Suffer from Osteoarthritis?
Osteoarthritis comes from wear and tear of joints. As such, it results from improper loads and abnormal stress on the same joints over a long time. This is what happens if you put abnormal loads on your fingers and joints for decades. As of today, there is no clear indication of whether sports activities cause Osteoarthritis or not. In order to find out, studies where undertaken with young climbers. Why young climbers you might ask? If young climbers show Osteoarthritis, that would be a very safe sign that climbing actually can cause Osteoarthritis. The same cannot be said about older climbers, as they can naturally suffer from Osteoarthritis.
Don’t mistake Osteoarthritis with “normal” Arthritis; these two are not exactly the same. Arthritis is usually more severe, and as an inflammatory disease affects the joint capsules first. Osteoarthritis affects the cartilage of the joints first and is usually not so severe. This study compared 27 climbers to non-climbers and found that the answer is likely no, at least for the joints in the hand. The study found out that the climbers had stronger hands, however, and some even thicker bones. Climbing is actually likely to remodel your bones to get stronger to make them more powerful – nice side effect! This study actually found out that non-climbers had a higher chance of Osteoarthritis then climbers, especially on the joints of the thumb finger.
But results are not uniform, this study, written 2 years earlier actually found that climbers were at increased risk, as there were climbers in the study group that had signs of OA and none of the non-climbers had. Another study from 2011 supported these findings, showing that climbers showed signs of osteoarthritis sometimes.
But all of these studies had very small sample sizes and not the best methodology. In my eyes, the study with the best methodology found these results:
The more intensive you traing climbing, the more your body adapts, resulting in broadened joints. Osteoarthritic changes where rare in young climbers.
Is Rock Climbing Bad for Arthritis?
But what if you suffer from arthritis already? Is climbing badly for it? Actually, there are many physiotherapists that recommend climbing when people suffer from arthritis. Climbing is great to improve flexibility in the core and hips. And while arthritis will probably reduce climbing performance, a general regimen of sport and exercises is still good for patients with arthritis. Keeping strong muscles and flexibility is even more important when your maximum range of motion is limited because of arthritis!
Can Rock Climbing Cause Carpal Tunnel?
Carpal tunnel is a condition that causes weakness and numbness. If you ever felt these things in your thumb, index, or middle finger when climbing a longer session, it might affect you as well.
Some people are more prone to carpal tunnel syndrome than others. People that spent most of their time in front of the computer and hack on their keyboard are particularly likely to develop it. Climbers can suffer from it too, as the repetitive pattern of wrist use when climbing increases the chance of developing these problems. Especially when you hold a grip, your wrist flexors are continuously put under stress. When the muscles compress, they can actually compress the nerves, and then you suffer from numbness.
If I’m reading it correctly, it appears to state that climbing does not increase your chances of arthritis. It also states that climbing causes the bones in the fingers to be wider than non-climbers, hypothetically proposed as additional bone deposits due to the rock climbing; not causing any negative side effects, however. Also, it appears that these traits appear in people who boulder a lot and rock climb a lot.
Is Rock Climbing Bad for Your Fingers When you Age? Can You Go Rock When You Are over 50 Without Finger Problems?
Most commonly climbers injure their A2 pulley in the finger. The injuries come in 3 categories from a simple sprain over a more serious sprain to a torn pulley. And the injuries take a long time to recover, especially for climbers of age over 50.
But climbing also strengthens the tendons of the fingers, so if you are careful, and have a disciplined training approach (i have an article about it here), there is a good chance of being in your 60s or 70s and climbing quite well. I actually know a lot of older climbers who are still sending hard routes, are all over 60, and have no problems with finger or hand pain.
Related Questions
How Can I Let My Hands Heal After Rock Climbing?
Skin problems are a typical problem for climbers. If you want to keep your skin in working condition for climbing, there are some easy tips you can follow. They will all help you to climb harder, and more often.
Tip for better skin healing
When to do
Why it’s effective
Wash hands after climbing
After your session
Removing dirt and chalk from scratches and wounds will decrease the chance of infection, and help hands to recover
Putting on Lotion before bed
Immediately before you go to bed
The lotion will recover the natural fatty film of your skin and moisturize it. By applying before you sleep, the lotion has a good chance to be fully effective, and you can use a very thick formula, that would normally interfere with not leaving greasy stains on clothing and work.
File calluses down
Whenever you have time
Calluses can get compressed and actually increase the change of flappers, read more about it here. So better file them down and keep a minimal thin layer of hardened skin.
Try different chalk brands
When training, not on on-sight attempts!
Some chalk is more aggressive on your hands than others, give yourself a chance to find the right one by trying out different brands, and see how your skin reacts.
Minimize hot water exposure of your hands
Whenever you wash hands or dishes
Hot water dries out your skin, read more about it here. Simple turn the water a bit cooler, it will still remove dirt and stains well.
Will Rock Climbing Get You in Shape?
It will get you in better shape than doing nothing. It’s not the Nr.1 sport to burn off calories, but it does burn between 500-900 calories in one hour, depending on how much you rest between routes. It also helps build some muscles in your body and keeps you flexible, although it is no way to build a bodybuilder physique. If you want to get in shape, combine climbing with some dedicated strength training and 1-2 times running per week, and you will be in very good shape quickly!
What Is Finger Tape for Climbing?
Climbing tape or also called finger tape is used to protect the skin and tendons of your fingers to put it simply. If you want to know more about it, I wrote an article about it here.
First time I did a multi-day hike I actually spent a lot of time thinking about how to carry my food. I wanted to make sure I brought enough, so I undertook some research. I came up with lots of information, and I thought, why not put them together, so you benefit from them as well. Turned out, packing food on a multi-day hike is a little more challenging than putting it into a fridge, especially in warmer climates or in summer.
How to Carry Food on a Multi Day Hike? On a multi-day hike, carry food in individual pouches. Repack it into Ziploc bags, soft foods on top of harder food. You want to get some fresh food and some food that stores well. On the first day, you will be able to have some nice perishable foods like fresh meat and cheese that needs a fridge, like cut vegetables. Store it in individual bags to minimize bacterial growth. Other vegetables like cucumber, tomato, and zucchini actually and preserved meats like salted meat and ham as well as salami are fine for 2-3 days without cooler unless you mash them up in your backpack with heavy items, so pack them on top. After 2-3 days it’s all about mapping out your meals with shelf-stable and easy-to-carry food and having some long term vegetables like carrots, potatoes, and squash if you want fresh veggies.
But it’s not just how to carry food on a multi-day hike; it’s also about how much food and what kind of food. The obvious problem is that food stored in a backpack spoils faster than in a fridge. Not only because there is no cooling, but also because the food is usually stuffed between clothes, cooking gear, and your camping utilities. Ever found a handful of grapes on the bottom of your backpack after a 3-day hike or an old banana that is liquified? Then you know what I mean.
What Are Good Kinds of Food to Bring?
Let’s talk about what kind of foods are best suited for a multi-day hike. In general, it’s all about the shelve life of the type of food. Now you might be quick to answer that a type of survival food like Meal-Ready-To-Eat should be good then. But if you are like me, hiking is a hobby, and I usually try to eat healthy and conscious if I have a choice. That’s why survival food like MREs or other types of emergency calory supplies like an expedition and freeze-dried meals are not the focus of this post.
Also, this article would not make sense as packing MREs is not a big deal; you can just stuff them somewhere and be good. In that sense, they are perfect, as they keep for years and are easily packed anywhere – that’s what they are designed for. But MRE causes terrible constipation for some and are filled with preservatives. Even the healthier brands for freeze-dried food are usually not very filled with vitamins, nor are they fresh.
So let’s try to find food that is “normally” available but can still be packed into a backpack and keeps for some days. A no-brainer is ready-to-eat granola and cereal. You can always have a snack with some granola, it’s a great dense energy source and tastes good. If you want some fruit, squeezable pouches with fruit and vegetable puree are great, although not completely fresh you still get some vitamins. Individual packets of condiments like ketchup, mustard, hot sauce, and soy sauce are a great way to save weight and still have great tasting food as you can sprinkle them over otherwise bland foods. Bring some pasta, couscous, instant rice, or pancake mix. If you combine it with hot cereal and dried soups, you have a great way of preparing tasteful carb-loaded meals – perfect when you spend the whole day outside. I usually always bring a bag of marshmallows, as it is a nice way to end the day with a campfire.
Bread can be easily transported, just make sure to keep it in a paper bag while hiking to prevent it from molding. Butter can actually be transported without cooling it easily, and it holds fresh for a week without issues. Even when the upper surface of the butter which is exposed to the air tastes a little funny, you can still eat the butter beneath it without a problem. Butter doesn’t spoil like meat, or some cheese does – the worst thing that happens to butter is that the fat goes rancid. In this case, you shouldn’t eat the rancid layer, but you can easily scrape it off with a knife and the butter beneath is most likely still good. Rancid butter is not like mold where you need to get rid of the whole bread!
How to Carry Meat?
Meat is by far the most problematic food to bring on a hike for several days. If you want fresh meat, the best way to bring it is to pack it in your backpack in individual plastic bags that you wrap inside a towel with a freeze pack next to them. You should prepare and possibly consume it on the very first day. I have an easy rule for fresh meat: If I unwrap it from the towel and the meat inside the pack feels still cool to the touch and doesn’t smell it’s alright. So far, I never had any problems with this method, especially if you thoroughly cook the meat. You can get away with warmer meat, but I try to stay away.
So this gives you one day of meat. What if you want more? Cooked Poultry, meat or fish pouches, as well as canned fish, poultry or meat in individual or regular servings is a good way to bring some. You can also bring extra meat to prepare for dinner on the first day and store the leftovers if the night temperatures are not too hot, cooked meat usually keeps for a day if you wrap it in some paper towel or paper. Another way is to get some cured meats like beef jerky, smoked ham and salami, they taste great and are good hearty alternatives for snacking. Examples for long keeping canned fish and meat are salmon, tuna, sardines or anchovies.
Vegetables, Fruit, and Cheese
Number two on the “easy-spoiling” list are vegetables, fruit, and cheese. They keep a bit longer than meat, but they still need to be consumed within the first 2-3 days of your trip. In terms of vegetables, anything that doesn’t need your fridge is your friend.
Examples are Tomatoes, potatoes, and sweet potatoes, apples, pears, peaches, and plums. These can all be stored in a backpack, and while you should put peaches, tomatoes, and plums on top, apples can actually be on the bottom, as well as potatoes and sweet potatoes. Oranges, lemons, and limes can also be a great fruit to take on a hike. Bananas, onions, and garlic are actually better when not stored in the fridge, and onion and garlic are a great way to put some flavor to otherwise boring dishes.
Carrots, avocados, and cucumbers are also easily stored without a fridge for 3-5 days. For avocados I have a simple but great trick: I buy them when they are hard and green, one day before I leave on a trip. By the 2nd or 3rd day, there is spot on and perfectly ripe.
You can also bring peppers and squash, although squash is probably a bit too heavy to transport with a backpack. From a shelve life perspective, squash is great though.
When to eat which food?
This is my usual approach; I eat food that spoils quickly early when I begin the hike.
Day
Food to bring
Where to pack in the backpack
1
Fresh meat, soft vegetables, fresh cheese
At the very top, in individual packs.
2-3
Vegetables like tomato, zucchini, cucumber. Fruits like Apple and peas.
Preserved meat like salami and air-dried ham
Beneath the top but not on the bottom.
3+
Shelf-stable items like rice, granola, pasta. Vegetables that store well like potatoes, squash, and carrots. Canned meat and candy for short term energy.
Can be lower in your backpack.
How much food should I take on a hike? How much food do you need for 3, 5, and 10 days of hiking?
How much food do you need for X days of hiking? How much food to bring on a five day hiking trip? All these questions can easily be answered by doing some math. Let’s say an average human being consumes 2200 calories a day (male a bit more, female less), now if you go hiking for 6 hours, you’ll more likely need around 3500 calories on that day. One gram of carbohydrates and protein have 4 calories, one gram of fat 9 calories. Since you won’t just carry pure olive oil for food, and some food has a lot of water (like fruit and vegetables), lets assume that one gram of food on average has 4 calories (low-fat diet with some fruit and veggies), now divide 3500 by 4, you get 875 grams or roughly 2 lbs. If you bring 4 lbs of food, you will be good for a day. Caveat: If you bring ONLY vegetable and fruit, the 875 grams of food will have LESS than 3500 calories, and if you bring 875 of butter you will have MORE than 3500 calories. But 2 lbs puts you in the right ballpark. If you want to be sure, round up to 1 kg, which is a little more than 2 lbs. 1 kg of food per day, and now multiply it with the number of days.
Days
How much food to bring
Why
3
1kg x 3 = 3 kg
5
1 kg x 5 = 5 kg
Beneath the top but not on the bottom.
10
1 kg x 10 = 10 kg
Can be lower in your backpack.
How do you pack the food for a multi-day hike?
I always try to pack food that’s soft on top of other things, very high in the backpack. This way it’s possible to reduce chances of mold and destroyed food, and tomatos and grapes that aren’t crushed to bits are also nicer to eat! Repacking food into ziploc bags is also a good idea, it saves a lot of weight and also makes things more organized and clean – you definetely don’t want to have your cookies and chips crumbling into your backpack if you are in bear areas. Always bring enough ziploc bags to store leftovers in a sealed bag too, as you don’t want your backpack to smell of food.
Related Questions
How many days of food can you carry backpacking at most? At most, you can carry as much food as your back and backpack can hold. I’d say 10kg of food is a lot to carry for an average hiker, and that is enough for around 10 days of hiking. You can probably stretch it to 15-20 days of supplies if you carry food with higher fat content, but without hauling extra gear than a backpack, I think that’s about the maximum for hikes that are no expeditions.
Should i bring water in my backpack or tablets? If you go hiking in hot places like deserts and arid climates, where you are not sure to find water, ALWAYS bring more water than you need. Having water is one of the things that will kill you quickly if you’re in a hot temperature zone. It’s no joke, and i know it sucks to carry 15kg of water, but if you’re unsure about water supply on the hike, either bring enough for at least one day extra or DON’T GO ON THE HIKE.
Recommendations for light cooking gear? MSR Pocket Rocket hands down the best stove. Bring a titanium spoon fork knife combination and a titanium cup and youre almost good to go – plates are overrated in my eyes.
Read more about how to fight backpack lower back pain in my other article here.
Around for over ten years, the Black Diamond Positron quickdraw has been updated with new colors and a better and thicker dogbone. They now last even longer. In our Black Diamond Positron quickdraw review, we tested this inexpensive and durable entry-level quickdraw. Bonus: It comes with dual keylocking carabiners.
The Black Diamond Positron Quickdraw was originally released over ten years ago but was continually improved and updated. The newest version offers cool new colors and a better and thicker dogbone, but also comes at 18$ list price. The Positron is a great beginner and intermediate quickdraw with flawless clipping, perfect handling, and great durability plus it’s inexpensive. Only downside: It’s a bit heavy.
It is a fairly heavy draw with 3.9oz (110 gram, 16cm sling), but as it is reasonably priced, it’s a perfect match for many beginner sport climbing racks. And it’s still a lot lighter than a steel quickdraw. For this test, I tested the Black Diamond Positron quickdraw with the 16cm sling during my 2018 and 2019 Winter and Summer season. I used it during both training and personal sport climbing sessions. While the Black Diamond FreeWire Quickdraw offers a better price, it it doesn’t come with dual keylocking design, so that’s a point to consider.
Our Verdict In short
The Black Diamond Positron Quickdraw is a high-quality quickdraw, that is made from aluminum. It comes with anodized colors, has a high-quality finish, and has solid gates on both carabiners with key locking noses. In the test, rope abrasion was fairly low, given that there are no defensive mechanisms like steel inserts. While there are lighter quickdraws on the market, this one is still OK for its durability and has a very good price. If you need a long-lived quickdraw for a very good price with two keylocking carabiners they are perfect. The Black Diamond Positron is a great all-round quickdraw for sport and crag climbing. Especially if you are not optimizing your rack to the last ounce of weight.
2016 Product Recall Some years ago these quickdraws had a product recall. If you have one of the current black and yellow style color configurations shown in my review you are on the safe side. But read more here if you’re unsure: Safety recall from Black Diamond.
Specs
Weight of the complete quickdraw: 1 12 cm version: 107 g (3.8 oz)
16 cm version: 110 g (3.9 oz)
Strength when Gate is closed: 25 kN
Strength when Gate is open: 8 kN
Cross load / Minor Axis Strength : 8 kN
Gate Opening : [Top] 22 mm (0.86 in)
[Bottom] 26 mm (1.01 in)
Dogbone Width: 18 mm
Dual Keylocks
Straitjacket on lower carabiner to keep in position for rope clipping
Straight gate carabiner on top and bent gate carabiner on the bottom
Available in 12 cm and 16 cm length sling
Black Diamond Positron Quickdraw Review of Components
The carabiners of this CE- and EN-certified Black Diamond Positron Quickdraw have a 3-dimensional H shape, which results in high material efficiency. Both carabiners have a keylock, which is nice to have a snag-free clipping experience. One carabiner is painted with a glossy finish, one comes with an anodized finish.
Both carabiners on the Positron Quickdraw are Positron carabiners. The top carabiner is a Positron painted black with a straight gate and 22mm (0.86 in) opening. The lower carabiner, facing the rope, is a Positron with yellow anodized finish, and a bent gate and 26mm (1.01 in) opening.
They’re both rated to 25 kN (5,620 lbf) closed gate, 8 kN (1,798 lbf) open gate, and 8 kN (1,798 lbf) cross-loaded. The straight gate is a bit rough in performance. Bent gate offers the same kind of gate tensions and springiness like any other high-end carabiner I possess.
It comes in two versions, a 16cm and a 12cm sling version, with the weight of the 12 cm version being 107 g (3.8 oz) and the weight of the 16 cm version 110 g (3.9 oz)
The lower Positron carabiner has no steel inserts at the rope bearing side, but wear and tear was still good during the test with no visible aluminum deposits on my rope.
Lower carabiner with bent
On the bottom Positron carabiner, there is a straitjacket insert that keeps the bottom carabiner in the optimal clipping position, which is a nice feature, although fairly common nowadays.
Upper carabiner without bent
Positron Quickdraws Performance at the Crag and Gym
Both carabiners come with key lock
Let’s have a bit more detailed look at performance now. During our Black Diamond Positron Quickdraw review we did both gym and outdoor climbing on sports climbing crags in Germany.
Ease of Clipping: Flawless
This quickdraw clips surprisingly good given the small price— it was never hard to clip no matter what situation. Plus the carabiners have a good size, the sling is nice and thick and stiff. It is a lot stiffer than it was in the past, which makes it easier to clip in hard-to-reach climbing situations. I never found myself fumbling with the gates of the carabiner on the bottom. When clipping the rope, this is a definite plus point.
Ease of Unclipping: Even better
The Positron really performs well in unclipping, thanks to its great keylock solid gate. As there is no notch or nose to catch on bolt or rope, it slides of sooo easy and fast. A breeze when you’re in a steep route. I know there are other models like some Petzl quickdraws, which are even easier. But that’s just because they have wider openings for the rope to go out. If you need easy unclipping, the Positron quickdraw is perfect thanks to its keylock design.
Portability: The Positron are Heavy Quickdraws
Portability is probably the main area where the Positron has some upward potential. As they weight a healthy 3.8 oz in their shortest sling version, they are among the heavier models made from only aluminum. Keep in mind, that Black Diamond actually improved this issue! The older models weighed around 4.2 oz – even heavier!
Other quickdraws like 17cm Petzl Spirit Express only weights 102 and the shorter 12cm Edelrid Bulletproof Quickdraw comes in at 118 g WITH steel inserts.
Why are the Positrons so heavy you might ask. Well, they are both equipped with solid cold-forged gates and they carry a lot of material. The advantage of cold-forging and lots of material is that these won’t wear down fast, making them more durable. So, if you need ultra light-weight onsight carabiners or a trad rack for multi-pitch routes, the Positron is not your first option. But for a typical sports climbing rack for crag days it’s still good enough.
Ease of Handling
Me and all the other testers, aka my buddies, that I exposed to this quickdraw had zero concerns about the handling. Neither did the quickdraws cross-clip on our gear, like some wire gated carabiners have a tendency. They never felt weird to big-handed climbers.
The wide and stiff sling facilitates reaching of a clip, especially with the 16cm version, and the profile is still slim enough to fit your gear loops easily if you carry 10 of them.
Ease of Grabbing
The Positron sports an 18mm dogbone in the current version, up from 16mm in the last version and a meager 14mm in the original version. That’s a third more width, which makes for a huge difference if you need to grab the quickdraw. With the 18mm dogbone, they are still slimmer than the modern 25mm dogbones, but we felt they were easy enough to grab.
Dogbone on the Positron is now a cool 18mm thick and stiffer than in the older versions
Our Performance Verdict
The Black Diamond Positron Quickdraw worked fairly good and like you would and should expect any high quality quickdraw. Most of the time we forgot about their duty, and I personally think this is how a good quickdraw should perform. Clipping and unclipping where good, material quality was nice. And the thick dogbone makes reaching the quickdraw easier than ever before on this model.
Final Thoughts: Our Black Diamond Positron Quickdraw Review Conclusion
As my two seasons of sport climbing season ends, the rope-end carabiners on the Black Diamond Positron Quickdraws show slight wear. The bolt-side of the quickdraw collected some scratches and gouges from bolt hangers. But this is to expect on full aluminum quickdraws.
In the end, the Positron quickdraws work like a high-end quickdraw should work. I can forget about it until I fall, then it catches my fall and I’m happy. Yes, they do weigh a bit more than other expensive carabiners, but they are really durable, have a good quality of construction and easy to grad. And clipping and unclipping were flawless. I can give them a clear recommendation for any sport or crag and gym climbing rack. Trad and multi-pitch climbers should think of some lighter options.
I know you like to browse some good whippers, I do at least. I put together a top 20 climbing huge whippers from different sources like Instagram, Youtube and Vimeo. When I collected these links, I had two rules:
A) Must include a decent fall or ‘whoops’ moment
B) No serious accidents, i.e. as you can see in some of these clips of huge whippers climbers bang arms or feet, etc., but I tried to not include videos where it was obvious that the person got hurt badly. Some videos probably caused a sprained ankle or bruises and cuts thought. But thats part of climbing and bouldering.
C) The clips are not in order, which means they are not rated by the length of the fall or something like that. Just the order I found them in.
1. Chris Sharmas Epic Whipper
Oldie but goldie!
2. Lead Climbing Whipper at Clear Creek Canyon Wearing a GoPro
Good that this climber had his action cam on, makes for a cool perspective!
This one sucks. Thanks that he didn’t injure himself more, at least he looks okay. Original here.
6. 40+ foot whipper at Escalante on Trad Gear
Wow, this one is high. Thankfully his belayer catched it!
7. Eagle Falls in Upstate New York – Trad Climbing Whipper
This happens when a cam placed does not hold. Probably due to wet conditions. Thanks to the good belayer and a fixed bolt beneath him this ended well! What a fall though…
8. 60+ Foot Whipper on Castleton Tower (trad climbing).
Whether this was intentional or not, this whipper is crazy. The climber must have left some clips out and got tangled in the rope too…
11. Trad Climbing Whipper at Joshua Tree (Route: Heart of Darkness)
If you don’t know it, trad climbing or traditional climbing has no drilled fixed bolts but you lay all the safety gear yourself. Can be dicey when you take a fall! This climber was alright except for some bruises.
12. Nasty Whipper on Wonderbar 10d at the Pub Wall With an Upside Down Flip
Thankfully the climber was OK, because he wore a helmet. But the flip at the end shows you how NOT TO fall.
13. Large Whipper with 10ft+ Fall taken on Johnny B Good at The Gallery in Red River Gorge
Nice flip at at the end!
14. Aid Climbing Fall On the lost Arrow Spire
This is how falling looks like when you do aid climbing. The gear slowly looses its hold until it all of a sudden ends in a good fall. Aid climbing means you use gear to help you ascent a route, if you don’t know already.
15. Slab slipper on Peak Technique, near Bowden, Northumberland, UK
Wow, why not top rope this piece of slab? That’s quite a fall and he was lucky to walk away from it.
16. Big Fall that Almost Lifts the Belayer on Tanuki, Japan
The Belayer is almost as high up as the climber!
17. Matt Reeser falls off Desdichado, a 5.13+ in Eldorado Canyon
Kind of a sideways whipper! He actually sent that route one month before.
18. Ben Griffin Takes a High Fall at The End of Sweatpants in Public (5.13c), Cascade Canyon, Colorado
He actually fell headfirst into the cliff and needed staples to close the wound on his head afterward. But he came back and sent the route later! “I decided to skip the last bolt, which I did many times in practicing the route, but the rope got stuck around my leg and knee pad and was unable to release the rope. It really sucked.” he told Rock and Ice later.
19. Boulder Pad Miss – Sprained Ankle
Thankfully nothing more happened to him. Technically not a climbing whipper, but he is like 25ft+ high so I thought it’s worth to include it!
No matter if you go hiking or mountaineering, if you’re on a multi-day hike, there is no way around a heavy backpack. All the things you need to set up camp like a sleeping bag, cooking gear, your tent plus freshwater and food are heavy. And in most cases, your lower back is the crucial part carrying the weight. You don’t need to be especially prone to back issues to profit from these tips on how to avoid hiking backpack back pain. This guide is battle proven and backed by science, so read on for the details!
An ergonomic backpack and some simple rules will lay the base to avoid hiking backpack back pain. This post will be split into multiple parts:
Bio Mechanical Basics: Your Back in Easy Words Explained
Your back consists of the sacrum, and the sacroiliac joint (SIJ), which connects to the spine. The SIJ connects the Sacrum and spine to each other, and as thus it connects back and leg muscles and transfers loads to your legs. This joint is particularly important if you carry a heavy backpack on a hike. In fact, it constantly moves when you walk around with your backpack, and that’s why a blockage in the SIJ causes back pain. Source article found here.
How Back Pain Is Caused When You Hike With a Heavy Backpack on Your Back
On a hike there are some situation that lead to blockage and then back pain: If you step into air because you miss a step or rock, or if you stumble, these things frequently lead to misplaced loads and then blockage of the SIJ. But chronic distress during your normal workday lead to back pain as well. Long static sitting at work, wrong movement when you carry loads, etc. can lead to blockage. Even if you don’t feel any pain in normal life, under load of a back pack these issue pop up.
A heavy backpack causes back pain when weight is placed on your joints in the wrong way. The basics are simple: You want a heavy weight to be evenly distributed on upper and lower body. A backpack has shoulder straps and a waist band. The shoulder straps transfer to the shoulder, the waistband to the legs, via the back. The weight which is transferred to the legs can be transferred through the sacrum or the pelvic bone. Any weight transferred to shoulders will go directly down the line to your SIJ and then the leg muscles.
The SIJ connects your back with the the legs via the sacrum, and any load placed on it directly will be transferred via the sacrum to the leg muscles. But the SIJ is particularly sensitive to displacement of the moment of inertia of loads, as are most joints. In some ways, the SIJ is similar to the conical grinder of a coffee machine: If you place a load on top of it and move it, it cannot move freely, as the gap for free movement reduces.reduced. The consequence is back pain.
Reduce Back Pain by Reducing Weight Placed on the SIJ and Sacrum
Your goal should be to reduce the load to the SIJ. If you want to do this, you have only one option: Put more load on the pelvic bones or waist. Don’t let the shoulder straps fool you: The weight that you place on your shoulders transfer down to your sacrum and SIJ more ore less directly, bio mechanically speaking. It follows the shortest route, and that’s a straight line directly down to your Sacrum. If you ever wondered why your lower back hurts when you wear a backpack without waist band / hip belt, this is the reason. But how to reduce the load on the SIJ? You have two ways that complement each other nicely.
A) Use a Waist Band / Hip Belt to Transfer Load Directly to Your Pelvic Bones and Then Legs
A carrying system that’s useful from a biomechanical viewpoint is reducing load on the shoulders and instead places it on the pelvic bones. This makes sure the weight is directly transferred to the leg muscles, without stressing the SIJ and Sacrum. As a consequence, the Sacrum is not displaced, and the gap between SIJ and Sacrum is nice and wide. This ensures free movement and no grinding (remember the coffee grinder!). To put the weight on the pelvic bone, carrying systems have a waist band / hip belt. This band ideally sits tight on your body, and if you adjust it correctly, the transmission of weight on the pelvical bone relieves the SIJ a lot. You can even have more than half of weight going directly to your legs this way!
B) Pack Your Backpack Right, I.E. With the Centroid Placed Correctly
Another way to reduce load on the SIJ is to pack the backpack right. A backpack that is packed correctly needs to have the centroid as close to your body as possible. If it does, then as much as 70% of the weight can be transferred to your legs directly via the pelvic bone, and only 30% are transferred via the shoulders and SIJ. Obviously, you cannot reduce the amount of weight transferred via shoulders to 0% as you always need them for stability and balance. Follow these tips to ensure the centroid of the backpack sits nice and tight to your body:
Put light items to the ground, heavy items as close to the body as possible, less heavy stuff further away from your body
Light terrain hiking: Centroid of weight close to body and at height of the shoulders
Difficult terrain hiking: Centroid a little below the shoulders, to give more stability when going steep downhill and climbing
Use side pockets to evenly distribute the weight on left and right side
How to Adjust Your Backpack to Reduce Hiking Backpack Back Pain
If you want to adjust your backpack, you first need a good carrying system. So my first advice is to buy a quality backpack. There are many good brands including Vaude, Lowa and Osprey to name a few. If you buy a backpack, pay some attention that the backpack fits your anatomy. What this means: Width of shoulder straps, shape of the waist band / hip belt, length of back piece and length adjustment of the carrying system. You should also pack the backpack with realistic weight, aka if you try it on in the store, bring some gear to stuff, and make sure to loosen all the straps BEFORE trying.
For adjusting the hiking backpack correctly to avoid back pain when hiking, follow this easy to remember sequence:
A) Adjust the waist band / hip belt first, place it on the middle of the pelvic bone on an area known as the iliac crest. B) Adjust shoulder straps: Carrier inserts should be at height of your blade bone. Don’t make the classic mistake of pulling the straps too tight, as this moves the weight too much over the shoulders and away from your pelvic bone where you want it. C) Adjust chest strap: Its used to keep the shoulder straps in position. D) Adjust the angle and stability of the load via the load adjuster straps.
Once you have all these adjusted, you are ready to go.
Use Sticks to Avoid Back Pain Both Ascending and Descending
No matter how good your carrying system is and how much care you pay while packing the backpack, if you have a heavy backpack your centroid is shifted backwards. Your bodys natural reaction is to lean forward while walking, which puts you in a bio mechanically problematic posture due to reduced freedom of movement in your SIJ and will lead to back pain in the long run. Ascending only makes this worse.
If you know how to use them, sticks are a great way to reduce the forward leaning while ascending and walking on a plain surface, and also help while descending. Sticks also help you to transfer weight force directly via your arms to the ground, relieving your SIJ. For most hikers they will also be really comfortable as they reduce load on the leg muscles and help utilizing arms while ascending. This leads to more even distribution of stress, and lets you hike longer and with less fatigue on individual muscle groups.
Sticks are also a great way to reduce load on knee and leg joints while descending. They also help you maintain upright posture when descending. Without sticks, many hikers tend to lean backwards while descending, which leads to an unnatural foot position where the heel is absorbing most of the load. This load is then transferred into the SIJ which in turn leads to even more back pain. Sticks reduce this, as they help you maintain an upright ad stable position, where you can naturally roll your feet while descending.
Conclusion
If you want to avoid back pain from your backpack while hiking, make sure to adjust your backpack correctly. Most back pain from heavy backpacks is caused by incorrect load transfer to the SIJ and Sacrum. A properly adjusted backpack transfers as much as 70% of the weight directly to the leg muscles via the pelvic bones, reducing load on the SIJ and Sacrum, and if you follow the steps above you can adjust it yourself easily. If you liked this post, feel free to leave a comment and read on some of your other gear related posts!
Most of you including me have bike helmets, and when I started climbing I was wondering if I can wear my Bike Helmet for Climbing? I figured any helmet was better than no helmet at all. Later an experienced rock climber told me that bike and climbing helmets are actually very different and if you interchange them you give up some protection. Makes sense kind of right? But what if you have no climbing helmets? Can you still wear a bike helmet – it’s climbing helmets vs bike helmet, we’re going to do a little comparison.
The short answer: No, you should not use a bike helmet for climbing, as you will give up some protection. But if you have nothing else, a bike helmet is better than nothing. There are some differences between climbing and bike helmets, read on for the details.
Bicycle helmets have a softer shell, where the climbing helmets usually have a very hard shell. Bicycle helmets are also better protected against impacts from the sides, and they usually have ventilation holes. In this post I’m going to answer these questions:
How are safety standards for climbing and cycling helmets compared to each other? Are they comparable?
Is there a tradeoff in protection when you wear a bike helmet for climbing?
Are there situations where a bike helmet can even provide better protection than a climbing helmet?
Bike Helmets – Designed for a Single Ground Impact
Bike Helmets are one-time-use. They are designed for a single ground impact, and they are designed to absorb energy from the impact by crumpling and deformation. This design is needed due to the high amount of energy involved in bike crashes. As a consequence bike helmets are probably the helmets that offer the most protection, aside from actual motorcycle helmets. But after the first crash, they are basically useless.
On the other hand, you have climbing helmets. By design, they should protect you from multiple small impacts like falling rocks, etc. That’s why they cannot absorb the same amount of energy like a bike helmet, but they do provide protection for multiple impacts. And they are not designed for hard impacts on the ground, like bike helmets. The typical scenario in climbing: You get hit by falling rocks during your descent. Most head injuries in climbing are not from falling to the ground on your head but instead getting hit by rocks.
That’s why a bike helmet will not work perfectly for climbing: Imagine an ascent and you take a fall, bang your head against the wall and the bike helmet is broken and deformed. From now on it will lack protection, but your ascent is not done yet, and even if you descent, there might still be more rocks, etc. falling on your head. At this point, a bike helmet will not give you good protection anymore.
Bike Helmets vs Climbing Helmets – Different Standards of Safety for Different Activities
The different scenarios of protection needed are also visible in the standards used to measure the helmets. The standards are very different in which these helmets are tested and rated. Climbing helmets use the EN 12492:2000 standard, where multiple impacts on a helmet are tested. Small weights 5kg are dropped at different angles on the top of the helmet from a falling height of 2 meters. Another 5 kg striker object with flat shape is then hit on the front, side, and rear, and they do penetration tests. In all these tests there is a maximum of 10 kN of force transferred to the helmet, so climbing helmets are not designed to absorb a large impact.
If you fall with a bike, there are typically larger forces involved (think of more than 10 kN), and the amount of force which is actually transferred to the head must be smaller, which is done by using a crumpling design with physical deformation. Let’s have a more detailed look at the standards involved and how they compare.
There are four main standards: Two for biking, one American which is the CPSC standard, and the EN 1078 from Europe, and two for climbing. For climbing, there is the European standard EN 12492, and the UIAA 106 which is international.
Bike Helmets – CPSC and EN 1078
CPSC in Detail
The American standard CPSC, CPSC stands for Consumer Product Safety Commission, tests bike helmets with a 5 kg headform that is dropped from 2 meters onto a flat-shaped anvil. There is another test on a hemispheric anvil and an anvil, that is shaped like a curbstone from 1.2 meters. These tests are all performed on helmets that have been sitting around in ambient temperate, freezing temperatures and hot temperatures. They are also performed when the helmet was underwater for 4 hours. All in all the helmets have to pass 5 impacts: 2 from the flat anvil and the hemispheric and one from the curbstone.
EN 1078 in Detail
The EN standard, EN means European, has impacts tested from only 1.5 meters, one from a flat anvil, one from a curbstone, and the helmets are also conditioned with UV light, temperature, and aging. This test is thus a little less strict than the American standard.
Climbing helmets – EN 12492 and UIAA 106
For climbing helmets, there are two main safety standards: The EN 12492:2000 and the UIAA 106. By the way, all these standards are not really testing a helmets ability to reduce traumatic brain injury. They only test for protection against direct physical impact. But traumatic brain injury due to acceleration forces is a huge problem in bike accidents, and there are helmet systems to protect against these injuries (called MIPS). This article here goes a bit more in detail about these injuries..
EN 12492 in Detail
For this standard, thez place the helmet on a form shaped like a head and hit with a striking mass of 5 kg. There are 3 different impacts tested, side, front and back, with an angle of 60 degrees. After this test, another strike mass drops onto the helmet which sits on the headform from 2 meters, this mass is hemispherically shaped. Then there is a further test where a flat striker hits the helmet from 50cm on the front, back and sides. In contrast to bike helmets, climbing helmets test for penetration too, with a canonical strike mass of 3 kg that drops from 1 meter. And there is a retention system test. In order to pass the tests, no impact is allowed to transmit a force of greater than 10 kN to the headform.
UIAA 106 in Detail
For the UIAA 106 safety standards, all the tests are identical, but the transmitted forces are lower: Only 8 kN of force is allowed to be transferred. Remember, the lower the transferred force to the head, the less injured you are in reality. Low forces mean no damage to your head!
Short Comparison of the Two Standards
When we compare the different standards, we can see that cycling and bike helmets have higher acceleration forces and thus forces of impact. This might not be apparent, as the safety standard tests for bike helmets call for only fixed mass and distances, while the climbing helmet tests are also talking about transmitted force. But we can calculate the forces of the test for the bike helmets: Assuming a 5kg headform that experiences 250g’s in a bike helmet test, the F=ma equation yields: 5.0 kg x 250 g x 9.8 m/s-2/g =~ 12 kN.
And what is also visible is that the American standards are a little stricter than the European standards. Why this is, I don’t know. I suspect that there is a reason behind it, but I don’t know. If you want to be extra safe, go with the American standards.
Rock climbing is exciting to watch and do, but if you haven’t really begun and watched it for the first time, it can also be a little intimidating to watch. I know that many friends I have were initially shy about going to a gym and starting to learn rock climbing in front of many strangers. Gyms also don’t have the best reputation for being learner-friendly places. But climbing gyms are different from regular gyms, and I have met tons of friendly sports climbers who are very eager to help and teach. One question remains, how hard is rock climbing? The question lacks details, and it’s kind of unspecific, but I’ll try to answer it in this post.
How hard is rock climbing? It’s as hard as you make it. There are straightforward routes that feel like a ladder in your garden. And there are challenging routes and boulder problems that you need to train months for. The good thing is that almost everybody can start, and if you go to a climbing or bouldering gym there are always some routes and problems that suit your ability. And from there on, you can gradually improve.
Once you reach a specific grade of difficulty in climbing, you might not want to improve anymore, and that’s fine. Depending on your body type and weight, improving beyond certain grade can involve a lot of training, and not everyone wants to spend the time. But that’s fine, there are a lot of routes of every ability and if you’re just out there for fun, why give yourself a hard time? On the other hand, if you want to keep improving a sound training system is essential, I tried to explain it in this article.
How Hard is Rock Climbing? What skills are needed?
When you rock climb and boulder you need 5 skills. The more skill needed from the individual aspects, the harder the climbing becomes.
Most moves require some strength
Longer routes and continuous climbing will need endurance
If you want to tackle the crux, i.e., the hardest part, of gradually increasing difficulty, you will need to solve problems with creativity
Sports climbing, traditional climbing, and alpine climbing need technical skills involving ropework, knots, and handling of gear
All the disciplines need courage and motivation, especially if you leave your personal comfort zone
Endurance: The engine that keeps you going when rock climbing or bouldering
If you want to become a decent climber, you need finger strength. Even though many people focus on training their fingers way too early in their climbing career, and fingers that give out are typically a sign of bad technique in beginners. But at some point, your fingers will become a limiting factor. You need to keep practicing, and then you will extend the time you can spend climbing without fingers giving out. There are good techniques to help reduce the force on your fingers, like climbing with extended arms and maintaining proper hip position. For more information about this, read here. Generally, in terms of endurance, multi-pitch rock climbing needs more endurance than sports climbing and sports climbing needs more endurance than bouldering.
No matter what you do, at some grade rock climbing routes and boulder problems need a strong grip. The easiest thing you can do to increase endurance is to climb often and train things like traversing. You can also do hangboard training, see my article about a quick DIY hangboard setup for your home, and use grip strengtheners.
Strength: A limit for power moves and if you lack technique
Most easy climbing routes like a US 5.5, 5.6 or V0 boulders don’t really need a lot of strength. If you can climb a household ladder, you’re probably strong enough. And most boulder and climbing gyms have a lot of routes of these grades as a lot of people are beginners. It can help to train pull-ups to improve faster, but if you continually fail to climb these routes because of strength, it’s probably your technique that lacks. If you’re a regular person to train pull-ups, you shouldn’t have difficulties to reach 5.8 or 5.9 or 5a, 5b in french grading.
Climbing definitely needs upper body strength, and even though you have to practice leg technique and proper core and footwork are super crucial, at some point, the upper body will become a factor. But not like you think, there are almost zero bodybuilders or powerlifter type of climbers. Instead, you need muscles that can hold you statically for long periods of time and then quickly and swiftly explode for dynamic moves. That’s why most professional rock climbers have very low levels of body fat. The technique is key, though, and if you see youngsters climbing hard problems faster and better than you, it’s almost safe to assume that they master the technique better. If you know how to mechanically approach a problem and use the body resources you have perfectly, strength will play a lesser role.
On the other hand, if you have no technique, raw strength will limit you. Look how most beginners climb, especially if they are gym bros: No legwork, lots of pull-ups and they usually burn out after 2-3 routes with arm pump. It really pays to know how to grip a hold correct and when and if to use heel hooks and advanced moves like flags and turns.
Problem Solving + Creativity: Bouldering and Climbing is like a 3D puzzle for your body
The biggest muscle involved in rock climbing of any kind and bouldering is your brain. It’s the aspect I really love rock climbing for. I think it’s an amazing way to forget work and other things, as climbing needs immense focus and dedication. Granted that indoor rock climbing takes some of the puzzle aspects away, with its color-coded routes, but even here challenges for your brain arise. Finding the right body position and grip sequence can be really hard. And a lot of times you will feel yourself watching good climbers in awe, thinking, “why didn’t I come up with this solution?”. By the way, the solution to a rock climbing problem is called beta.
Outdoor climbing is where this puzzle becomes really interesting. There are usually tons of possible holds, and only every now and then do you see chalk marks. You really need to develop an eye for good holds, and it helps to go through the route mentally before you try. An easy trick is to “climb” a route some times mentally before you actually try it and then try to notice the difference between your mental climb and the reality. You will be surprised by how many different routes are once you’re doing them for real.
The harder a route is, or a problem in bouldering, the longer you need to solve it. Easy routes can be done onsight usually, but harder routes need some thought and practice. The process of learning a route with its intricacies is called projecting. Read more about correct “projecting of a route” here.
It’s an art that you need to practice too!
Technical Skills needed
Some types of rock climbing need more technical skills than others. The least technical discipline, by far is bouldering. You only need some shoes and know how to fall. In the gym, even falling is usually not a problem as the shock-absorbing ground is usually fine for fall heights up to 2-3 meter. If you don’t want to learn about knots and belaying and carabiners and have no money to spend on a harness, go bouldering indoors. Outdoor bouldering, however, needs a crash pad and some knowledge how to use it, plus you need someone to spot you, so that’s a bit more involved.
Indoor top-rope climbing is the next easiest thing to do in terms of technical skills. Besides the correct belaying technique, which you can learn in under one hour, and the basic double figure 8 knots to tie into your harness you need nothing else. It becomes more challenging when you start to climb outdoors, where you need to know how to build a correct anchor (if you don’t know how to read here), and once you get into lead climbing, you will also know how to place quickdraws. It’s also when you need to think about cleaning a route, which means removing the anchor on the top and setting things up to be lowered down by your belayer after finishing a route.
When you master sport climbing in the lead, you can think about traditional climbing. Traditional climbing means you place your own safety gear such as nuts and bolts and cams. This is also when most people start climbing multi-pitch routes, so you need advanced anchors. Multi-pitch climbing, solo top-roping, etc. are other disciplines of climbing that involve advanced gear.
Motivation and Courage
When I started rock climbing, I actually began to do bouldering. I was just too afraid of heights initially. But by working my way up to higher boulder problems in the gym, at some point, I was ready to try an indoor rock climbing gym. Man, to this day, I remember how sweaty my hand palms were… I also did some canyoning and started rappelling down cliffs to work on my fear of heights. If you’re bothered by the height, I think exposing yourself to it gradually more is the best way to fight it.
I’m apparently not the only person, see this article about exposing yourself to cure anxieties. Once you’re comfortable with boulders of all sort inside the gym, get a harness, and do some indoor top rope. The good thing about top-rope climbing is that you can actually train to take falls in a very controlled way: Just have your partner lower you once you finished a route, and tell him or her to give you some slack, then let go of the wall. You will probably only fall for 5 inches or so, and there is no danger, but it will get you desensitized to the height and sensation of falling quickly.
Once you gain confidence, you will be quickly going up and down without hesitation, and at that point, you can start lead climbing. The longer you keep climbing, the less the irrational fear will become. There will always be some slight risk involved, but if you want, climbing can be a very safe sport. You just need some courage to enjoy it, and by following my approach, you will gain that courage if you don’t already have it!
Are traditional climbing and multi-pitch climbing harder than sports climbing?
There are some styles of climbing that are harder than others. When it comes to the strength needed, bouldering reigns supreme. There are some very dynamic and challenging moves involved when you try hard boulder problems, and strength will become a limiting factor here. But in terms of endurance, multi-pitch and traditional climbing are harder than sport climbing.
Top-rope climbing is the easiest of all, as you can take a break whenever you want during the climb, and if you have no endurance left, you can simply lower down. The risk of falling is almost zero too, as the belayer can keep adjusting the rope while the climber moves up, so the highest fall that occurs is not more than a foot usually, including rope stretch.
In terms of route difficulties – it’s very varied. There are some long routes of difficulty 5.8 that feel harder than shorter 5.10 routes. It comes down to your personal preferences – if you like slab climbing, a 5.8 slab route might feel easier than a 5.7 overhung route. That’s why you should always keep in mind your personal strengths and weaknesses and work on them to become an overall good climber.
What do I need to bring to the table to learn rock climbing or bouldering?
Rock climbing is pretty straight forward in theory: You climb a wall up until you reach the end of the route. But there is theory and technical details that you can learn to become a better climber. Just read my blog to find more tips, watch youtube videos, and visit other sources like climbing.com and rockandice.com. I would also recommend you to join a rock climbing or bouldering gym; it’s the perfect way to work on your skills in a controlled environment. A bouldering gym brings the further advantage that you can go train solo, which is nice if you and your friends have busy schedules.
If you start out, getting a mentor is a good idea too, as it helps you improve even faster. Most people I know are always keen to teach and help new climbers. I think the hardest part to learn is to work n your fear of height and falling, which is typically a thing most beginners have. If you don’t consider yourself one out of 100, it’s also good to book a climbing course to learn the details of knots, belaying, and general safety with climbing gear. If you lack knowledge, it can be dangerous.
How hard is it to become good at rock climbing or bouldering?
If you want to become really good at climbing, it takes years. Like any other serious sport, it will need dedication and systematic training. But the cool part is, you can always climb with better climbers. This is not true for other sports like running or football, where you won’t have a good time if you cannot keep up with the pace or skill of the other.
If you go rock climbing with very good rock climbers, there might be some routes which are too hard for you. But you can always let them try the route first, and then follow them top-rope. By alternating the belaying, you can also let them work on their hard routes, and they belay you for easier routes. You only need two ropes in this case, as you don’t want to switch the rope to the other route all the time.
If you climb with better climbers than you are, you will also quickly learn from their good technique and execution, becoming a stronger and faster climber in progress. If you just want to progress fast, I recommend focussing solely on climbing often and many different routes until you reach 5.10 (french 5c), and then include systematic training workouts like campus board sessions and grip strength training.
Which grade do I need to be a “good” climber?
If you start out, your goal should be to become comfortable with lead climbing 5.8 (french 5a). Amateur climbers who just work on their climbing during the weekend usually reach grades like 5.10 (french 5c). If you hit the bouldering or rock climbing gym frequently and regularly, you will probably get up to 5.12 or higher within 3-5 years (french 7a).
After that, it becomes a different story. Becoming a 5.13+ climber needs years of hard and daily training and also the mental ability to read routes correctly. These are also the grades where natural preposition like ape index, weight, etc. come into play. The current maximum is 5.15d (french 9c). There are only a handful of athletes around the world who climb at this level, so don’t beat yourself up about it!
Do you need to be really fit to start rock climbing or bouldering?
No, certainly not. It doesn’t harm if you are not morbidly obese, but I have seen heavy climbers tackle really hard problems with technical finesse. Most people who can climb a ladder can also rock climb, and since there is no weight limit, even if you are a little heavy, you can start. The only thing you should keep in mind is the weight of your belayer, as too big of a difference can be a problem.
When you advance, you will notice how you become stronger in your arms and core region, and people who regularly climb are among the strongest and most flexible people in the general population.
Can You rock climb with a disability?
Yes, you can, there are people with no legs who successfully climb. It’s just a matter of your personal disability what kind of routes suit you best. But even with missing fingers or hands, you can still climb slab routes. I think you should definitely give it a try, even if you feel a disability holds you back. There is a good chance that you will have a lot of fun nonetheless!
Are Rock Climbing and bouldering Dangerous?
If done right rock climbing is pretty safe. Yes, there are accidents, but if you and your partner learn to belay correctly and keep the basics in mind, you can minimize the risk. Indoor climbing is pretty safe, with indoor bouldering probably being the safest. Outdoor climbing is a bit more difficult, but if you take a course, I think climbing is most likely safer than riding a bike or motorbike.
Other Related Questions
Can I Lose some Weight by Rock Climbing or Bouldering?
Sure, you can. However, if your goal is only to lose weight, it might be a better idea to go running or to bicycle. Climbing is not a cardio sport, and it will help you to get stronger and more flexible and maybe motivate you to lose more weight in the process of becoming a stronger climber.
Is Bouldering or Rock Climbing an Extreme Sport?
How often I heard this question. The general public is influenced by movies like “Free Solo” etc., but in reality, I wouldn’t consider climbing more extreme than mountain biking.
Can my kids start rock climbing and bouldering?
If they’re 1-2 years old, yes they can. You can even build them their own little climbing wall in their room, as a 2-year-old doesn’t need a lot of height to have fun. The good part about climbing is that there is no age limit – you can have fun no matter if you’re 80 or 4 years old.
Kids can start climbing as young as 1-2 years old, especially on smaller climbing walls. Many professional climbers started getting into the sport in their early teens. There’s no age limit for rock climbing.
Conclusion
If you liked this article, have a look at some of my other articles. Maybe you’re about to start climbing and need some good shoes, well I tested them, and these are the top climbing shoes for 2020. Or you need some advice on how to prepare for bouldering and climbing, read more here.
Feel free to leave me a comment; I’m always happy to get some feedback!
No matter if you sport climb or trad climb, quickdraws are one of the essentials. Finding good quickdraws can be quite hard, and especially when you are a beginner it’s hard to find quickdraws with good value for the money. Our Skylotec ClipZ Basic Quickdraws review shows if they are a bargain, and see why they’re a great fit for beginners and advanced climbers in our in-depth review.
Pros: Durable, fairly lightweight, cheap and easy to clip Cons: The gate closure could be a bit smoother, but for the money spent we can live with it
Quick Facts
Skylotec Clipz Basic Quickdraw Carabiner Material: Aluminum
Bolt Carabiner:Aaluminum, key lock, solid
Rope Carabiner: Aluminum, nose lock, wire
Weight: 102 g
Closed Major Axis Strength: 25 kN
Open Major Axis Strength: 9 kN
Minor Crossload Strength: 9 kN
Gate Type: Upper carabiner solid, lower wire
Bolt Carabiner: straight
Rope Carabiner: wire
Sling Material: nylon
Available Sling Lengths: 12 cm
Test Locations: Frankenjura, Germany and various gyms
Days Tested: 30
Our Verdict
Skylotec Clipz Basic Quickdraw are ideal for beginners and advanced. They come in 12 cm length, and while we tested them we loved how the combined solid carabiner for the bolt and wire carabiner for the rope side saved weight. The wire carabiner is also great in reducing the whiplash effect that happens on solid closed carabiners when you take a fall. Both carabiners have big enough openings, making clipping easy as pie, and the nylon sling is durable and wide enough to grab for it if you need an emergency anchor or hold. If you’re looking for a good, all-round set of quickdraws that won’t break your bank account, the Skylotec Clipz Basic are a great fit!
Excurse: Gate slap or Whiplash
If you don’t know about the whiplash effect, also known as gate slap, it happens when you take a fall and the weight of the carabiner gate opens from the bouncing force. When open, this means the carabiner of the rope side of the quickdraw is open and under load, reducing the possible maximum load to roughly a third of the original major axis strength. A wire closure on the rope side minimizes this risk because the weight is reduced
Analysis and Results from Our Review
What we liked
Let’s dive into the details of the Skylotec Clipz Basic, we put them through a thorough test in and around our local home mountains in beautiful Frankenjura Germany.
Design
We live at a point in time, where carabiners and quickdraws are pretty advanced in terms of technology. If you look at the differences, you will most likely find only small differences like color, weight and so on. Like many other carabiners on quickdraw sets on the market, the Skylotec come with one solid-gate and one wire-gate. The solid gate carabiner has a keylock and the wire carabiner has a traditional nose lock. They come in only one size, the standard 12 cm you find on many port climbing dogbone slings. The sling, also referred to as dogbone, can be replaced when it wears down.
Carabiner Shape
The shape of the carabiner on quickdraws decides how their action goes. Different shapes of carabiners have a different action, and the shape also influences if a carabiner feels very smooth or snappy. The Skylotec Carabiners are pretty normal in terms of length, neither longer nor shorter than standard Edelrid or Petzl carabiners. And while they won’t come in fancy colors or anodized surfaces, but rather standard aluminum they do look nice.
Both the rope and bolt side are snappy and close tight, yet easy enough to clip without effort. The wire gate of the rope carabiner is great if you’re a beginner and looking for easy and reliable quickdraws. And it’s easy to always grab the right side for the rope if you’re still learning – there is only one wire gate and it goes to the rope.
Weight
The Skylotec Clipz Basic quickdraw is a little heavier than some of the other more expensive quickdraws, but still lighter than steel quickdraws.
Find some references down there to compare.
107 g Petzl Djinn Axess, 12 cm
103 g Black Diamond Freewire, 12 cm
102 g Skylotec Clipz Basic, 12 cm
98 g Petzl Spirit Express, 12 cm
63 g Black Diamond Oz, 12 cm
Durability
Durability is something that is not obviously an issue with quickdraws, as carabiners are made from aluminum. But the snapping mechanism and the nylon slings are nonetheless prone to wear and tear. For us, we couldn’t notice any real wear and tear during our tests. Snappyness of the gates remained good during our test, and the slings remained crisp and clean. Keep in mind that we climbed in the Frankenjura in Germany, where the rock is not as sharp and unforgiving like in other places where granite and volcanic rock destroy textile materials faster.
For the money spent, Skylotecs Clipz Basic quickdraws were durable enough for all our sport and trad climbing needs. After two seasons of climbing on these draws, we can’t discern any wear to the wire rope bearing carabiners surface. And we have seen aluminum carabiners to develop edges and dents after only some days of heavy use. Especially in areas where the rock is more abrasive like granite or volcanic areas.
No visible wear on the plastic insert of the rope side of the sling after 30 days of testing
What we didn’t like so much
The action of the bolt side carabiner could be smoother. We had a set of 10 quickdraws and noticed some of the gates were not as smooth as carabiners of brands like Edelrid or Salewa. That said, we never had trouble clipping in, so the action was not perfectly smooth, but didn’t interfere with climbing performance. It’s just that if you are used to very smooth high-quality carabiners it might feel a bit rough.
Also, the aluminum color without any anodizing or color looks a bit bland – but can we really complain given the pricepoint? We think no!
Who are these quickdraws perfect for?
While we cannot say anything about big wall climbing or long alpine multi-pitches, we think the Skylotec quickdraws are excellent for normal sport climbing at the crag and moderate multi-pitch climbing as well as light traditional climbing. The carabiners are sturdy, and the weight is average.
If your goal is to climb long pitches on traditional routes, or you plan to do heavy and long multi-pitch alpine climbing routes, it might be better to opt for a set of lighter quickdraws.
Bottom Line
The Skylotec Clipz Basic are terrific quickdraws for a very competitive price. If you start out climbing and look for an affordable set of quickdraws that will serve you well for your first seasons of sport climbing or just need a good cheap allround set then they are perfect. They don’t wear down fast and while there are lighter options out there if you are willing to spend more money, the weight is still good. We can absolutely recommend them.
Let’s make it brief, the Axiom Jean are probably the best looking climbing pants we ever tested. Is it a good pant for traditional climbing, outdoor expeditions or long days of sport climbing at the crag? No, we cannot say that. But if you plan of walking from work to bouldering or climbing directly and spend 2 hours doing some easy climbing, the Axiom are your fest friend. Besides looking good, they have a good amount of stretch, an inseam gusset and the cut is really athletic. Which means they won’t get in your way as much as normal jeans will when you go outside cycling, hiking, climbing or bouldering.
Look very good, can be worn to work, material stretches just right, durable, comfortable with deep pockets
Cons
No good insulation when wet, ventilation sub-par, no closable pocket, sizing off
While you can get any pair of jeans at Walmart or Target for less than $30, we would still recommend getting these if you are outdoor inclined. The Axiom is very durable, and get take a beating, no matter if rocks or trees are involved. And where normal jeans have no flexibility and lack range of motion these are good performers.
If you want to go on longer climbs or traditional climbing routes outdoors, you should go for another pair of pants, read our review for the best climbing pants 2020.
Analysis and Results from Our Review
What we liked
As a pair of jeans, the Prana Axiom Jean sits comfortable, is durable and just looks nice and sharp. Prana told that they are their best selling pair of jeas, and there are several professional pro climbers swearing on them. Their verdict: You can probably not find a better pair of jeans to go climbing in. Why would you do that? Well, of course, because of the looks. But it’s also comfortable to not have to change after work and directly hit the boulders or crags. And once you’re finished you can keep the pants on and go to a restaurant.
Materials used and the Weight
Axiom jeans are made of 98% cotton and a tiny amount of elastic material, 2% spandex. The spandex is the trick, making them nice and stretchy. If you know about jeans with stretch, you know that it comes down to how much spandex you weave in. Too much and the jeans doesn’t look and feel like jeans anymore, while not enough means they are just too stiff. Prana hit the right amount, the Axiom jean feels like any pair of casual jeans but gives you the full range of motion thanks to the spandex and the relaxed fit.
These jeans are not waterproof, so if you’re looking for hardcore outside climbing pants, don’t buy the Axiom. But if you compare it to regular storebought jeans, they will dry faster and easier. Thanks to the thick material, Pranas Axiom jean does a good job of protecting your leg skin from abrasions and cuts on the rock. That becomes very handy if you climb on granite boulders. Even when we wore them day after day, our test couldn’t notice visible signs of damage on the pants.
Fit: Casual and relaxed at the hips
These are no skinny jeans. They are more on the relaxed side, and have some widening going to the cuff. We wouldn’t call it boot cut, but it’s noticeable. Inseam lengths are accurate and precise to the sizing. We found the pants really comfortable, and you can wear them on any occasion where you can wear jeans. Note that they won’t fit your style if you are into hardcore skinny jeans.
With this said, we have to give them our award for the best looking and fashionable bouldering and climbing pant.
Features, Goodies and Pockets
These pants have a couple of noteworthy features, ranging from climbing and bouldering focused or focused on the fashion sense of the wearer. They come with a gusseted crotch area, which is pretty much standard for climbing pants, as the extra material adds a nice freedom of movement. Combine this with the stretchy material and you will get a pair of climbing and bouldering pants that won’t hold you back even if you need to do high steps and heel hooks.
In terms of fashion features you can find rivets with styling on the pockets and some sweet zig-zag stitching on the area of your thighs. The Axiom jean also sports a fake-leather trim sitting on the back pockets. Axiom jean comes with 4 pockets, 2 in the front and 2 in the rear, which is pretty much standard for a pair of jeans.
While the pockets are large and functional, and also sit well on the pant, you won’t find any closable pocket on this pants – a trade off Prana did for fashionability. This is a problem if you have overhanging boulders etc., as things in your pocket might fall out. While we didn’t have this particular problem while testing, as the front pockets are deep and snug, keep in mind it might happen. Outdoor climbing pants usually have this feature, and it’s one of the things that could be improved with an inline closable pouch pocket in the future, while still maintaining fashionability.
The material blend with 98% cotton is definitely not the material blend of choice for bad weather. If you plan to spend hours outside in humid and cold weather, these pants will be like a big wet rock dragging you down. And they won’t insulate at all in this case, as cotton becomes really cold when wet. The material is also not good in terms of ventilation, which makes Prana Axiom jeans not suited for long approaches in autumn or winter conditions. Consider it a good weather bouldering and sport climbing pant.
When it came to durability, they were good and protected. Some people however reported that after only some months stitching began to peel of on the outside seam and the inside seam above hemlines. Prana has a very good reputation for replacing these faulty pants, so we wouldn’t worry too much about it.
The waist fit is definitely large. If you normally wear a 33 waist size, the 33 sized Prana Axiom is probably to wide. From what we observed, they are one size larger than normal pants, so either get a belt or order them a size smaller than you would normally do. It’s not a big problem, but can be annoying if you order only one pair online from amazon and have to send it back due to the off sizing.
A Value Hit?
The price of $89.00 is justified in our opinion. Yes, they cost more than double what Walmart jeans cost, but they offer a lot more value too. Try climbing in Walmart jeans, and you will see what we mean. Prana Axiom comes with features like gusseted crotch and a good stretchy material, that worked for years on climbing pants. And if you compare the price to some Levis or Replay jeans, they are even cheaper.
Other Colors & Sizes
Pranas Axiom jean can be found in Antique Stone Wash or Dark wash. You can get them in sizes from 28 – 38 and even odd sizes like size 33. We recommend to try them on, due to the off sizing. Other option would to order two sizes and return the one that doesn’t fit if your retailer allows for it.
I want to talk about the basics today. Basics as in basics of bouldering foot placement. It’s one of the most underrated aspects for many beginners.
When people start with bouldering, they usually focus on their hands only. If you’re rested and fresh, nailing a route is easy if you have solid upper body strength. And many gyms are very arm-focused too, as they have lots of overhanging routes with huge jugs to grab on the lower grades. But using only your arms will quickly wear you down, and the sight of beginners finishing their session early after 30 min with arm pump is a common one at any gym or crag.
Once beginners start to focus more on foot placement and leg technique, they feel very wobbly in the beginning. And they make many mistakes – sloppy footwork results in bad foot placement. Try to listen if someone climbs, and you’ll quickly notice if she is a master of foot placement. Silent, quick and elegant movement usually tells that someone knows how to use their feet while beginners are often loud and bang the main portion of their soles on the footholds.
I want to dedicate this complete post only to bouldering foot placement and the basics of proper foot placement. Many posts handle all the different topics of bouldering technique, but I think you cannot overrate and over practice footwork, especially if you want to improve your grades. Good foot placement will also save you lots of strength and energy in your arms. So, keep reading to learn how to build your bouldering on a solid foundation, feet first…:D
Put your shoes on and it’s go-time!
Why Is good foot placement important for bouldering?
Climbing and bouldering are very arm heavy sports. There is no way around it, top professional climbers you will see a certain type of athlete dominate, and they all have relatively strong upper bodies. Don’t get me wrong, you don’t have to be a bodybuilder for climbing, that kind of muscle mass is probably more impeding than helping, but compared to other sports, climbers have a relatively high amount of their (overall low body mass) concentrated in the upper body. Why this post then? Why do people tell you foot placement is so important and that it’s the most important aspect in bouldering? When I started bouldering most people told me that my foot placement was more important than what I did with my arms. Here is the answer: foot placement is so important because most people neglect it completely. And if we assume that 60% of bouldering is arms, then you still have 40% that comes down to leg and footwork.
But if you neglect them, you will always be 40% under your maximum ability. Your legs are the strongest muscles in your body by far, and leaving them out means you miss out on potential. Your legs are also much more enduring than your arms, as they are made for holding the majority of your body weight when you walk and stand. If you take walking, for example, your arms are more or less useless while your legs do the work – that’s why they are so strong. Every time you climb a stair, it’s like a little workout for your legs.
By learning correct foot placement and foot placement technique you can achieve your full potential.
Your legs have greater strength, power, and endurance than your arms. To see why that might be, consider the act of walking. While your arms dangle by your side for the entirety of a typical day (assuming it’s not a day filled with bouldering), your legs are carrying your entire body weight around — step after step after step, for thousands of steps each day. In case you don’t believe me yet, just compare the world records for the bench press and squat:
If you have a solid bouldering foot placement technique it will help you save strength and energy in your arms, while using your already strong legs.
There is a famous quote in Better Bouldering from John Sherman where he says that you should let the big muscles of the legs help you reach higher ground, while your arm muscles should actually only do positioning and balancing. I couldn’t add more to this, that’s what bouldering foot placement technique comes down to.
Bad foot placement means your upper body will wear down quickly, you will get forearm pump more often and faster, and your training session length will be shorter. Chances of injury for elbow and shoulder will also grow as you constantly run into the risk of overstressing the small shoulder muscles or elbow joints. Good foot placement will make you tackle harder problems, climb longer and progress faster. That’s why you should work on your footwork technique, and these basics of footwork placement will give you a good starting point.
Know the Different Areas in a Bouldering Shoe
Before we get into our techniques and drills, let’s talk shoes first. Good climbing shoes LINK are the one and only piece of gear that you really rely on when bouldering.
No matter what you think about them, they are your main contact point with the wall and as such you need to understand how they work. For beginners, climbing shoes look like a rubbery mess, but there is intelligence behind the design. If you know how to use which part of the shoe, your foot placement will become more efficient and better. Knowing what to use where will also help you develop a beta for onsighting a project or boulder too, and it’s important to build solid bouldering foot placement and technique.
Toe Section
This is the part where your toes touch the rock. When you climb, you should usually have your weight centered around this area, and try to avoid touching the wall with anything else. Exceptions are heel hooks and side edges. This part of the shoe is not only the most stable part of the shoe, it’s also the most precise area. And when you use it correctly, it allows you to easily pivot and adjust hips and feets. You can also stand on your tip-toes, which is great to keep balance. If you don’t use your toes you miss out on mobility and reach, and also face the risk of slipping. To understand the toe box, lets look at the thee different parts of it.
Front
If you place the front part of your shoe on a hold, this is a frontstep. Frontsteps are the basic moves when bouldering, and mastering them is key to proper foot placement. With the front of your feet you can super precise. Pivoting is very easy when you front step. But there are some footholds, like thin edges for example, where front stepping is not the best idea. On these footholds, frontsteps have a very small shoe-to-rock area, and that makes it slippery. Being perpendicular to the wall is sometimes a problem too, as it pushes your hips away from the wall which makes you spend more energy to hold and limits potential reach. In these cases you should press hips against the wall and utilize the inner and outer edge of the toe box to gain more stable hold.
Inner Edge
If you use the inner or outer edge of your climbing shoe this is called edging, read more the details of it here. Using the inner side of the shoe is a great way to get more contact area on to the rock and increase friction and hold on thin ledges and edges. It also opens your hips and helps you get the hip closer to the wall, which is good for preserving energy and maintaining hip mobility. Close hips are also good to have maximum reach. A disadvantage of this position is that you have less flexibility when maintaining this position, as it impacts your ability to pivot. Inside edging with both feet is called frog legging.
Outer Edges of the Shoe
When you place the outer edge of the shoe on a foothold it uses your small toes. As they are smaller and not as strong as the big toes on the inside of your feet, this kind of edging is not as stable as inside edging. But this kind of foot placement can be used to perform the backstep. If you don’t know what backstepping is, watch the video down below.
Arch
The midsection of your shoe. Generally speaking, try to avoid using this section for footholds. The climbing shoes have rubber here mainly to protect your feet and when you do crack climbing or twisted moves between rocks where you need to lock yourself in position. For normal climbing, avoid using the main sole of the shoe as much as possible. If you watch someone climbing and she or he uses the midsection of the shoe, often with a lot of noise when placing feet, it’s a typical sign of poor foot placement technique.
Heel
This is the back end of your bouldering or climbing shoe. This part of your shoe is used for hooks. Hooks are important for certain moves, but not for stepping on to regular footholds. For most climbers, hooks become important once they reach certain grades of difficulty, as hooks usually require lots of leg strength, flexibility, and core stability.
8 Keys in Order to Build Superior Bouldering Foot Placement
You know which part of the foot to use for certain situations. But now you need to learn the basics needed to have a solid foot placement technique when climbing or bouldering. The aspects presented here are very important and you should keep them remembered. It’s also helpful to think about them before you start your training session to focus on them. My advice is to try and improve single aspects initially.
Use your eyes and look before you place your feet
Look where you step. Before you do anything, always do a visual assessment if possible. Not only can you identify the quality and potential of a foothold, it will also help you to place your feet correctly. Both things are important. a) Identify FootholdsWhen you try hard boulders or climbing routes, identifying a good foothold quick and effortless is priceless. If you cannot do it, you will find yourself in situations where you use a lot of energy just by holding yourself in position and searching for the next foothold. I know i messed up many problems and routes as a beginner because my eye was not trained to identify potential footholds. This skill is especially important when you climb outside, where there are no marked footholds. Good footholds are often hidden under other rock features, and assessing them in terms of weight placement and potential to support upwards movement is crucial. b) Watch feet placement
Keep your eyes on the feet while you place them. It makes a huge difference for good foot placement in bouldering when you keep your eyes on your foot while you move it. Most beginners have only a quick glance at a foothold, and then carelessly slap their foot on it. And they usually pay for it by needing to readjust their feet. You should do it better: Move your feet as slow as necessary while watching them. Eye the exact point of the rock where you want your toes placed, and don’t look away until you place your foot. If you develop this careful attention, you will notice that you slip less and less with time, and soon you will be super confident and precise. You will also be quick once you get started with a route, as you find new footholds effectively and fast
Be precise When you place your feet, you should only need one try to do so. This means you place your foot exactly where it belongs at the first try. When you have precise foot placement, you save energy on stalls and re-positioning, as both cost a lot of arm energy. Think about it: While you fiddle around to have your feet placed right, all the energy comes from your arms while you hold yourself in position. And sometimes margin of error on small and thin edges is simply to small to be sloppy, and you take a fall if you mess it up. If you become precise, you will also become elegant and efficient.
Place feet silently
When you place your feet while bouldering, they should make almost no noise. Noise usually means you had too much momentum and the rock stops your feet, which means you lack control over your movement. Lots of noise mean no control, no noise means good control. If you cannot execute a move fast without making a lot of noise, you need to work on control. Try to climb routes extra silent, even if it means to execute movement slower. Go and climb a lesser grade if needed, but work on that foot placement control. Once you become better and more controlled, you can work on execution speed again.
Trust your feet and legs
There are many situations where you need to place enough weight on your foot in order to maintain a stable position. If you don’t trust your feet in these situations it will mean you take a fall. Most beginners don’t trust their feet because they are afraid they will slip and fall. And because they lack trust, they don’t place enough weight on their feet, which results in a fall. It’s a vicious circle. But you can break it, by going all in and putting some “blind” trust into your feet. After a while, you will extend your comfort zone easily by increasing the difficulty of the foothold step by step. Keep trying to step on footholds that you don’t tust in a controlled environment, where you gradually decrease the amount of energy of your arms while holding, and increase the placed weight until you have maximum weight on your toes.
Climb with sticky feet
Sticky or glue feet means that you have the ability to place your feet without readjusting. It’s a consequence of being very precise, to a level where you can place your foot on a hold and it sits almost perfectly – without any readjusting. Constant readjusting burns up precious energy and endurance, and you can easily practice this skill by climbing boulders without adjusting the feet and trying to spend more time before you place your feet and trying to be precise.
Proper hip movement
All climbing starts in your hip. It’s the single skill most people neglect, and for good foot placement you need good hip technique. Keep in mind to keep your hips as close to the wall as possible and to initiate movement with your hips.
Grab holds actively with your feet When you grip a hold with your hand you don’t just lay your hands on them and wait if it works out. You grab and squeeze (but don’t overgrip!). But when it comes to foot placement, many beginners passively place their feet on the foothold and are done with it. What you should do is actively step and grab a foothold with your feet. Activate your muscles, step on your tip-toes if needed and try to really hold and “draw” the hold with your feet. You will notice a big difference regarding the amount of energy needed from your arms to hold a position this way – the more you actively hold a foothold with your feet, the less energy is needed from your arms.
Use the feet to propel upwards movement Try to imagine you’re doing a super hard one legged squat when you actually progress vertically. Activate your leg muscles, and don’t just pull yourself up with your arms. Once you feel the burn in your leg muscles you know you are using them correctly.
8 Drills for building foot placement techniques fast
I put together some helpful drills to execute, to make learning proper foot placement easier for you. Include them when you do gym climbing sessions or outside. It doesn’t matter if you boulder or rock climb, they work for both.
1. Drill to train precise foot placement: Corks on Footholds
A great way to practice precision is the cork method. You pick a simple traverse on a nearly vertical or vertical wall and place wine corks on the footholds. Now your goal is to traverse and use the footholds with the cork laying on top of it, but doing it without kicking the cork of the foothold. This way you need to be very precise and gentle when you place your foot. Don’t worry if you are super slow, this is not about being fast. Remember the saying: Slow is smooth, and smooth is fast. It’s all about controlling the movement and being smooth.
2. Another Drill to train precise foot placement: One-time placement game
Climb some boulders with imaginary glue on your feet. Once you place your feet, you’re not allowed to adjust them. Try to find the right position at the first try, then commit for the foothold and continue.
3. Drill to train foot placement and body positioning: Tennis ball drill
This drill helps you train how you position yourself on the wall. You need 2 tennis balls and a slab wall. Now hold the 2 balls in your hands and climb the wall, without holding anything. You are allowed to place the ball with your fist for support. Remember to push on your feet to hold position on the slab. You can also use your fists for this drill if you have no tennis balls.
4. Drill for more calve strength: Tip-toeing If you need more power in the calves and upper feet, deliberately train tip-toeing. Find a level surface and then press up from the ground to stand on the front part of your feet, if possible only the toes. Hold the position for some seconds, do 10 repetitions for 3 sets, wait a minute between the sets. If you build strength in these muscles, it will be much easier for you to maintain a balanced position on a tiny foothold.
5. Drill for switching feet: Warm up with traverse and switching feet
Find a traverse wall, and use it for warming up. While you traverse it, practice different styles of feet swapping. You can use the foot on top of other foot method or any other method. Some good tricks are shown in the video below.
6.Drill to learn trusting your feet: Tape on footholds (Only do in the gym!)
Put some shiny tape over footholds and then climb them. You will only be able to hold onto them if you put maximum pressure on your feet. This way you will build up confidence and trust in your foot placement, as the friction of the footholds is reduced. But don’t do this on difficult routes and don’t forget to completely remove the tape afterward. Please also refrain from this drill on natural rocks!
7. Drill for accuracy and tension: Toe-stabs
This drill improves both precision and tension in your feet. With you standing away, have a friend to point to a foothold near the ground. You can also chose it yourself. Then balance on one leg and try to touch the foothold with your other feet as quietly as possible.
8. Climb outside
Admitted, this is not really a drill that teaches you a certain part of foot placement. But it’s super important to keep climbing outside. Only there you need all the skills, including the vision to read the different foothold types. So go outside and climb on real rock!
How to Study other Climbers for Good Bouldering Foot Placement
Bouldering is a sport where you can learn from others. Reading about great foot placement is good, but watching good climbers is super important too. Next time you’re at your gym, watch some good climbers climbing and how they place and use their feet. You can also watch some videos of professional climbers. Adam Ondra and Alex Honnold are both super controlled climbers with great foot placement. Keep an eye out for these things when you watch other climbers or videos:
Which part of the foot touches the rock
How do they use their core and lower body to relieve their arms
What are they doing with their eyes and head
How long do they keep both eyes on the foot when they place it
Are they adjusting the foot placement often?
What are they doing with their hips to initiate movement?
What kinds of rest positions do they use and how do they place their feet when resting?
Which part of their foot touches the wall or rock
Conclusion
Foot placement is a basic skill, and like most basic skills it requires hours of training to mastering it. The good news: It’s a linear process, and even if you only spent 2 hours per week on dedicated foot placement training you will quickly notice gains in the difficulty of bouldering you can do. Training foot placement and footwork will make you a better boulderer and also transfer to sport and trad climbing. Don’t be like many beginner boulderers who only train their arms, but focus on your legs and feet too. Your legs are your strongest muscles, and they are a great tool that will save you energy and let you climb more difficult boulders.