
Table of Contents
There is nothing better than going on multi-day backpacking trip in a tent! Here we explain to beginners what equipment they need for it and what clothes you should have with you. Tent tours have their own special charm: away from civilization, the stars twinkle even brighter, neither houses nor power poles block the view of the surrounding nature, and with a little luck, you can spot reindeer, elk, chamois, or marmots in the evening and morning hours. The search for the right place to camp gives you a feeling of adventure, and even the food tastes better outdoors than at home. Everything you need for your next big tour is explained on this page – from tents to sleeping bags and backpacks as well as sleeping pads and the stove.
Disclaimer: This article has some referral links, but only for products we recommend. If you use our referral link to buy the product you still pay the same price, so no worries, but we earn a small commission from the seller (it’s how we pay our bills). We only use referral links for pieces of gear that we can honestly recommend!
Finding the right tent for backpacking beginners
Without a reliable roof over your head, you shouldn’t head out into the wilderness. Otherwise, you’ll quickly go from the frying pan into the fire at the first downpour or have to pack up a tattered home after a few strong gusts of wind. Tests show that there are other ways. The three models we present at the bottom of this page have performed particularly well. The Exped Orion, for example, withstood gusts beyond 75mph in some reviews – best tent tip stormy regions such as Patagonia or the Highlands. To get a feeling for this wind speed: At this speed, you can only move around bent over and exerting all your strength, small branches are snapped off, and house roofs are damaged! But the other two models are also stable, and all three tents offer at least one vestibule (vestibule), where you can cook in the rain with the necessary caution and with good ventilation.
The required space of a tent depends on the number of people: if you are going on tour alone, buy a solo tent, couples a two-person tent, and three – or if you need a lot of space for two – take a three-person tent. Larger groups should also equip themselves with two- and three-person models – for these, it is usually easier to find a level pitch than for even larger tents. Personal space requirements also influence the purchase decision: While some campers get by with little headroom, others need the spacious feel of a cathedral; tall people need more lounging length than short people. However, you can only find this out if you test live tents in the store before buying. On the one hand, the manufacturer’s values do not always fully correspond to reality, and on the other hand, the footprint of a tent says little about the amount of space it offers, as this is strongly influenced by the shape of the tent. Basically, the steeper the tent walls, the more space.
Another important criterion for a good trekking tent is the space-to-weight ratio. After all, you carry the mobile dwelling in your backpack during the day – and you’re happy about every gram saved.
Affordable two-person tent: Boulder 2 – Robens
The Robens Boulder 2 trekking tent costs around $250. It offers enough space for two people and scores with good ventilation and wide-opening entrances. In our test, the 2.4-kilo tent was also impressed with very good weather protection.
Particularly lightweight two-person tent: Slingfin Portal 2 Dome Tent
The storm-proof, 1.4-kilo two-person tent from Slingfin has enough room for two people and their luggage – but the sleeping pads must not be wider than 50 centimeters: The inner tent measures one meter at its narrowest point (lounging length: 1.88 m). But thanks to steep walls of mosquito netting and ample interior height (107 cm), there is a pleasant feeling of space in the Slingfin Portal 2.
Stormproof two-person tent: Exped Orion Extreme II (800$)
If you’re looking for a particularly robust, stormproof tent for wild regions and use in all four seasons, you’ll find it in the . It always stood stable in the wind in our tests, offers a lot of living comfort, and weighs around 2.8 kilos.
Tips for setting up a tent for backpacking beginners
It is best to think about where you can set up camp approximately before the tour. Ideally, it should be away from settlements, roads, and huts. Also, the tent should not be visible from forest roads or hunters’ stands.
Consider this first
Slightly elevated sites with an unobstructed view are ideal. If you want the sun to shine on your face in the morning, there should be no mountain or tree on the way to the east. If there is a small stream nearby, the drinking water supply is also ensured.
Ground and soil
For a restful sleep, the sleeping surface should be level or rise slightly on the head side. Unevenness in the form of hollows can be evened out with leaves or brushwood. In any case, the ground should be free of sharp-edged stones and pointed branches.
Finding the right sleeping bag as a backpacking beginner
How comfortable you really feel on the road depends not only on the right tent. At night, the outdoor bed also decides whether you feel good or bad. If the sleeping bag is too warm, you’ll feel like you’re in a steam bath; if it’s not insulating enough, the night will turn into a shivering match. Buying the right sleeping bag depends on several factors, such as the temperature range that the outdoor bed must cover. An indication of the thermal performance is provided by the temperature specifications of the manufacturer or the even more precise temperature values that outdoor determines for each tested sleeping bag in an extremely elaborate process. The lower temperature, the so-called limit value, applies to outdoor enthusiasts who are not very cold, while cold-sensitive sleepers should orient themselves to the comfort value – but both values only apply when the hood is closed. If you leave it open during the night, you should definitely wear a thick hat – and add another ten degrees to the selected temperature range. You also need to look for a model with a thick thermal collar. This wraps around the neck like a scarf and prevents warm air from escaping from the sleeping bag. Our sleeping bag finder will help you choose the right temperature range. Here you can see which models we recommend. And what about the filling?
Down or synthetic fiber?
On average, down sleeping bags weigh a good third less than synthetic fiber sleeping bags for the same amount of warmth and can also be packed smaller. In addition, down models offer greater sleeping comfort: they are cozier and cover a wider temperature range in which the sleeper feels comfortable. The higher price makes up for the two to four times longer life. However, a down sleeping bag must be aired for at least 30 to 60 minutes every morning. If this is not done, down loses its insulating properties in just a few days. If, after a few days, the sleeping bag is no longer as plump as it was at the beginning, you must immediately air it thoroughly for several hours. Only then is it fully efficient – care muffle lie with a synthetic fiber model better.
Rule of thumb that applies to the sizing: As roomy as necessary, but as tight as possible
If the sleeping bag is too tight, you’ll feel like you’re in a sardine can; if it’s too wide, you’ll freeze. In addition, roomy models are heavier and larger in pack size than body-fitted sleeping bags. The right sleeping bag length also saves weight and increases warmth. Ideally, the toes just do not touch the foot part. In case of doubt, however, it is better to buy the longer model. Good that there are many sleeping bags of different lengths.
A comfortable and well-warming sleeping pad also makes a significant contribution to a restful night’s sleep. How comfortable the sleeping pad needs to depend on your comfort preferences. While some people sleep blissfully on a thin foam mat like the Therm-a-rest Z-Lite, others need self-inflating mats several centimeters thick or outdoor mattresses filled with down or synthetic fibers that are almost as thick as those in their beds at home – try it out! Good stores offer a lying surface paved with roots and thick stones for this purpose. When you try it out, you can also find out right away how wide the mat needs to be.
For quite strong statures, the usual width of around 25 inches maybe a bit narrow. Then in the sleep, constantly, the arms of the mat slip – and lie coldly on the tent soil. Here only the grasp helps to a wider, usually also longer, but heavier luxury variant.
Practical tips for cozy nights in the sleeping bag for backpacking beginners
Dry packing
Only a dry sleeping bag insulates well. Therefore, you need to pack the sleeping bag in the backpack waterproof, for example, in waterproof compression bags. There are highly recommended models from Ortlieb, Exped, and Sea-to-Summit.
Adjust length
If the toes have more than ten centimeters of space in the sleeping bag foot section because the sleeping bag is too long, cold feet are imminent. You can remedy this by filling the foot section with clothing or stuffing it in until the length fits exactly.
Compensate for unevenness
Does the campsite remain a mogul slope despite compensatory measures, or is it heavily sloped? Then underlay the sleeping pad with clothing, pack sacks, and the backpack in the troublesome places until the surface is as level as possible.
Cooking tips for backpacking beginners
And how do you cook outside? No problem, with the right cooking set, you can create delicious menus away from the inn and hut. Which set is best depends on how elaborate you want to cook and how much you are willing to carry. We put together three recommendations: a lightweight set, a gourmet set, and an all-rounder. The lightweight set is perfect for those who only want to boil water on summer trips and appreciate a lightweight backpack above all. You don’t care about weight, prefer to eat something decent, to spoil the palate? Go with the allrounder; you can even choose between gas cartridges, gasoline, or even kerosene as fuel.
Speaking of fuel: Take enough with you so that after a few days of touring, you don’t end up with nothing but cold coffee and minestrone on the menu. The need depends on the length of the tour and your eating and drinking habits. If you only drink a cup of coffee in the morning and a little tea in the evening in addition to your meal, you can get by with about 30 grams of fuel per person per day. Connoisseurs who don’t want to do without a warm soup at lunchtime quickly need twice that. If you have to melt snow in the mountains because there is no water, fuel consumption explodes up to 500 grams – per person!
Pots with heat exchangers, such as the Primus Primetech pot, offer savings potential. It reduces the consumption of fuel by up to 40 percent. This usually compensates for its extra weight after five to ten days. It’s best to make a note of your fuel consumption after each trip. With time, you can plan then always more exactly. However, as a precaution, take 20 percent more fuel with you than you are sure to need.
Cooking with a gasoline stove on your backpacking trips
The optimal fuel
The first choice is cleaning gasoline, which is available in hardware stores. Better available, cheaper, but not quite as clean is unleaded gasoline, which most gasoline stoves tolerate. Only multifuel stoves also burn kerosene and diesel, but these should be the last choice because of soot and odor.
Proper preheating
Gasoline and multifuel burners must be preheated before each use. To do this, turn up the flame regulator and allow some fuel to flow into the preheating pan or wadding. Then close the flame regulator and ignite the fuel. Once the flame is extinguished, slowly turn up the regulator and ignite the stove.
Clean alternative
Since preheating with gasoline produces a lot of soot, professionals preheat with methylated spirits, which burn without leaving residue. Here’s how: Get a good plastic bottle (100 ml) for the spirit and a 3-ml syringe without a needle. Use it to drip the spirit directly into the preheating tray or absorbent cotton.
Clean the nozzle
If the stove does not burn properly, the nozzle is often clogged. Then let the stove cool down and unscrew the nozzle using the onboard tool and clean it with the needle included in the tool.
Stoves and cooking sets in comparison for backpacking trips
Super high-quality pick: MSR Reactor Stove ($250, 480 gr)
If you only need to boil hot water, a gas-powered system stove is recommended. MSR offers the best of its kind: the Reactor Stove ($250, 480 gr) is -with or without wind- fast and economical (4 min/12.25 g per liter of boiling water).
Foodies reach for the GSI Pinnacle Backpacker ($109, 735 g), consisting of an aluminum pot and pan with nonstick coating, lid, and two thermal mugs and bowls that fit inside the pot. As finely adjustable, small packable outdoor stove we recommend the burner Edelrid Opilio ($60, 175 g) or the MSR gasoline Dragonfly ($150, 495 g). Sensible accessories from GSI: telescopic spatula ($4), Lexan spoon ($4).
Advantages:
– thanks to the non-stick coated pot, even elaborate menus succeed
– the complete cooking set disappears into the pot for transportation
– Stoves can be precisely regulated and are stable
Disadvantages:
– Scratch-prone coating in pot and pan
Expedition grade stove for any fuel kind: Primus Omnifuel (190 $, 450 gr).
Do you often travel through wild regions with your tent and backpack? Or are you looking for a cooking set for all uses – from camping to expeditions? Then you need the Primus Omnifuel. The Primus stove burns gas, gasoline, kerosene, and diesel stands safely and can be cleaned if necessary. The Trangia HA pots ($60) made of hardened aluminum are his optimal companions: light and robust. Practical: burner and Jetboil telescopic spoon (6 euros) fit together in the pots.
Advantages:
– Undemanding stove that burns everything from gas to diesel.
– Stove and pot with low headroom – good for the vestibule
– Pots and stove are forgiving of rough use
Disadvantages:
– Regulation doesn’t work quite as finely as the Gourmet set
Primus Omnifuel at Amazon for $190
Things to know about cooking on backpacking trips
On trekking tours, you can fill your stomach without a guilty conscience: On average, the body consumes 3200 to 3500 calories per day – about 75 percent more than in everyday life. So that the provisions do not burst the backpack, food must weigh little and have as high an energy density as possible. Granola or oatmeal porridge is ideal for breakfast. Freeze-dried berries, cinnamon, cocoa, or malted powders add variety to the menu. During the day, there are bars, nuts, and chocolate; as a hearty alternative, crackers and salami are suitable. In the evening, trekking food is the right choice. The following rough rule of thumb applies to fuel requirements: two people need about 50 grams of gas per day in summer (gasoline: 55 g), so a 450-gram cartridge will last for more than a week. At temperatures below ten degrees, consumption increases by up to 50 percent.
Smart products for delicious outdoor meals
Heat accumulator
Tea and coffee are a fine thing on outdoor hiking trips. But only if you can enjoy both hot and in peace. This is usually only possible with a thermal mug. The thermal mug (300 ml) from Snow Peak, weighing only 90 grams, insulates particularly well.
Polyester camel water bladder
Even in humid regions, it’s worth taking along a water bag. It serves as a drinking water tank for the night and even as a warm shower – just fill it and put it in the sun for a few hours. Perfect: Ortlieb water bags (2-10 liters, from 20$).
Pimp my meal
Freeze-dried bagged food is pretty handy: Lightweight and packed small, it can be prepared quickly with low fuel consumption. But it often tastes bland. Spices, chilies, fresh garlic, and the like add pizzazz to food – without weighing much.
Smart idea: Foldable wine bottles
If you want to top off your fresh-air menu with wine, you don’t have to bring a glass bottle. The Platypus Reserve Foldable Wine Bottle weighs 26 grams empty, is reusable and tasteless.
Countertops for outdoor use
Use the pot lid to pour pasta water? That can end up on the turf. It’s better with the Trangia cutting board (8€). It has special drainage holes for this; you can also chop on it.
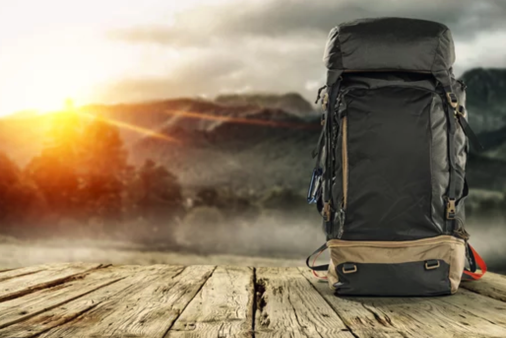
The best hiking backpack for multi-day backpacking trips
The equipment must also be transported. Trekking backpacks with more than 60 liters volume are ideal for this: In addition to sufficient storage space, good models offer a steeled carrying system that can even put away loads around 20 kilos.
But be careful: not everyone can handle every model. The fit of the backpack is a decisive factor in its performance. Therefore, don’t buy a trekking backpack that you haven’t tried out with the same weight that will later be carried on tour – only then can you feel whether it’s really comfortable.
Of course, you should keep your own fitness in mind. While some trekkers are still in a good mood even with 35 kilos of luggage on their backs, others already reach their limits at 15, 18, or 20 kilos.
Here are a few recommended backpacks for backpacking beginners:
Deuter Aircontact Pro 70+15 ($300)
If you’re traveling for days on end in remote regions and have all your camping gear with you, you need a real heavy hauler! A backpack that shines on epic treks with high durability and beautifies your hiking with splendid carrying comfort, luxurious features, and space for extensive tent equipment. Ideal: the Deuter Aircontact Pro 70+15. Thanks to its stable carrying system, it also takes on loads of over 30 kilos! Even he weighs a good three kilos, which, however, should be only a fraction of the load in species-appropriate tours.
Bach Specialist FA ($250)
Whether mountain tour or Nordic expanses, whether short tour or expedition: with the Bach Specialist FA, you have both! Its top carrying system is the best recipe against back pain or tension on tour. It can be perfectly adjusted and makes every movement. Also, its material is not picky and will acknowledge even years of bully treatment with a shrug of the shoulders. Class: Despite its approximately 70 liters of volume, it weighs only about 2.6 kilos – and costs a reasonable 240 euros!
Gregory PARAGON 58
The best choice for shorter treks or weekend trips with less luggage is a lightweight, compact trekking backpack like the Gregory Paragon 58 (women’s version: Maven 55). In these two models, the hip belt and lumbar padding are made of stretched mesh material. It lies almost imperceptibly against the body and distributes loads up to 25 kilos without any pressure. The classic back support in the shoulder area, on the other hand, enables a controlled fit close to the body. Another plus: the low weight of just 1620 grams. The price is around 220 dollars.
How to wear the backpack more comfortably on multi-day hikes
Correct back length
A backpack must fit! Therefore, before buying a backpack, try it out with a load of at least 15 kilos! Many backpack models are available in different lengths – or can be adjusted to the right one. Ask the salesman about it!
Adjust the straps
Next, adjust the aluminum stays of the carrying system to the shape of your back: pull out the stays and have a second person hold them against your back. Where the back and bars are not parallel, bend the bars (above the knee).
Distribute the load evenly.
For a backpack to carry itself optimally, the load distribution must be right. Heavy items such as provisions and fuel should be placed close to the back, while lighter items such as a change of underwear should be placed further out. Small items belong in the lid compartment; the tent is easily accessible in the main compartment.
Adjustment tips
First, loosen all straps. Put on the backpack, position the hip belt and tighten it. Now tighten shoulder straps and then load control straps (run from shoulder straps up to backpack).
Carrying hacks for beginners: Play with the distribution and adjustments.
If the load becomes too heavy or shoulders begin to ache, play with load distribution: loosen shoulder straps, tighten load control straps – and vice versa. Take breaks every few hours and readjust to unload the burden on sore parts of your body. It’s a good idea to take breaks every hour or so and do some light stretching and mobility to keep your body flexible and from developing muscle cramps. This is especially important on the first days of getting used to the load and carrying a heavy backpack!
Clothing Guide for backpacking trips
Trekking tours are the supreme discipline among outdoor adventures: they offer by far the most intense and lasting nature experience, but at the same time, they place the highest demands on touring clothing and footwear.
In trekking clothing, you have to feel comfortable in cold, wet weather as well as in sunshine. The best way to achieve this is to combine different items of clothing depending on the weather: The basis is functional underwear made of synthetic fibers or wool. Over this, you wear trekking pants and a top made of wind- and water-repellent, highly breathable stretch material, a so-called softshell jacket – unless the sun is blazing down from the sky. In that case, a short or long-sleeved functional shirt will suffice.
Breathable, waterproof functional jackets and rain pants are usually only used when it is pouring down. When buying, look for ventilation openings such as long underarm zippers (Pitzips). A light jacket insulated with synthetic fibers or down provides the necessary amount of warmth in the evening at camp or during breaks. In addition, despite all the robustness, you should make sure that the trekking clothing is light and does not hinder movement. You can find prime examples of this below.
Because of the heavy backpack, trekking boots must offer more support than hiking boots: the shaft is not only firmer, it also reaches far above the ankle. The sole is resistant to twisting in longitudinal and transverse directions. In addition, it is pre-curved in the forefoot area, which supports natural rolling behavior. A waterproof, breathable lining, for example, made of Gore-Tex, is also mandatory.
Trekking clothing layers – buying tips for beginners.
1. Functional jacket
In heavy rain, there is no alternative to a waterproof, breathable functional jacket, for example, the sustainably produced, durable all-season jacket Fjällräven Keb Eco-Shell ($500). Mountain Equipment also offers a good all-around jacket with the Odyssey Jacket ($290). It combines durability with fairly low weight, comfort, and weather protection. Budget tip: The Marmot Precip Eco Jacket (about $90).
2. Softshell jacket
Softshells are ideal for changeable weather: they wear extremely smoothly and keep out wind and drizzle. A hood extends the range of use. Tips: Arc’teryx Gamma MX Hoody ($330 ) or the Mountain Equipment Frontier Hooded Jacket ($180). Both scored well in tests with soft fabric, plenty of comforts, and good weather protection.
3. Functional shirt
Modern, fast-drying functional underwear represents the basis of the outdoor clothing system. If you sweat quickly, you should pay attention to well-cooling underwear such as the Capilene series from Patagonia – and in no case buy wool underwear. Shirts made of merino wool, on the other hand, are only recommended for people who don’t run hot quickly. On the hike, you should wash the clothes regularly because salt and grease otherwise diminish the function.
4. Trekking and outdoor pants
The trousers must offer freedom of movement on trekking tours, be comfortable and robust – then they do not immediately go to the knees when you have to fight through the undergrowth. In addition, good trekking pants should protect against wind and drizzle. Top choice: Fjällräven Keb Trousers ($220).
5. Microfleece shirt
A thin fleece is excellent as a warm layer in cold weather, for example, the R1 pullover from Patagonia ($100).
6. Warmth insulating jacket
For longer breaks or the stay at the camp, however, we recommend a (light) down or synthetic fiber jacket to pull over, such as the Jack Wolfskin Argon Jacket ($130, 415 g). Such jackets insulate well, weigh little, and do not take up much space in the backpack.
7. Underpants
In fair weather areas, you can do without long underpants (material: wool or thin stretch fleece) – but only then. At night they serve as pajama pants; during the day, you wear them – in cold weather – under your trekking or rain pants.
8. Hiking socks
Without hiking socks, there is a risk of blisters and chafing because good trekking socks not only dry quickly but also cushion the foot. The right choice is the sock model that fits you best and does not wrinkle.
9. Hiking boots
High trekking boots are the right partners for rough terrain: the firm, high shaft provides support, the torsionally stiff sole ensures grip with its grippy profile. Models like the Hanwag Tatra II GTX ($290 euros, 1650 g) are comfortable to wear for hours, and the waterproof, breathable Gore-Tex lining keeps moisture out.
10. Hiking poles
They help to keep your balance and relieve the strain on your legs: downhill, your arms support part of your weight; uphill, you push yourself upwards with the poles in addition. The Leki Micro Vario Carbon Antishock ($180) impresses with its low weight and ease of use, the Black Diamond Alpine Carbon Cork ($120) with maximum stability – ideal for very heavy hikers.
11. Rain pants
Good rain pants for hikes weigh less than 500 grams and consist of robust three-layer materials. The interior can be optimally ventilated via long side zippers, and the hem of the pants can be neatly fixed to the shoe. Product tip: the Patagonia Torrentshell 3L rain pants. They weigh around 300 grams and cost a relatively inexpensive $130.
Tips and tricks for choosing shoes and outfits
Trekking boots should never be bought sight unseen: Only if a boot fits one hundred percent, it wears comfortably and offers optimal support. Only buy a model that holds your foot securely and feels comfortable after 30 minutes of trial wear.
Good things take time.
Even though you don’t have to break in modern trekking boots for as long as you used to, you should take them on a good dozen day hikes before setting out on your first trekking tour. Over time, they fit better and better.
Lacing twice is better.
After you’ve been hiking for fifteen minutes, you should stop to re-lace your shoes. You’ll be surprised how much tighter the warmly worn shoe can suddenly be laced – and how this increases the hold of the foot in the shoe.
Wear clothes you actually wear on tour when trying on a jacket and shoes
When buying different layers, you should wear the things you will also use on tour. Only then will you notice how well the different pieces fit together – and whether you feel comfortable.
Keep flexible
How can you recognize an outdoor clothing professional? By his or her shopping gymnastics: neither the jacket nor the pants should stretch when you bend your knees, lift your legs or arms, or stretch them out in front. Outdoor and hiking clothing should fit comfortably even when you squat or climb things.
Keep your head cool but warm.
You will be amazed at how well the climate can be regulated via the head. In cool weather, therefore, be sure to wear a light (fleece) hat and a windproof headband like the Salewa WS Tornado ($20).
Do not forget gloves.
A thin pair of windproof gloves belongs in every backpack, except for treks in fair-weather areas. If you do leave them at home, use your spare socks as gloves.
Conclusion
With these tips you should be ready for your first backpacking multi-day trip in terms of gear. Make sure to chose an easy hike if you start out and progress slowly.
More reviews: