
Table of Contents
When i got into climbing i was overwhelmed with the vast knowledge needed to stay save. There are tons of nots and rope techniques to lear. And if you ask people out there you will get 12 different answers for the same question.
Let me tell you one thing: There is no “perfect” anchor. Every anchor can be messed up and destroyed when it is abused or built without care.
But there are some good things to keep in mind and proven techniques to build safe anchors.
The anchors i show you are proven, safe and they can save your life if done right.
And no matter what you do, you will need a climbing rope anchor to fix your rope. It’s literally the first thing you need to build when you want to climb safely.
What is a climbing rope anchor ?
A climbing anchor is a system of individual anchors which are connected together to create one master point where the climber and rope can clip into. They are then securely attached to the rock.
By the way, it doesn’t matter if you’re a top-rope climber or lead the climb – knowing how to build the perfect climbing rope anchor is the first skill you need to learn. It will save your and your buddies live.
You need to keep some things in mind when you build an anchor. Let’s break it down to two steps:
- 1. Step: Find or create single anchor points to use in the the system.
- 2. Step: Connect those anchor points together using one of the techniques i’ll show you next
Since there are so many variables that come together it’s impossible to cover all scenarios. But i will tell you how i setup my anchors – there are other techniques out there, but this one is proven, easy to learn and works.
And: After this article you will also understand how anchors work and know the most common way to build the perfect climbing rope anchor.
1. Step: Identify those Points
Before you build the anchor, you will need to find the points for it. What they are is more or less up to the terrain, which gear you have etc.
I’ll introduce you to some typical anchors i use.
Natural anchors
These can be trees and large rocks. They can be awesome anchors which also conserve your gear. But you need to play it safe and check them before you use them as anchors.
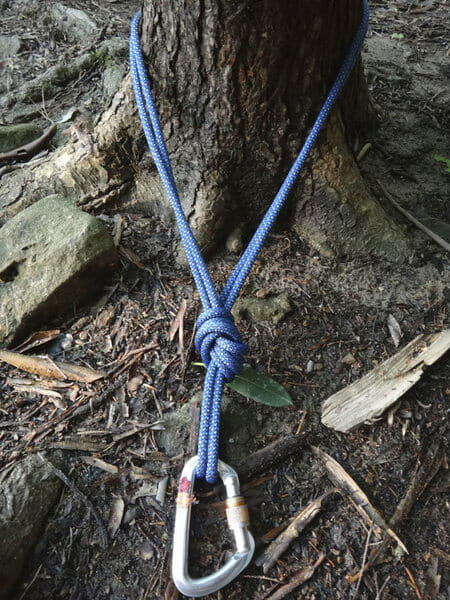
- Trees:
- Don’t just use a tree. Make sure to check if its alive, has good roots and is solid before you use it. Never use a tree growing out of a cliff – unless you are chased by a bunch of ninjas and running for your live ;-). Also push against it with a foot to test it and use the golden rule: It should be atleast 12 inches thick in diameter (or 30cm for our metric friends). If you use it for your anchor, circle a runner around the base of the tree and clip the ends together with a carabiner. Use a Flat Overhand Bend (like in the picture) or Double Figure 8 Knot as loop.
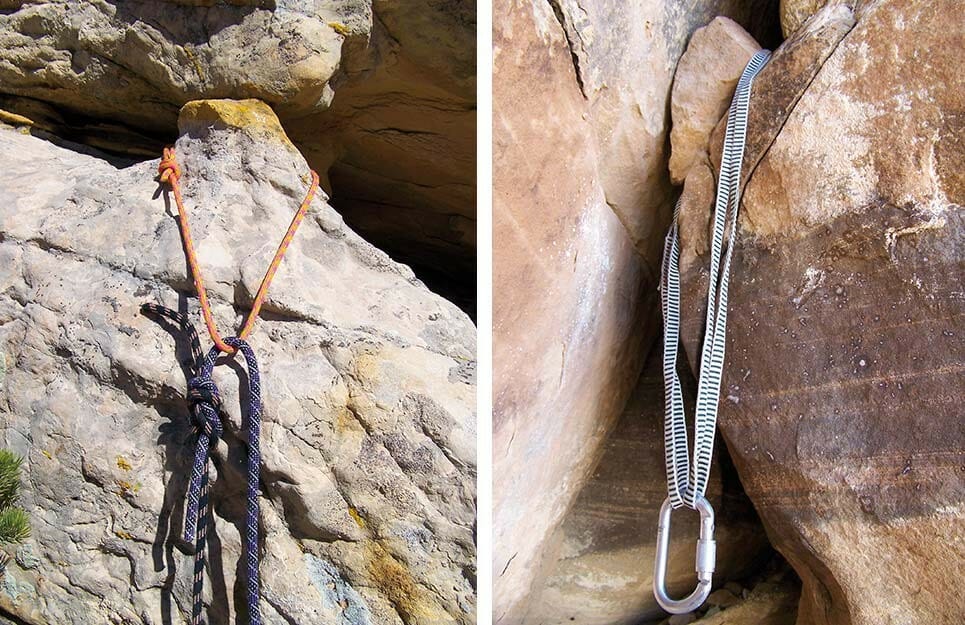
- Rocks: You can use horns and chockstones (stones which are tightly wedged in a crack). When checking the integrity of them, don’t forget to make sure they are solid and well attached. Be extra careful if you notice brittle rock or cracks. When building the anchor you can loop a runner over the top of the rock on a horn and clip it to the rope. Or you circle a runner line around the feature and clip the ends together on chockstones – it works like a tree.
Fixed anchors
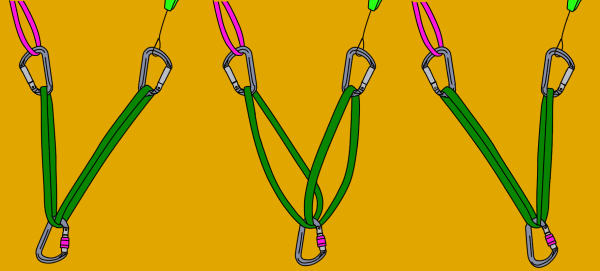
You will most likely find fixed anchors on sport climbing routes. They are placed there and are permantly fixed to the rock. You can use quickdraws, carabiners and runners to attach your gear. Look at these example drawings to get an idea:
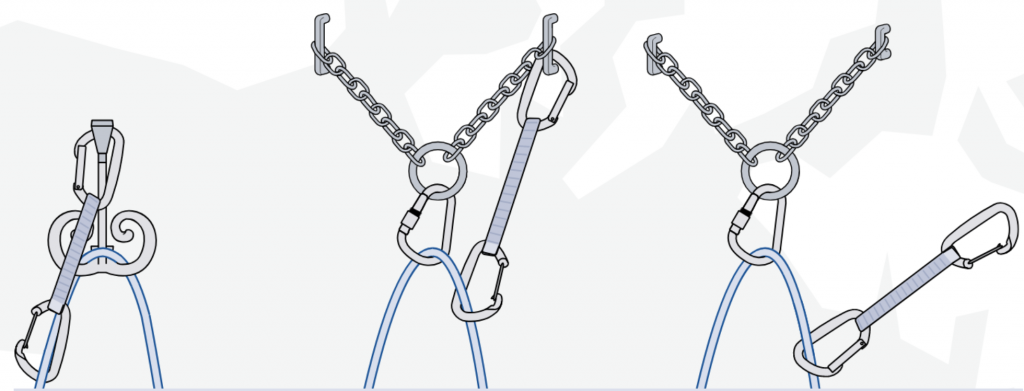
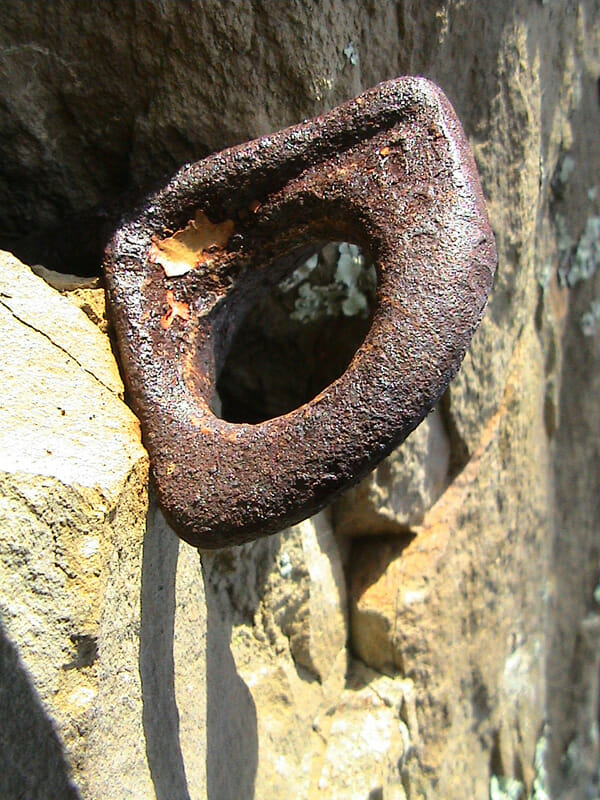
Just because they are artificial doesn’t mean they are save. Metal and concrete rusts and after a while these things will come off too. So make sure to check for signs of weakness like cracks or lots of corrosion. If you’re not sure: Don’t use them. Stay away from bolts or pitons that move in any direction.
Be super cautious if you find old out-dated gear like 1/4 inch bolts or sheet metal hangers like these:
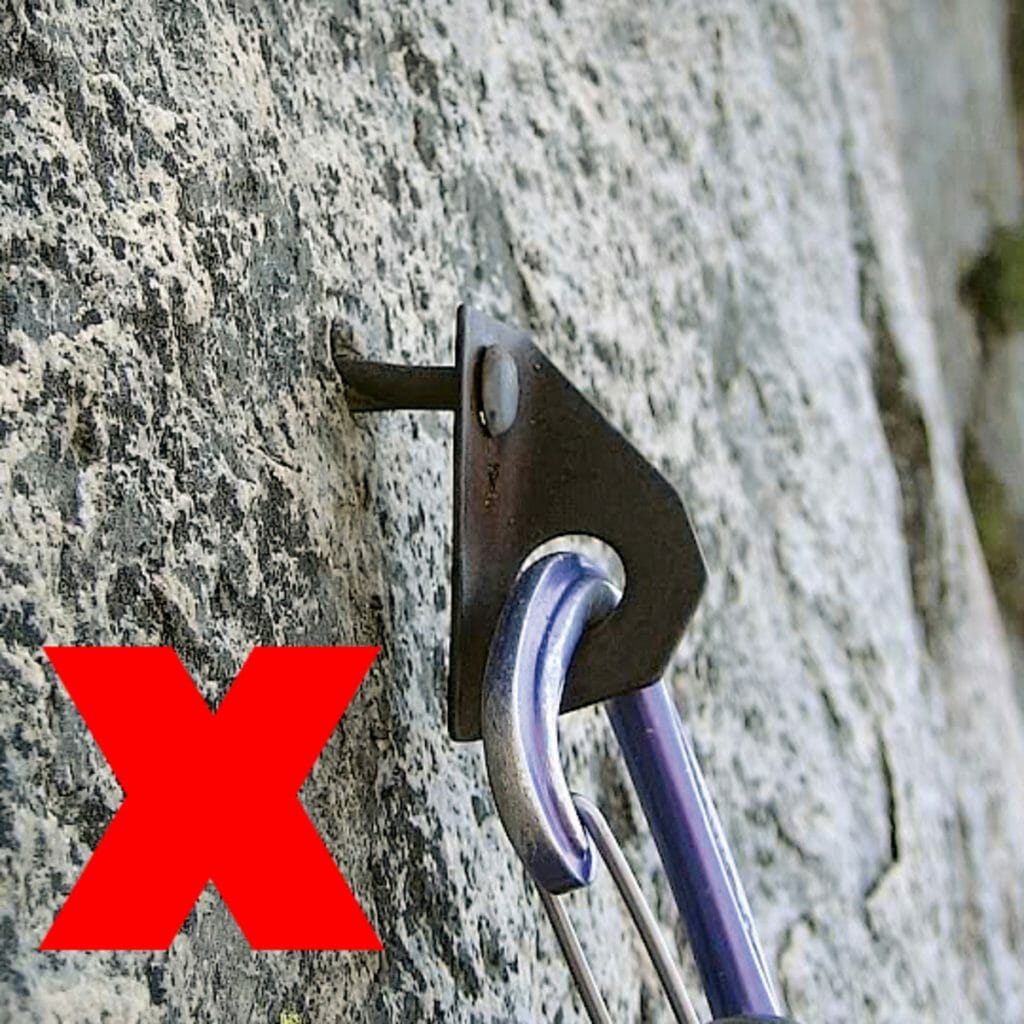
R
2. Step: Connect your anchor points
You found your individual points – now it’s time to connect. You should always have at least two points holding a downward pull and one for upward pulls.
Most important when connect them is to equalize them, so the load is distributed evenly. You got 2 choices when it comes to equalization: Static or self equalizing.
Static Equalization

Static equalization means you equalize the anchor points beforehand. Once you tie the system off, there will be no slack or adjusting it later. This is a great method for climbing where you have one clear direction of pull: Like straight down. If you climb more advanced and might have situations where pull is upward you should use a self equalizing method.
Cordelette Anchor: This is a way to connect two, three or more anchor points to using static equalization. To make a it, use a 18–20 ft. long section of 7 to 8 -millimeter Perlon accessory cord tie it into a big loop with double fishermen’s knot.
Equalizing 3 anchor points with a cordelette:
- Clip a cordelette into each of the quickdraws attached to the anchor points with carabiners, then pull down top sections between the pieces.
- Connect the sections with the bottom part of the cordelette by moving them together, then clip a locking carabiner to all three loops
- Pull on the carabiner to even out tension
- Move the fisherman’s knot directly below the highest of your anchor points – that will keep it clear of the master point
- Position the fisherman’s knot, which connects the cordelette ends, so it is below the highest anchor point to keep it clear of the master point knot that you will tie. This is important as you don’t want it to be where the master point it and tangle up.
- Try to figure where the force will come from and pull the carabiner in that direction
- Then tie the sections together with a figure eight not or, if you don’t have enough cord an overhand knot (easier to tie but harder to untie after loading)
- Tug the carabiner firmly to make sure all the anchor points are equally weighted

By the way: The figure eight knot is called master point – and it will be around 3-4 inches thick. It’s the main clip-in point for the anchor and it is where you and your buddy clip in.
Cordelettes are great when directions stay the same. If they change though, you can end up with an anchor where one point takes the entire load. That’s never a good thing as you want redundancy.
Self-Equalization
This term sounds fancy but it’s pretty simple. It means you build an anchor which adjusts itself no matter where the pull comes from. And it distributes the load evenly on the anchor points. It’s good when pull directions can change during your climb.
I’ll show you a simple technique that works good for many situations. Of course there are more techniques, but this one is easy to learn. If you ask me, keeping it simple is king and the easier a technique is – the less potential it has to turn your climb into a disaster because you forget something.
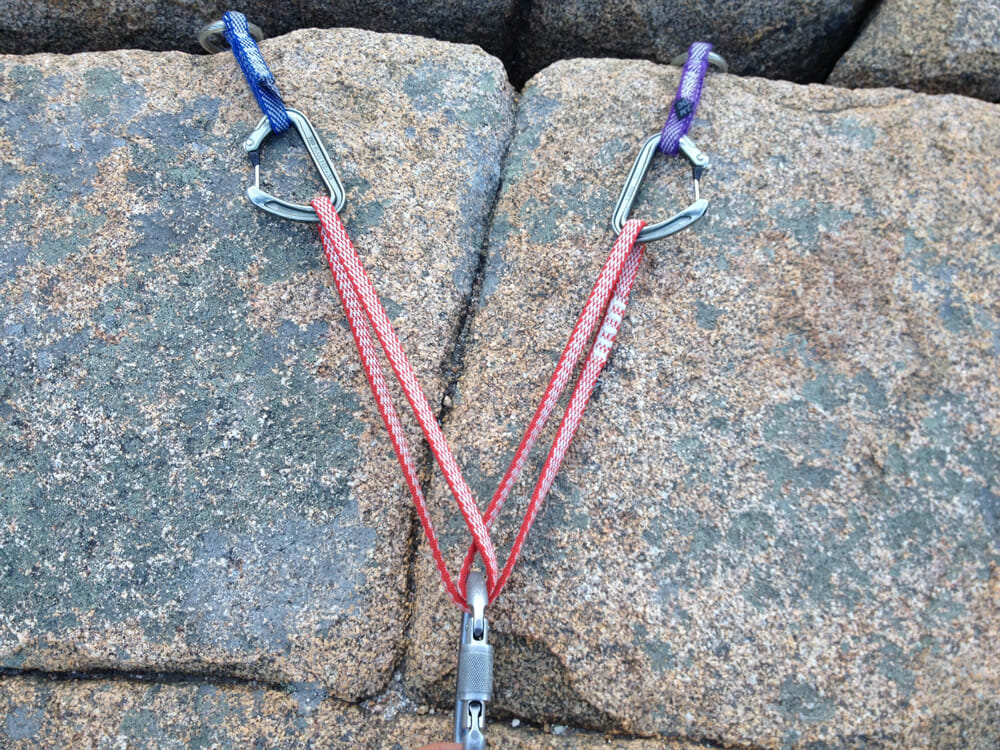
The sliding X
- Clip a single sling to the carabiners at each anchor point.
- Grab the top section of the sling. Now give it a half twis, then clip a locking carabiner into the twist and around the lower section of the sling.
If one anchor point fails, there will be lots of extension. This will shock load the other anchor point, which is not good. To limit this you can tie some additional overhand knots just above the clip-in points: They allow the system to adjust, but will limit extension and shock loading when an anchor fails.
Anchor Theory

Anchors are different and there are some points you should keep in mind. There is a tool called SERENE-A, it’s a good mnemonic.
My tip: Until you memorize it, keep a written note with you when you build an anchor and go through SERENE while you build it. It will save your ass!
Solid: Each component of the anchor must be fully solid.
Equalized: Rig an anchor so the load is distributed equally between the individual anchor points.
Redundant: Your points must be reduntant. If one anchor fails, the authors should not fail automatically too. Use always two, better more solid anchor points. Three is a good number. Ensure to keep redundant carabiners and slings too. I cannot stress this enough: Redundancy is the number one rule that will save your life if applied right.
Efficient: Make efficient use of time and gear when you’re building an anchor, and don’t create something overly complicated – see the KISS (Keep it stupid simple) principle.
No Extension: Construct without extensions. This means if an anchor fails, it should not suddenly shock extend other anchors. Important for the X Slide.
Angles: Consider angles created by the sling or slings in your anchor system. A larger angle puts more force on an anchor, so keep angles 60 degree or less.
Conclusion
You learned two basic anchor techniques and how to build them. You know there is no perfect anchor, but you can build safe and good anchors using SERENE-A.
Now, just because an anchor fits SERENE-A doesn’t mean it is perfect. But if you build them to meet this criteria, you have a good guideline to build a safe anchor.
Keep these things in mind, and have fun gearing up and building your first outdoor climbing rope anchors. We will dive into Multidirectional Anchors and Anchor Angles in later posts!
Always remember: Your safety is your responsibility. No article or video can replace proper instruction and experience. Make sure you’re practiced in proper techniques and safety requirements before you climb.
[/et_pb_text][/et_pb_column][/et_pb_row][/et_pb_section]