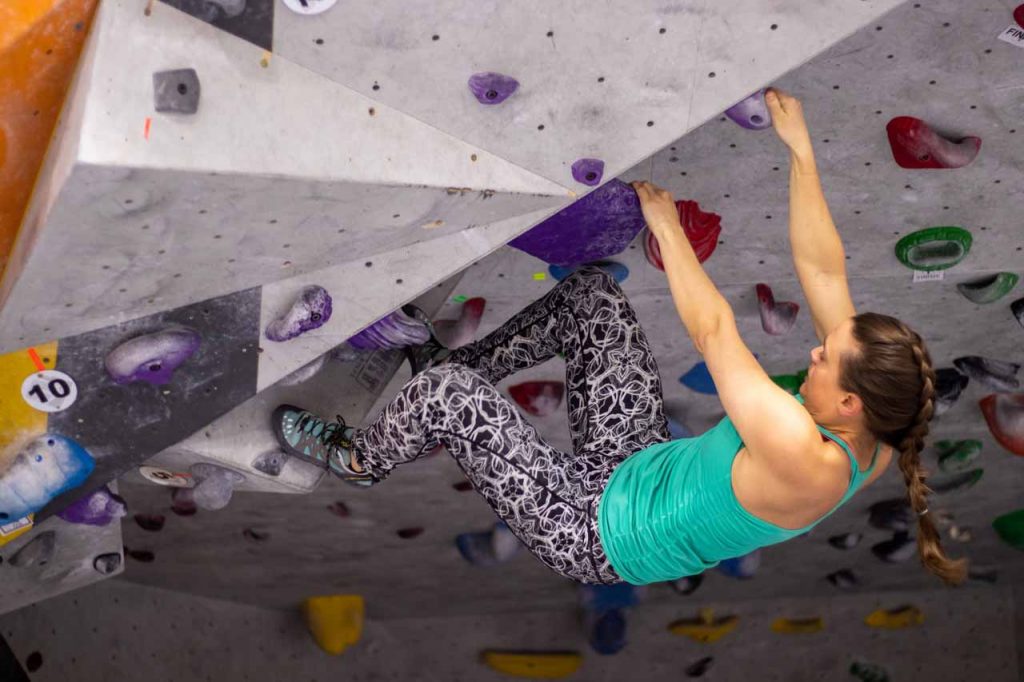
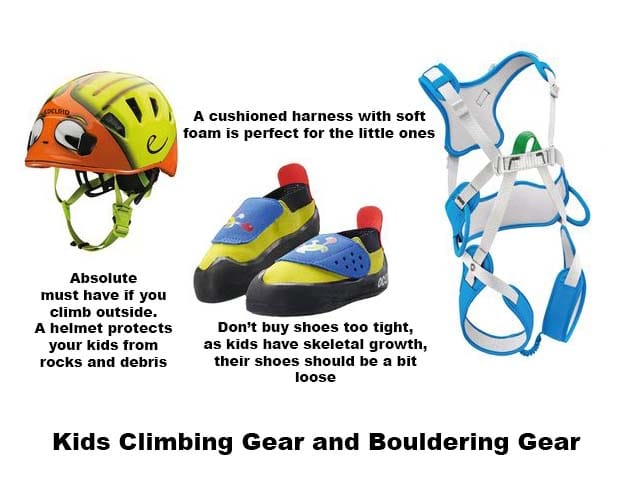
Most children have a natural urge to move. They usually climb early: they sit up at chairs or coffee tables before they learn to walk. Later, it continues on trees and climbing frames with zeal and courage. Most children enjoy climbing!
At what age can a child begin with rock climbing or bouldering? For climbing and bouldering, children must be coordinatively able to move hands and feet in a controlled and independent manner. In principle, children can already climb in preschool age. At the age of seven, most children can try climbing. The age is only a guideline. If you go climbing with kids, and bouldering, follow these tips to have more fun and keep your kids active.
Climbing promotes natural development
Climbing is fun for most children. Climbing obstacles motivates children, they like to try out. Courage and the ability to assess risks are promoted. Effort is rewarded with success and one can sometimes also fail, without the world ending.
The skills required for climbing are manifold: strength and coordination are trained, and the perception of space and body becomes better through climbing. The children learn to concentrate and take responsibility. Climbing extends movement repertoire and mobility. In addition, children experience climbing and self-determined action and its consequences directly and immediately.
When climbing, difficult areas can often be resolved with agility and sensitivity, which is less disadvantageous to girls, who usually have less strength than their male counterparts, than other sports. Climbing is inclusive and opens up the freedom to try one another within the framework set by safety rules.
Other requirements include a relatively high degree of self-control, a sufficient attention span and the ability to concentrate, not to be distracted easily. The children must be able to safely follow even more complex instructions. These skills should be brought to children if they want to start with bouldering or climbing.
Climbing with a rope
When climbing on higher walls, a top rope and a safety harness is added. Prerequisite for this form of rock climbing is the ability to concentrate and a sense of responsibility. The children must be able to keep a cool head even in stressful situations and concentrate on their rope partner. Younger children do not have these skills yet. It depends on the level of development of each child when these skills are trained. Belaying should ALWAYS be done by an adult!!
Climbing equipment for children
For climbing in the gym children need sportswear, the rest of the equipment can usually be borrowed in the gym.
Children secure each other in climbing courses right from the start, but they work long with back-up. This means that an adult person with some distance still controls the safety rope. Only if the safety competence is sufficiently developed in the estimation of the trainer, the child will climb without supervision, but still supervised. Experience shows that children from primary school age usually have the necessary conditions. According to the recommendation of the Alpine Club (DAV) can begin with securing under control for about eight years, self-securing without supervision is only possible from 14 years.
When children with a lot of climbing experience take their first steps in the lead and are backed up by much heavier adults, it is important that the belayer master the “soft belay” to avoid hard impacts and a dangerously hard impact on the wall.
Bouldering for beginners, then rock climbing
Children want to play and playfully explore. Playing and enjoying doing things should be the most important thing when climbing and bouldering with small children. As a mother or father, you quickly realize if a toddler is having fun. It may also be that a child has a great desire to boulder on one day, not on another. That’s okay and child-friendly.
For the entry is the bouldering, so climbing up to four meters wall height on soft floor mats. Bouldering lessons for children without parents can be useful from the age of five if the bouldering hall is equipped with child bouldering facilities. From this age, children are usually able to concentrate and follow instructions and rules.
Competitions and performance-oriented climbing for children
Depending on their motivation and abilities, children climb ambitiously or compete in competitions. Already for six- to twelve-year-olds, the national associations of the DAV offer Kids Cups, where children can compete with each other in a playful competitive situation. Others soon pull out with their parents or leisure groups on the rock. Even if children participate in competitions or like to try out how hard they can climb, the playful nature of climbing should always be in the foreground.
Although children rarely overburden themselves and, unlike athletic ambitious adolescents, usually do nothing that causes them pain, it can sometimes be necessary to slow down their urge to move a bit. Children from the age of twelve can certainly do physical strength exercises. However, they should not go to the campus board or fingerboard, and the repeated retention of very small handles should be avoided. Particularly sensitive in children and adolescents are the growth joints of the fingers, the tendon attachments on the bone and the still relatively soft articular cartilage.
Bouldering: Safety Basics
Boulder gyms are not playgrounds, but sports facilities. Races and toys are prohibited in the boulder area as this can lead to serious injuries.
Important: Do not stay under a bouldering person, the jump or fall area must always remain free!
Caution: Many children (and many adults) can not estimate how extensive this area is. As far away as possible from the wall or in the middle between two walls. This rule should be re-discussed with the child each time before entering the boulder mats. Parents must ensure that this rule is adhered to – a breach of duty is a criminally relevant act!
The Boulder is not secured, here is “ridiculed”. The spotter always keeps an eye on the bouldering person and, with his arms raised, stands behind them so that the spotter can stabilize or steer the boulder in a fall so that he lands safely on the mat. The spotter should make sure that there are no objects or persons in the lintel area. You have to explain to children that spotters are the only people allowed to stand behind a boulderer. Who has never “spotted”, it should be shown.
Are there good Bouldering games for children to keep them motivated?
There are various bouldering games that even parents with very little experience in bouldering can play with their children. It makes sense to motivate small children through tasks that they can master well because they are inspired by small success experiences and the excitement and the fun of bouldering remain. It is important that the children know and understand the rules of the boulder. No other bouldering people should be bothered or even endangered by the bouldering games.
Save the animal
This game is perfect for a stuffed animal. Depending on the age and ability of the child, it is placed on an easily accessible grip and the child is allowed to boulder to him and get it. It is important not to overstrain the child and to place the stuffed animal in three meters height. It is sufficient if the child has to make two or three climbing moves to catch it.
Mum or dad should be able to get on well with their hands to their own child if it gets scared and you have to help with climbing. It is not unusual for children to be motivated and carelessly bouldering up to a certain height and then realize that they are more anxious and do not dare to boulder down again. Therefore, the first boulder trains should take place within the easy reach of the parents. It does not always have to go up. You can also let the children traverse left or right.
The cuddly toy can be put upwards, depending on motivation and courage. The child should let the stuffed animal down after reaching down and not climb in the arm because it is so limited and can slip off the handles. A variation is to give the cuddly toy to the child so that it can put the animal itself on a handle. Mum or dad must then boulder to cuddly toy and get it. For this purpose, the stuffed animal should be placed eg in the waistband of the child so that the child has his hands free to boulder.
Hide small toys
If the little ones are braver and want bigger incentives, it’s best to bring small toys that stay well on the handles. These include, for example, Playmobil figures, large puzzle pieces or small toy cars. These are placed on top of the handles. The child can either watch or it has to shut his eyes. This makes the game a little harder because the child first has to search for the items. Then the toys can be taken out of the handles.
Either one object after another is brought or they are all taken out of the handles one after the other, without coming back to the mat. It should be noted that the child does not boulder above or below other children. Here, as already described above, the toys should be carefully dropped down and not thrown, and the children should not climb with an object in their hands. Parents remember best where the cars or figures are because they can often no longer see from below. All toys must be found again and taken!
Bouldering blindfolded
A game that demands a lot of attention from the parents but fun for the kids is bouldering blindfolded. Because seeing is an important part of climbing and bouldering, connected eyes pose a special challenge. Touch and confidence are put to the test.
This game should only be played with children who are familiar with the boulder wall and also feel confident in bouldering with blindfolds. For this, the child’s eyes are hidden. Sleeping goggles or a scarf are good. The parents say the direction and the position of the handles. At the beginning, the children stay close to the ground and traverse. The parents basically scoff at the child in this game. If it’s braver it can boulder uphill too. The child should always remove the blindfold if it feels unwell. It should also be removed to boulder down.
General information about bouldering with children
Ensure safety
Children and parents need to understand that bouldering gyms are not playgrounds but sports facilities. Even Boulder games must take place in a disciplined manner. Running, screaming, flying objects or toys on the mats can cause injury. The items that are used in Boulder games, must always be removed from the mats and handles.
Respect gym rules
Each gym has its own rules. However, always keep in mind to not stand below someone bouldering or climbing. The jump or lintel area must always remain free! Since children can not yet estimate how extensive this area is, they must always be sufficiently far away from the boulder wall. Even in a children’s gym. This important rule should be re-discussed with the child each time before entering the boulder mats. In addition, parents must ensure that their children adhere to this important rule.
Have an alternative program Children usually boulder very much. However, this is not true for all children and not always. Coloring books, puzzles or a small card game in a backpack provide variety and can save the bouldering session. Sometimes even a small meal break helps. If games can not motivate and the mood is bad, it’s best to take a break or stay open for a spontaneous alternative program.
Conclusion
I hope you enjoyed this post, read more here, why climbing and bouldering are great for your kids!
Days get shorter, nights longer, the weather turns cold and wet. It’s autumn time, and this means for many of my friends and me more time inside the bouldering and rock climbing gym. But besides training to become a better climber, indoor rock climbing is actually a good workout if done right.
Is Indoor Rock Climbing a Good Workout? Yes, it is – indoor rock climbing is a good and physically demanding workout for the complete body. Because you need to stay light and flexible to climb, it keeps you young too, while also building muscles. It’s no powerlifting or marathon, but more of an all-round workout. It helps you reduce stress and build muscular and mental stamina and also trains your mind. And indoor rock climbing is a lot safer than outdoor rock climbing for beginners.
Indoor Rock Climbing – Cardio and Strength Building In One Independent from the Weather
No matter if you go climbing indoor or outdoor, rock climbing is always a good workout. Not only will continuously climbing build muscular stamina, but it will also make you stronger. If you climb many routes fast, it’s even a good cardio workout for your heart, and inside a gym you can easily send route after route, shielded from bad weather and cold outside temperatures.
To get yourself up a route you need a lot of strength in your upper body and lower body. It’s actually surprising how much leg strength you need for some climbing routes. As a nice side effect, climbing provides a demanding workout for these muscle groups.
It gets better: Climbing in a gym is also a great way to train muscles you didn’t even know you had before. Like your core and hips and some other more obscure smaller muscles. Indoors you will find all kinds of hard routes with difficult crux sections where you need to twist and bend your body in weird positions. it’s like an extreme yoga session that’s a lot more fun. Rock climbing inside a gym is also nice for this, as it helps you try out new styles of climbing you might not find in your area otherwise. If you need a good training regime and system, read on here, I wrote an article about it.
Muscle Groups That You Train By Climbing – You Can Work Your Complete Body Indoors
There are a variety of muscles involved in climbing. If you try out all kinds of different routes like overhangs, slabs, and cracks, you will ultimately give yourself a complete workout.
Abs
Quads
Lats
Calves
Biceps
Core muscles you never knew you had
Obliques
Traps
Delts
Triceps
As you climb on, you will also work your hand, wrists, and forearms. And while rock climbing won’t let you look bulky like a bodybuilder, if you do it right and maybe support it with some pull-ups it definitely lets you build a good physique if you want.
Rock Climbing Improves Flexibility
I can’t stress this enough. I’ve seen 80-year-old rock climbers that were stronger and more flexible than most young people I know. Rock climbing does exactly that: It makes you strong and flexible at the same time. Something you cannot say about most gym memberships. By training in a rock climbing gym, indoors, you can also directly work on moves and routes that are hard for you. By training these weaknesses, rock climbing effectively increases your range of motion too.
The more flexible you get, the better you become at climbing too. If you need some more tips to prepare for bouldering and climbing, read more here.
An Hour Indoor Rock Climbing Works Off Stress
And compared to outdoor rock climbing, where you usually need at least 2-3 hours of time, including the approach and the drive, rock climbing indoors is a quick activity. Have an hour of time after work? Grab a buddy and hit the rock climbing gym for a fun quick hour-long session. Indoor rock climbing helps to raise norepinephrine levels like outdoor rock climbing will too, and this neurotransmitter helps you release stress.
Rock climbing consists of a unique mix of adrenaline and exhilaration that comes with the actions of climbing, leaping, hanging in the air and the feeling of being high above. This mix is powerful and almost like a natural high.
Even with Indoor Rock Climbing You Train Your Brain
Granted, indoors you need less mental skills to read a route. The colored grips are no challenge in this regard. But navigating routes is still hard sometimes, finding the right sequence of footholds and handholds, and balance. So even indoor rock climbing trains your brains problem-solving skills.
And like it’s brothers bouldering and outdoor rock climbing, indoor rock climbing gives you the same good hand-eye coordination that you need for hard sections.
Rock Climbing In The Gym Lets You Conquer Fear In a Safe Environment
Many of us are limited by our fears. Fear is the biggest challenge that stands between the dreams of most people I know. If you can conquer the fear, you can experience success and live your life fully.
While rock climbing doesn’t directly help you with those, it helps you tackle the fear of falling and the fear of heights. When I started rock climbing, I’d get sweaty palms as soon as I was higher than 9 feet above the ground. Continuously learning and climbing new routes helped me work on this fear, and while I still get sweaty palms from time to time, it definitely got better.
When you go indoor rock climbing, you can work on these fears in a safe way. Climbing gyms are inherently safer than outdoor rock routes, as safety bolts are more frequent and you can climb most routes top route too if you want. That way it helps you build confidence and self-esteem before you try out harder routes outside. Indoor rock climbing is really safe that way and climbing walls are also all kinds of safety tested, read more about them here!
Rock Climbing Fights Chronic diseases like High Blood Pressure and Heart Disease
Most people today know about these diseases. Many diseases like diabetes, high blood pressure, and high cholesterol are inherently connected to a sedentary lifestyle and overweight.
Indoor rock climbing is a great way to enjoy rock climbing even in wintertime when most other people sit lazily in front of their TVs or computers. And as rock climbing has the same physical benefits as other sports, it helps you build endurance and strength and those two fight of illnesses as well
Every Rock Climbing Session Burns Off Calories – No Matter if Indoor or Outdoor
Most people don’t know about it, but if you keep resting times to a minimum rock climbing burns off lots of calories too. Depending on how much time you rest between routes, you burn off between 400 and 900 calories in an hour.
I would say, rock climbing indoors can actually burn off calories easier than outdoors, as you can pick and climb many easier routes fast in a rock climbing gym. That way you can work on endurance and strength while also burning lots of calories if you minimize pause time between routes.
Indoor Rock Climbing is A Ton Of Fun and Keeps you Motivated
Rock climbing indoors might not give you the same view and feel of being outdoors. But it’s still a great feeling to be on top of things, up in the air.
When you reach the top of a route, you still have a birds-eye view of things and that still feels great. You also get the same adrenaline rush when you take a fall or lower or lower really fast and when sending hard routes.
And the pure joy of moving fluidly through a route is the same when climbing indoors. If you know every handhold and every twist of your body, you feel a natural flow. This feeling is powerful and fun to experience. By connecting these good feelings with a sport you can enjoy indoors you create almost like an addiction – to a positive thing of course, which is a great way of keeping at it.
Indoor Rock Climbing Gives you the Same Sense of Accomplishment
Tackle a hard route outside your comfort zone and you test your skill and fears. Accomplish it, and you shifted your physical and mental limitations by a degree. This is the same no matter if you climb indoors or outdoors. A hard route is a hard route, and yes indoors you can climb a bit harder than outdoors as you have better safety and don’t need so much route reading.
But successfully climbing a route is still a win-win and indoors you can do it no matter which weather. That way you keep training the whole year. And when summertime comes you are fit and prepared to climb outdoors! By the way, if you need some good climbing shoes or climbing pants read my other articles: Climbing shoes review for 2020, climbing pants review for 2020.
Related Questions
How many calories do you burn by rock climbing or bouldering?
Rock climbing and bouldering burn between 500 to 900 calories per hour, if you can keep rest to a minimum between climbs. It doesn’t matter if you climb indoors or outdoors and if you go bouldering. If anything, bouldering is harder and might burn a bit more per hour.
Can you lose weight indoor rock climbing?
Building muscle will help burn fat, and indoor rock climbing burns off calories too. So yes it will help you lose some weight, provided that you keep rest at a minimum and don’t just chat your way around the gym. But you need to also have a healthy diet and nutrition to lose weight!
Is indoor rock climbing dangerous?
Not really. Indoor rock climbing is among the safest forms of rock climbing if you begin with top rope indoor rock climbing. The worst thing that can happen when you go indoor top-rope climbing is that you take a fall of a few inches.
Climbing is a sport where you need lots of finger strength. The same goes for bouldering and alpine climbing. No matter what you do exactly, your fingers will usually be sore if you’re new to climbing. There are actually findings that show that climbers fingers and hands actually adapt to the short, intense stress climbing exposes them to. Others claim climbing can lead to early Osteoarthritis, so is climbing badly for your fingers?
No climbing is not bad for your fingers, at least not when done right. Improper technique can lead to injuries, but proper climbing strengthens the tendons in hands and fingers, but over a long period of time. If you’re prone to arthritis, you should take extra care warming up properly and work on your finger flexibility.
Does Climbing Increase Chances to Suffer from Osteoarthritis?
Osteoarthritis comes from wear and tear of joints. As such, it results from improper loads and abnormal stress on the same joints over a long time. This is what happens if you put abnormal loads on your fingers and joints for decades. As of today, there is no clear indication of whether sports activities cause Osteoarthritis or not. In order to find out, studies where undertaken with young climbers. Why young climbers you might ask? If young climbers show Osteoarthritis, that would be a very safe sign that climbing actually can cause Osteoarthritis. The same cannot be said about older climbers, as they can naturally suffer from Osteoarthritis.
Don’t mistake Osteoarthritis with “normal” Arthritis; these two are not exactly the same. Arthritis is usually more severe, and as an inflammatory disease affects the joint capsules first. Osteoarthritis affects the cartilage of the joints first and is usually not so severe. This study compared 27 climbers to non-climbers and found that the answer is likely no, at least for the joints in the hand. The study found out that the climbers had stronger hands, however, and some even thicker bones. Climbing is actually likely to remodel your bones to get stronger to make them more powerful – nice side effect! This study actually found out that non-climbers had a higher chance of Osteoarthritis then climbers, especially on the joints of the thumb finger.
But results are not uniform, this study, written 2 years earlier actually found that climbers were at increased risk, as there were climbers in the study group that had signs of OA and none of the non-climbers had. Another study from 2011 supported these findings, showing that climbers showed signs of osteoarthritis sometimes.
But all of these studies had very small sample sizes and not the best methodology. In my eyes, the study with the best methodology found these results:
The more intensive you traing climbing, the more your body adapts, resulting in broadened joints. Osteoarthritic changes where rare in young climbers.
Is Rock Climbing Bad for Arthritis?
But what if you suffer from arthritis already? Is climbing badly for it? Actually, there are many physiotherapists that recommend climbing when people suffer from arthritis. Climbing is great to improve flexibility in the core and hips. And while arthritis will probably reduce climbing performance, a general regimen of sport and exercises is still good for patients with arthritis. Keeping strong muscles and flexibility is even more important when your maximum range of motion is limited because of arthritis!
Can Rock Climbing Cause Carpal Tunnel?
Carpal tunnel is a condition that causes weakness and numbness. If you ever felt these things in your thumb, index, or middle finger when climbing a longer session, it might affect you as well.
Some people are more prone to carpal tunnel syndrome than others. People that spent most of their time in front of the computer and hack on their keyboard are particularly likely to develop it. Climbers can suffer from it too, as the repetitive pattern of wrist use when climbing increases the chance of developing these problems. Especially when you hold a grip, your wrist flexors are continuously put under stress. When the muscles compress, they can actually compress the nerves, and then you suffer from numbness.
If I’m reading it correctly, it appears to state that climbing does not increase your chances of arthritis. It also states that climbing causes the bones in the fingers to be wider than non-climbers, hypothetically proposed as additional bone deposits due to the rock climbing; not causing any negative side effects, however. Also, it appears that these traits appear in people who boulder a lot and rock climb a lot.
Is Rock Climbing Bad for Your Fingers When you Age? Can You Go Rock When You Are over 50 Without Finger Problems?
Most commonly climbers injure their A2 pulley in the finger. The injuries come in 3 categories from a simple sprain over a more serious sprain to a torn pulley. And the injuries take a long time to recover, especially for climbers of age over 50.
But climbing also strengthens the tendons of the fingers, so if you are careful, and have a disciplined training approach (i have an article about it here), there is a good chance of being in your 60s or 70s and climbing quite well. I actually know a lot of older climbers who are still sending hard routes, are all over 60, and have no problems with finger or hand pain.
Related Questions
How Can I Let My Hands Heal After Rock Climbing?
Skin problems are a typical problem for climbers. If you want to keep your skin in working condition for climbing, there are some easy tips you can follow. They will all help you to climb harder, and more often.
Tip for better skin healing
When to do
Why it’s effective
Wash hands after climbing
After your session
Removing dirt and chalk from scratches and wounds will decrease the chance of infection, and help hands to recover
Putting on Lotion before bed
Immediately before you go to bed
The lotion will recover the natural fatty film of your skin and moisturize it. By applying before you sleep, the lotion has a good chance to be fully effective, and you can use a very thick formula, that would normally interfere with not leaving greasy stains on clothing and work.
File calluses down
Whenever you have time
Calluses can get compressed and actually increase the change of flappers, read more about it here. So better file them down and keep a minimal thin layer of hardened skin.
Try different chalk brands
When training, not on on-sight attempts!
Some chalk is more aggressive on your hands than others, give yourself a chance to find the right one by trying out different brands, and see how your skin reacts.
Minimize hot water exposure of your hands
Whenever you wash hands or dishes
Hot water dries out your skin, read more about it here. Simple turn the water a bit cooler, it will still remove dirt and stains well.
Will Rock Climbing Get You in Shape?
It will get you in better shape than doing nothing. It’s not the Nr.1 sport to burn off calories, but it does burn between 500-900 calories in one hour, depending on how much you rest between routes. It also helps build some muscles in your body and keeps you flexible, although it is no way to build a bodybuilder physique. If you want to get in shape, combine climbing with some dedicated strength training and 1-2 times running per week, and you will be in very good shape quickly!
What Is Finger Tape for Climbing?
Climbing tape or also called finger tape is used to protect the skin and tendons of your fingers to put it simply. If you want to know more about it, I wrote an article about it here.
I know you like to browse some good whippers, I do at least. I put together a top 20 climbing huge whippers from different sources like Instagram, Youtube and Vimeo. When I collected these links, I had two rules:
A) Must include a decent fall or ‘whoops’ moment
B) No serious accidents, i.e. as you can see in some of these clips of huge whippers climbers bang arms or feet, etc., but I tried to not include videos where it was obvious that the person got hurt badly. Some videos probably caused a sprained ankle or bruises and cuts thought. But thats part of climbing and bouldering.
C) The clips are not in order, which means they are not rated by the length of the fall or something like that. Just the order I found them in.
1. Chris Sharmas Epic Whipper
Oldie but goldie!
2. Lead Climbing Whipper at Clear Creek Canyon Wearing a GoPro
Good that this climber had his action cam on, makes for a cool perspective!
This one sucks. Thanks that he didn’t injure himself more, at least he looks okay. Original here.
6. 40+ foot whipper at Escalante on Trad Gear
Wow, this one is high. Thankfully his belayer catched it!
7. Eagle Falls in Upstate New York – Trad Climbing Whipper
This happens when a cam placed does not hold. Probably due to wet conditions. Thanks to the good belayer and a fixed bolt beneath him this ended well! What a fall though…
8. 60+ Foot Whipper on Castleton Tower (trad climbing).
Whether this was intentional or not, this whipper is crazy. The climber must have left some clips out and got tangled in the rope too…
11. Trad Climbing Whipper at Joshua Tree (Route: Heart of Darkness)
If you don’t know it, trad climbing or traditional climbing has no drilled fixed bolts but you lay all the safety gear yourself. Can be dicey when you take a fall! This climber was alright except for some bruises.
12. Nasty Whipper on Wonderbar 10d at the Pub Wall With an Upside Down Flip
Thankfully the climber was OK, because he wore a helmet. But the flip at the end shows you how NOT TO fall.
13. Large Whipper with 10ft+ Fall taken on Johnny B Good at The Gallery in Red River Gorge
Nice flip at at the end!
14. Aid Climbing Fall On the lost Arrow Spire
This is how falling looks like when you do aid climbing. The gear slowly looses its hold until it all of a sudden ends in a good fall. Aid climbing means you use gear to help you ascent a route, if you don’t know already.
15. Slab slipper on Peak Technique, near Bowden, Northumberland, UK
Wow, why not top rope this piece of slab? That’s quite a fall and he was lucky to walk away from it.
16. Big Fall that Almost Lifts the Belayer on Tanuki, Japan
The Belayer is almost as high up as the climber!
17. Matt Reeser falls off Desdichado, a 5.13+ in Eldorado Canyon
Kind of a sideways whipper! He actually sent that route one month before.
18. Ben Griffin Takes a High Fall at The End of Sweatpants in Public (5.13c), Cascade Canyon, Colorado
He actually fell headfirst into the cliff and needed staples to close the wound on his head afterward. But he came back and sent the route later! “I decided to skip the last bolt, which I did many times in practicing the route, but the rope got stuck around my leg and knee pad and was unable to release the rope. It really sucked.” he told Rock and Ice later.
19. Boulder Pad Miss – Sprained Ankle
Thankfully nothing more happened to him. Technically not a climbing whipper, but he is like 25ft+ high so I thought it’s worth to include it!
Rock climbing is exciting to watch and do, but if you haven’t really begun and watched it for the first time, it can also be a little intimidating to watch. I know that many friends I have were initially shy about going to a gym and starting to learn rock climbing in front of many strangers. Gyms also don’t have the best reputation for being learner-friendly places. But climbing gyms are different from regular gyms, and I have met tons of friendly sports climbers who are very eager to help and teach. One question remains, how hard is rock climbing? The question lacks details, and it’s kind of unspecific, but I’ll try to answer it in this post.
How hard is rock climbing? It’s as hard as you make it. There are straightforward routes that feel like a ladder in your garden. And there are challenging routes and boulder problems that you need to train months for. The good thing is that almost everybody can start, and if you go to a climbing or bouldering gym there are always some routes and problems that suit your ability. And from there on, you can gradually improve.
Once you reach a specific grade of difficulty in climbing, you might not want to improve anymore, and that’s fine. Depending on your body type and weight, improving beyond certain grade can involve a lot of training, and not everyone wants to spend the time. But that’s fine, there are a lot of routes of every ability and if you’re just out there for fun, why give yourself a hard time? On the other hand, if you want to keep improving a sound training system is essential, I tried to explain it in this article.
How Hard is Rock Climbing? What skills are needed?
When you rock climb and boulder you need 5 skills. The more skill needed from the individual aspects, the harder the climbing becomes.
Most moves require some strength
Longer routes and continuous climbing will need endurance
If you want to tackle the crux, i.e., the hardest part, of gradually increasing difficulty, you will need to solve problems with creativity
Sports climbing, traditional climbing, and alpine climbing need technical skills involving ropework, knots, and handling of gear
All the disciplines need courage and motivation, especially if you leave your personal comfort zone
Endurance: The engine that keeps you going when rock climbing or bouldering
If you want to become a decent climber, you need finger strength. Even though many people focus on training their fingers way too early in their climbing career, and fingers that give out are typically a sign of bad technique in beginners. But at some point, your fingers will become a limiting factor. You need to keep practicing, and then you will extend the time you can spend climbing without fingers giving out. There are good techniques to help reduce the force on your fingers, like climbing with extended arms and maintaining proper hip position. For more information about this, read here. Generally, in terms of endurance, multi-pitch rock climbing needs more endurance than sports climbing and sports climbing needs more endurance than bouldering.
No matter what you do, at some grade rock climbing routes and boulder problems need a strong grip. The easiest thing you can do to increase endurance is to climb often and train things like traversing. You can also do hangboard training, see my article about a quick DIY hangboard setup for your home, and use grip strengtheners.
Strength: A limit for power moves and if you lack technique
Most easy climbing routes like a US 5.5, 5.6 or V0 boulders don’t really need a lot of strength. If you can climb a household ladder, you’re probably strong enough. And most boulder and climbing gyms have a lot of routes of these grades as a lot of people are beginners. It can help to train pull-ups to improve faster, but if you continually fail to climb these routes because of strength, it’s probably your technique that lacks. If you’re a regular person to train pull-ups, you shouldn’t have difficulties to reach 5.8 or 5.9 or 5a, 5b in french grading.
Climbing definitely needs upper body strength, and even though you have to practice leg technique and proper core and footwork are super crucial, at some point, the upper body will become a factor. But not like you think, there are almost zero bodybuilders or powerlifter type of climbers. Instead, you need muscles that can hold you statically for long periods of time and then quickly and swiftly explode for dynamic moves. That’s why most professional rock climbers have very low levels of body fat. The technique is key, though, and if you see youngsters climbing hard problems faster and better than you, it’s almost safe to assume that they master the technique better. If you know how to mechanically approach a problem and use the body resources you have perfectly, strength will play a lesser role.
On the other hand, if you have no technique, raw strength will limit you. Look how most beginners climb, especially if they are gym bros: No legwork, lots of pull-ups and they usually burn out after 2-3 routes with arm pump. It really pays to know how to grip a hold correct and when and if to use heel hooks and advanced moves like flags and turns.
Problem Solving + Creativity: Bouldering and Climbing is like a 3D puzzle for your body
The biggest muscle involved in rock climbing of any kind and bouldering is your brain. It’s the aspect I really love rock climbing for. I think it’s an amazing way to forget work and other things, as climbing needs immense focus and dedication. Granted that indoor rock climbing takes some of the puzzle aspects away, with its color-coded routes, but even here challenges for your brain arise. Finding the right body position and grip sequence can be really hard. And a lot of times you will feel yourself watching good climbers in awe, thinking, “why didn’t I come up with this solution?”. By the way, the solution to a rock climbing problem is called beta.
Outdoor climbing is where this puzzle becomes really interesting. There are usually tons of possible holds, and only every now and then do you see chalk marks. You really need to develop an eye for good holds, and it helps to go through the route mentally before you try. An easy trick is to “climb” a route some times mentally before you actually try it and then try to notice the difference between your mental climb and the reality. You will be surprised by how many different routes are once you’re doing them for real.
The harder a route is, or a problem in bouldering, the longer you need to solve it. Easy routes can be done onsight usually, but harder routes need some thought and practice. The process of learning a route with its intricacies is called projecting. Read more about correct “projecting of a route” here.
It’s an art that you need to practice too!
Technical Skills needed
Some types of rock climbing need more technical skills than others. The least technical discipline, by far is bouldering. You only need some shoes and know how to fall. In the gym, even falling is usually not a problem as the shock-absorbing ground is usually fine for fall heights up to 2-3 meter. If you don’t want to learn about knots and belaying and carabiners and have no money to spend on a harness, go bouldering indoors. Outdoor bouldering, however, needs a crash pad and some knowledge how to use it, plus you need someone to spot you, so that’s a bit more involved.
Indoor top-rope climbing is the next easiest thing to do in terms of technical skills. Besides the correct belaying technique, which you can learn in under one hour, and the basic double figure 8 knots to tie into your harness you need nothing else. It becomes more challenging when you start to climb outdoors, where you need to know how to build a correct anchor (if you don’t know how to read here), and once you get into lead climbing, you will also know how to place quickdraws. It’s also when you need to think about cleaning a route, which means removing the anchor on the top and setting things up to be lowered down by your belayer after finishing a route.
When you master sport climbing in the lead, you can think about traditional climbing. Traditional climbing means you place your own safety gear such as nuts and bolts and cams. This is also when most people start climbing multi-pitch routes, so you need advanced anchors. Multi-pitch climbing, solo top-roping, etc. are other disciplines of climbing that involve advanced gear.
Motivation and Courage
When I started rock climbing, I actually began to do bouldering. I was just too afraid of heights initially. But by working my way up to higher boulder problems in the gym, at some point, I was ready to try an indoor rock climbing gym. Man, to this day, I remember how sweaty my hand palms were… I also did some canyoning and started rappelling down cliffs to work on my fear of heights. If you’re bothered by the height, I think exposing yourself to it gradually more is the best way to fight it.
I’m apparently not the only person, see this article about exposing yourself to cure anxieties. Once you’re comfortable with boulders of all sort inside the gym, get a harness, and do some indoor top rope. The good thing about top-rope climbing is that you can actually train to take falls in a very controlled way: Just have your partner lower you once you finished a route, and tell him or her to give you some slack, then let go of the wall. You will probably only fall for 5 inches or so, and there is no danger, but it will get you desensitized to the height and sensation of falling quickly.
Once you gain confidence, you will be quickly going up and down without hesitation, and at that point, you can start lead climbing. The longer you keep climbing, the less the irrational fear will become. There will always be some slight risk involved, but if you want, climbing can be a very safe sport. You just need some courage to enjoy it, and by following my approach, you will gain that courage if you don’t already have it!
Are traditional climbing and multi-pitch climbing harder than sports climbing?
There are some styles of climbing that are harder than others. When it comes to the strength needed, bouldering reigns supreme. There are some very dynamic and challenging moves involved when you try hard boulder problems, and strength will become a limiting factor here. But in terms of endurance, multi-pitch and traditional climbing are harder than sport climbing.
Top-rope climbing is the easiest of all, as you can take a break whenever you want during the climb, and if you have no endurance left, you can simply lower down. The risk of falling is almost zero too, as the belayer can keep adjusting the rope while the climber moves up, so the highest fall that occurs is not more than a foot usually, including rope stretch.
In terms of route difficulties – it’s very varied. There are some long routes of difficulty 5.8 that feel harder than shorter 5.10 routes. It comes down to your personal preferences – if you like slab climbing, a 5.8 slab route might feel easier than a 5.7 overhung route. That’s why you should always keep in mind your personal strengths and weaknesses and work on them to become an overall good climber.
What do I need to bring to the table to learn rock climbing or bouldering?
Rock climbing is pretty straight forward in theory: You climb a wall up until you reach the end of the route. But there is theory and technical details that you can learn to become a better climber. Just read my blog to find more tips, watch youtube videos, and visit other sources like climbing.com and rockandice.com. I would also recommend you to join a rock climbing or bouldering gym; it’s the perfect way to work on your skills in a controlled environment. A bouldering gym brings the further advantage that you can go train solo, which is nice if you and your friends have busy schedules.
If you start out, getting a mentor is a good idea too, as it helps you improve even faster. Most people I know are always keen to teach and help new climbers. I think the hardest part to learn is to work n your fear of height and falling, which is typically a thing most beginners have. If you don’t consider yourself one out of 100, it’s also good to book a climbing course to learn the details of knots, belaying, and general safety with climbing gear. If you lack knowledge, it can be dangerous.
How hard is it to become good at rock climbing or bouldering?
If you want to become really good at climbing, it takes years. Like any other serious sport, it will need dedication and systematic training. But the cool part is, you can always climb with better climbers. This is not true for other sports like running or football, where you won’t have a good time if you cannot keep up with the pace or skill of the other.
If you go rock climbing with very good rock climbers, there might be some routes which are too hard for you. But you can always let them try the route first, and then follow them top-rope. By alternating the belaying, you can also let them work on their hard routes, and they belay you for easier routes. You only need two ropes in this case, as you don’t want to switch the rope to the other route all the time.
If you climb with better climbers than you are, you will also quickly learn from their good technique and execution, becoming a stronger and faster climber in progress. If you just want to progress fast, I recommend focussing solely on climbing often and many different routes until you reach 5.10 (french 5c), and then include systematic training workouts like campus board sessions and grip strength training.
Which grade do I need to be a “good” climber?
If you start out, your goal should be to become comfortable with lead climbing 5.8 (french 5a). Amateur climbers who just work on their climbing during the weekend usually reach grades like 5.10 (french 5c). If you hit the bouldering or rock climbing gym frequently and regularly, you will probably get up to 5.12 or higher within 3-5 years (french 7a).
After that, it becomes a different story. Becoming a 5.13+ climber needs years of hard and daily training and also the mental ability to read routes correctly. These are also the grades where natural preposition like ape index, weight, etc. come into play. The current maximum is 5.15d (french 9c). There are only a handful of athletes around the world who climb at this level, so don’t beat yourself up about it!
Do you need to be really fit to start rock climbing or bouldering?
No, certainly not. It doesn’t harm if you are not morbidly obese, but I have seen heavy climbers tackle really hard problems with technical finesse. Most people who can climb a ladder can also rock climb, and since there is no weight limit, even if you are a little heavy, you can start. The only thing you should keep in mind is the weight of your belayer, as too big of a difference can be a problem.
When you advance, you will notice how you become stronger in your arms and core region, and people who regularly climb are among the strongest and most flexible people in the general population.
Can You rock climb with a disability?
Yes, you can, there are people with no legs who successfully climb. It’s just a matter of your personal disability what kind of routes suit you best. But even with missing fingers or hands, you can still climb slab routes. I think you should definitely give it a try, even if you feel a disability holds you back. There is a good chance that you will have a lot of fun nonetheless!
Are Rock Climbing and bouldering Dangerous?
If done right rock climbing is pretty safe. Yes, there are accidents, but if you and your partner learn to belay correctly and keep the basics in mind, you can minimize the risk. Indoor climbing is pretty safe, with indoor bouldering probably being the safest. Outdoor climbing is a bit more difficult, but if you take a course, I think climbing is most likely safer than riding a bike or motorbike.
Other Related Questions
Can I Lose some Weight by Rock Climbing or Bouldering?
Sure, you can. However, if your goal is only to lose weight, it might be a better idea to go running or to bicycle. Climbing is not a cardio sport, and it will help you to get stronger and more flexible and maybe motivate you to lose more weight in the process of becoming a stronger climber.
Is Bouldering or Rock Climbing an Extreme Sport?
How often I heard this question. The general public is influenced by movies like “Free Solo” etc., but in reality, I wouldn’t consider climbing more extreme than mountain biking.
Can my kids start rock climbing and bouldering?
If they’re 1-2 years old, yes they can. You can even build them their own little climbing wall in their room, as a 2-year-old doesn’t need a lot of height to have fun. The good part about climbing is that there is no age limit – you can have fun no matter if you’re 80 or 4 years old.
Kids can start climbing as young as 1-2 years old, especially on smaller climbing walls. Many professional climbers started getting into the sport in their early teens. There’s no age limit for rock climbing.
Conclusion
If you liked this article, have a look at some of my other articles. Maybe you’re about to start climbing and need some good shoes, well I tested them, and these are the top climbing shoes for 2020. Or you need some advice on how to prepare for bouldering and climbing, read more here.
Feel free to leave me a comment; I’m always happy to get some feedback!
I want to talk about the basics today. Basics as in basics of bouldering foot placement. It’s one of the most underrated aspects for many beginners.
When people start with bouldering, they usually focus on their hands only. If you’re rested and fresh, nailing a route is easy if you have solid upper body strength. And many gyms are very arm-focused too, as they have lots of overhanging routes with huge jugs to grab on the lower grades. But using only your arms will quickly wear you down, and the sight of beginners finishing their session early after 30 min with arm pump is a common one at any gym or crag.
Once beginners start to focus more on foot placement and leg technique, they feel very wobbly in the beginning. And they make many mistakes – sloppy footwork results in bad foot placement. Try to listen if someone climbs, and you’ll quickly notice if she is a master of foot placement. Silent, quick and elegant movement usually tells that someone knows how to use their feet while beginners are often loud and bang the main portion of their soles on the footholds.
I want to dedicate this complete post only to bouldering foot placement and the basics of proper foot placement. Many posts handle all the different topics of bouldering technique, but I think you cannot overrate and over practice footwork, especially if you want to improve your grades. Good foot placement will also save you lots of strength and energy in your arms. So, keep reading to learn how to build your bouldering on a solid foundation, feet first…:D
Put your shoes on and it’s go-time!
Why Is good foot placement important for bouldering?
Climbing and bouldering are very arm heavy sports. There is no way around it, top professional climbers you will see a certain type of athlete dominate, and they all have relatively strong upper bodies. Don’t get me wrong, you don’t have to be a bodybuilder for climbing, that kind of muscle mass is probably more impeding than helping, but compared to other sports, climbers have a relatively high amount of their (overall low body mass) concentrated in the upper body. Why this post then? Why do people tell you foot placement is so important and that it’s the most important aspect in bouldering? When I started bouldering most people told me that my foot placement was more important than what I did with my arms. Here is the answer: foot placement is so important because most people neglect it completely. And if we assume that 60% of bouldering is arms, then you still have 40% that comes down to leg and footwork.
But if you neglect them, you will always be 40% under your maximum ability. Your legs are the strongest muscles in your body by far, and leaving them out means you miss out on potential. Your legs are also much more enduring than your arms, as they are made for holding the majority of your body weight when you walk and stand. If you take walking, for example, your arms are more or less useless while your legs do the work – that’s why they are so strong. Every time you climb a stair, it’s like a little workout for your legs.
By learning correct foot placement and foot placement technique you can achieve your full potential.
Your legs have greater strength, power, and endurance than your arms. To see why that might be, consider the act of walking. While your arms dangle by your side for the entirety of a typical day (assuming it’s not a day filled with bouldering), your legs are carrying your entire body weight around — step after step after step, for thousands of steps each day. In case you don’t believe me yet, just compare the world records for the bench press and squat:
If you have a solid bouldering foot placement technique it will help you save strength and energy in your arms, while using your already strong legs.
There is a famous quote in Better Bouldering from John Sherman where he says that you should let the big muscles of the legs help you reach higher ground, while your arm muscles should actually only do positioning and balancing. I couldn’t add more to this, that’s what bouldering foot placement technique comes down to.
Bad foot placement means your upper body will wear down quickly, you will get forearm pump more often and faster, and your training session length will be shorter. Chances of injury for elbow and shoulder will also grow as you constantly run into the risk of overstressing the small shoulder muscles or elbow joints. Good foot placement will make you tackle harder problems, climb longer and progress faster. That’s why you should work on your footwork technique, and these basics of footwork placement will give you a good starting point.
Know the Different Areas in a Bouldering Shoe
Before we get into our techniques and drills, let’s talk shoes first. Good climbing shoes LINK are the one and only piece of gear that you really rely on when bouldering.
No matter what you think about them, they are your main contact point with the wall and as such you need to understand how they work. For beginners, climbing shoes look like a rubbery mess, but there is intelligence behind the design. If you know how to use which part of the shoe, your foot placement will become more efficient and better. Knowing what to use where will also help you develop a beta for onsighting a project or boulder too, and it’s important to build solid bouldering foot placement and technique.
Toe Section
This is the part where your toes touch the rock. When you climb, you should usually have your weight centered around this area, and try to avoid touching the wall with anything else. Exceptions are heel hooks and side edges. This part of the shoe is not only the most stable part of the shoe, it’s also the most precise area. And when you use it correctly, it allows you to easily pivot and adjust hips and feets. You can also stand on your tip-toes, which is great to keep balance. If you don’t use your toes you miss out on mobility and reach, and also face the risk of slipping. To understand the toe box, lets look at the thee different parts of it.
Front
If you place the front part of your shoe on a hold, this is a frontstep. Frontsteps are the basic moves when bouldering, and mastering them is key to proper foot placement. With the front of your feet you can super precise. Pivoting is very easy when you front step. But there are some footholds, like thin edges for example, where front stepping is not the best idea. On these footholds, frontsteps have a very small shoe-to-rock area, and that makes it slippery. Being perpendicular to the wall is sometimes a problem too, as it pushes your hips away from the wall which makes you spend more energy to hold and limits potential reach. In these cases you should press hips against the wall and utilize the inner and outer edge of the toe box to gain more stable hold.
Inner Edge
If you use the inner or outer edge of your climbing shoe this is called edging, read more the details of it here. Using the inner side of the shoe is a great way to get more contact area on to the rock and increase friction and hold on thin ledges and edges. It also opens your hips and helps you get the hip closer to the wall, which is good for preserving energy and maintaining hip mobility. Close hips are also good to have maximum reach. A disadvantage of this position is that you have less flexibility when maintaining this position, as it impacts your ability to pivot. Inside edging with both feet is called frog legging.
Outer Edges of the Shoe
When you place the outer edge of the shoe on a foothold it uses your small toes. As they are smaller and not as strong as the big toes on the inside of your feet, this kind of edging is not as stable as inside edging. But this kind of foot placement can be used to perform the backstep. If you don’t know what backstepping is, watch the video down below.
Arch
The midsection of your shoe. Generally speaking, try to avoid using this section for footholds. The climbing shoes have rubber here mainly to protect your feet and when you do crack climbing or twisted moves between rocks where you need to lock yourself in position. For normal climbing, avoid using the main sole of the shoe as much as possible. If you watch someone climbing and she or he uses the midsection of the shoe, often with a lot of noise when placing feet, it’s a typical sign of poor foot placement technique.
Heel
This is the back end of your bouldering or climbing shoe. This part of your shoe is used for hooks. Hooks are important for certain moves, but not for stepping on to regular footholds. For most climbers, hooks become important once they reach certain grades of difficulty, as hooks usually require lots of leg strength, flexibility, and core stability.
8 Keys in Order to Build Superior Bouldering Foot Placement
You know which part of the foot to use for certain situations. But now you need to learn the basics needed to have a solid foot placement technique when climbing or bouldering. The aspects presented here are very important and you should keep them remembered. It’s also helpful to think about them before you start your training session to focus on them. My advice is to try and improve single aspects initially.
Use your eyes and look before you place your feet
Look where you step. Before you do anything, always do a visual assessment if possible. Not only can you identify the quality and potential of a foothold, it will also help you to place your feet correctly. Both things are important. a) Identify FootholdsWhen you try hard boulders or climbing routes, identifying a good foothold quick and effortless is priceless. If you cannot do it, you will find yourself in situations where you use a lot of energy just by holding yourself in position and searching for the next foothold. I know i messed up many problems and routes as a beginner because my eye was not trained to identify potential footholds. This skill is especially important when you climb outside, where there are no marked footholds. Good footholds are often hidden under other rock features, and assessing them in terms of weight placement and potential to support upwards movement is crucial. b) Watch feet placement
Keep your eyes on the feet while you place them. It makes a huge difference for good foot placement in bouldering when you keep your eyes on your foot while you move it. Most beginners have only a quick glance at a foothold, and then carelessly slap their foot on it. And they usually pay for it by needing to readjust their feet. You should do it better: Move your feet as slow as necessary while watching them. Eye the exact point of the rock where you want your toes placed, and don’t look away until you place your foot. If you develop this careful attention, you will notice that you slip less and less with time, and soon you will be super confident and precise. You will also be quick once you get started with a route, as you find new footholds effectively and fast
Be precise When you place your feet, you should only need one try to do so. This means you place your foot exactly where it belongs at the first try. When you have precise foot placement, you save energy on stalls and re-positioning, as both cost a lot of arm energy. Think about it: While you fiddle around to have your feet placed right, all the energy comes from your arms while you hold yourself in position. And sometimes margin of error on small and thin edges is simply to small to be sloppy, and you take a fall if you mess it up. If you become precise, you will also become elegant and efficient.
Place feet silently
When you place your feet while bouldering, they should make almost no noise. Noise usually means you had too much momentum and the rock stops your feet, which means you lack control over your movement. Lots of noise mean no control, no noise means good control. If you cannot execute a move fast without making a lot of noise, you need to work on control. Try to climb routes extra silent, even if it means to execute movement slower. Go and climb a lesser grade if needed, but work on that foot placement control. Once you become better and more controlled, you can work on execution speed again.
Trust your feet and legs
There are many situations where you need to place enough weight on your foot in order to maintain a stable position. If you don’t trust your feet in these situations it will mean you take a fall. Most beginners don’t trust their feet because they are afraid they will slip and fall. And because they lack trust, they don’t place enough weight on their feet, which results in a fall. It’s a vicious circle. But you can break it, by going all in and putting some “blind” trust into your feet. After a while, you will extend your comfort zone easily by increasing the difficulty of the foothold step by step. Keep trying to step on footholds that you don’t tust in a controlled environment, where you gradually decrease the amount of energy of your arms while holding, and increase the placed weight until you have maximum weight on your toes.
Climb with sticky feet
Sticky or glue feet means that you have the ability to place your feet without readjusting. It’s a consequence of being very precise, to a level where you can place your foot on a hold and it sits almost perfectly – without any readjusting. Constant readjusting burns up precious energy and endurance, and you can easily practice this skill by climbing boulders without adjusting the feet and trying to spend more time before you place your feet and trying to be precise.
Proper hip movement
All climbing starts in your hip. It’s the single skill most people neglect, and for good foot placement you need good hip technique. Keep in mind to keep your hips as close to the wall as possible and to initiate movement with your hips.
Grab holds actively with your feet When you grip a hold with your hand you don’t just lay your hands on them and wait if it works out. You grab and squeeze (but don’t overgrip!). But when it comes to foot placement, many beginners passively place their feet on the foothold and are done with it. What you should do is actively step and grab a foothold with your feet. Activate your muscles, step on your tip-toes if needed and try to really hold and “draw” the hold with your feet. You will notice a big difference regarding the amount of energy needed from your arms to hold a position this way – the more you actively hold a foothold with your feet, the less energy is needed from your arms.
Use the feet to propel upwards movement Try to imagine you’re doing a super hard one legged squat when you actually progress vertically. Activate your leg muscles, and don’t just pull yourself up with your arms. Once you feel the burn in your leg muscles you know you are using them correctly.
8 Drills for building foot placement techniques fast
I put together some helpful drills to execute, to make learning proper foot placement easier for you. Include them when you do gym climbing sessions or outside. It doesn’t matter if you boulder or rock climb, they work for both.
1. Drill to train precise foot placement: Corks on Footholds
A great way to practice precision is the cork method. You pick a simple traverse on a nearly vertical or vertical wall and place wine corks on the footholds. Now your goal is to traverse and use the footholds with the cork laying on top of it, but doing it without kicking the cork of the foothold. This way you need to be very precise and gentle when you place your foot. Don’t worry if you are super slow, this is not about being fast. Remember the saying: Slow is smooth, and smooth is fast. It’s all about controlling the movement and being smooth.
2. Another Drill to train precise foot placement: One-time placement game
Climb some boulders with imaginary glue on your feet. Once you place your feet, you’re not allowed to adjust them. Try to find the right position at the first try, then commit for the foothold and continue.
3. Drill to train foot placement and body positioning: Tennis ball drill
This drill helps you train how you position yourself on the wall. You need 2 tennis balls and a slab wall. Now hold the 2 balls in your hands and climb the wall, without holding anything. You are allowed to place the ball with your fist for support. Remember to push on your feet to hold position on the slab. You can also use your fists for this drill if you have no tennis balls.
4. Drill for more calve strength: Tip-toeing If you need more power in the calves and upper feet, deliberately train tip-toeing. Find a level surface and then press up from the ground to stand on the front part of your feet, if possible only the toes. Hold the position for some seconds, do 10 repetitions for 3 sets, wait a minute between the sets. If you build strength in these muscles, it will be much easier for you to maintain a balanced position on a tiny foothold.
5. Drill for switching feet: Warm up with traverse and switching feet
Find a traverse wall, and use it for warming up. While you traverse it, practice different styles of feet swapping. You can use the foot on top of other foot method or any other method. Some good tricks are shown in the video below.
6.Drill to learn trusting your feet: Tape on footholds (Only do in the gym!)
Put some shiny tape over footholds and then climb them. You will only be able to hold onto them if you put maximum pressure on your feet. This way you will build up confidence and trust in your foot placement, as the friction of the footholds is reduced. But don’t do this on difficult routes and don’t forget to completely remove the tape afterward. Please also refrain from this drill on natural rocks!
7. Drill for accuracy and tension: Toe-stabs
This drill improves both precision and tension in your feet. With you standing away, have a friend to point to a foothold near the ground. You can also chose it yourself. Then balance on one leg and try to touch the foothold with your other feet as quietly as possible.
8. Climb outside
Admitted, this is not really a drill that teaches you a certain part of foot placement. But it’s super important to keep climbing outside. Only there you need all the skills, including the vision to read the different foothold types. So go outside and climb on real rock!
How to Study other Climbers for Good Bouldering Foot Placement
Bouldering is a sport where you can learn from others. Reading about great foot placement is good, but watching good climbers is super important too. Next time you’re at your gym, watch some good climbers climbing and how they place and use their feet. You can also watch some videos of professional climbers. Adam Ondra and Alex Honnold are both super controlled climbers with great foot placement. Keep an eye out for these things when you watch other climbers or videos:
Which part of the foot touches the rock
How do they use their core and lower body to relieve their arms
What are they doing with their eyes and head
How long do they keep both eyes on the foot when they place it
Are they adjusting the foot placement often?
What are they doing with their hips to initiate movement?
What kinds of rest positions do they use and how do they place their feet when resting?
Which part of their foot touches the wall or rock
Conclusion
Foot placement is a basic skill, and like most basic skills it requires hours of training to mastering it. The good news: It’s a linear process, and even if you only spent 2 hours per week on dedicated foot placement training you will quickly notice gains in the difficulty of bouldering you can do. Training foot placement and footwork will make you a better boulderer and also transfer to sport and trad climbing. Don’t be like many beginner boulderers who only train their arms, but focus on your legs and feet too. Your legs are your strongest muscles, and they are a great tool that will save you energy and let you climb more difficult boulders.
Disclaimer: This article may contain affiliate links. If you make a purchase through these links, I will earn a commission at no extra cost to you. Thanks!
Climbing shoes are one of the essential climber gears. That is why you need to make sure you buy the best pair for your style of climbing. On the other hand, with tons of different styles of climbing shoes available to select from, it can be overwhelming to choose the best pair that will suit your preference and budget. To help you pick the right climbing shoes, here are the tips you need to follow. We also put the best climbing shoes for 2020 for boulderers and climbers to the test!
Climbing shoes have a short history, they were only invented in the second half of the last century. But they have gone a long way from there, and for 2020 there are some interesting new concepts like 3D molded climbing shoes with inlay socks and really aggressive beginner shoes, targeted for gym climbers.
What Sort of Climbing You Do Most?
The first and perhaps the most essential factor to consider when buying a climbing or bouldering shoe is to know what kind of climbing are you into. Are you into bouldering, alpine climbing, or sport climbing? Crack climbs, face climbs, or slab climbs?
Different kinds of rock climbing need different types of equipment. What is more, they also need various features and properties in bouldering or climbing shoes. Like for instance, boulders often use tighter shoes which they can pull off fast between climbs.
Choosing the Best Type of Closure
The most popular shoe closures are Velcro and lace, even if slippers are slowly becoming a new style. Selecting the best kind of closure is a personal choice and somewhat about fit. Start by choosing a type of closure and then searching for bouldering shoes which fit your fit. You can also try on many shoes and from the ones which fit, pick the type of closure that meets your needs and preference.
Velcro
Advantages
For those with an average foot, ho big toes or crazy archers but the small middle section, this type of closure fits excellent.
Velcro is faster than lacing, and three straps will provide further adjustability
Velcro’s that has split tongues help fit a wider foot.
Disadvantages
Often, this material can be loose when you are climbing at a high grade for a continued amount of time.
Sometimes Velcro’s can loosen (compared to a lace-up) when you’re climbing at a high grade for a sustained amount of time.
The closure of Velcro might add bulk while climbing and cause pressure points
Who Can Benefit from Velcro Shoes?
This is ideal for everyone, most especially boulders because of the speed in putting on and taking off.
Lace
Advantages
This type of shoe is useful when you have oddly, fussy shaped feet as you can customize the fit, like tighten the lace at the toe. You can also loosen in the mid-part to have a room for high volume feet or high arch feet.
Disadvantages
It takes time to put on and take off
Who Benefit from Wearing Laced Shoes
This is ideal for trad climbers who need a versatile fit. This is also perfect for sport climbers who climb aggressive routes.
Slipper
Advantages
Extremely fast to put on and take off
It is an automatic fit, so there is no closure to stress about
Some models come with a strap made of Velcro, which adds more safety to keep your heel in the right place and lessen slipping.
Disadvantages
Climbers with wide foot might find restrictions to the elastic
If the only closure is made of stretchy material, you may find limitations in performance during aggressive maneuvers because the shoe might stretch or slip.
Wide-footed climbers may find restrictions to the elastic.
When the only closure is stretchy material, one may find performance limitations during aggressive maneuvers as the shoe may slip or stretch.
Who can Benefit from Wearing Slipper Shoes?
Boulders love the quickness of this shoe in getting it on and getting it off. While trad climbers enjoy less bulk as well as pressure point while rock climbing.
Choosing the Best Material
Boulders shoes are available in various materials, so it is important to choose one that meets your needs and preference. Some of the best materials are:
Leather
In case you have fussy or oddly shaped foot which does not seem to like a climbing shoe, then leather might be the best choice. Leather expands when there’s pressure so that it can provide a comfortable fit as this match to your foot over time.
The disadvantage of this expanding is that it makes it challenging to know the right size. It depends on the kind of leather, and it will be more or less stretchy. In general, the leather shoe will expand .5 to 1 shoe size. However, there is an exception, and the LA Sportiva Mythos are renowned for quickly stretching additional 1.5-inch sizes. How big the shoe stretches depend on how tightly it is fitted to start with- a tighter one will expand or stretch more.
Leather is breathable compared to synthetic components. So, your foot minimizes sweats and the shoe airs more, which reduce the smell. This doesn’t alleviate all odors. However, it helps. This material can smell just as gross when aren’t aired out properly after using. So, carry and store your climbing shoes in an open area with lots of fresh air to dry out properly.
Important Considerations
When your shoe does get disagreeably smelly, it is harder to clean a leather model as it stretches when wet. Lined leather climbing shoes do not extend as much. However, they are less breathable.
Synthetic
A synthetic bouldering or climbing shoe is more accessible to size compared to leather models as it has minimal stretch. If you are looking for a boulder shoe which will not alter sizes in due course, then synthetic is the best choice. On the other hand, the lack of stretch does not mean it is vital to get a precise fit-out of the box.
Even if this material can get smells caught in them easier, they are easy to maintain. Most synthetic boulder shoes available will not acquire water damage. Like for instance, the famous LA Sportiva Oxygym’s, this were made to be submersible and washable. A lot of synthetic bouldering or climbing shoes are vegan-friendly as well.
Hybrid
A hybrid climbing shoe can be a good choice because it is easier to size with less stretching. However, it conforms to the exceptionality of your foot in specific areas. However, it all depends on the situation as well as the ratio of leather to artificial materials.
The way you will take advantage of this type of climbing shoes is to look for a model which fits well all through your feet, but could be a bit tighter in the leather parts. This is perfect as those leather parts are able to stretch in order to have a room for knuckles and wider hear.
Sizing Tips on Climbing and Bouldering Shoes
Bouldering and climbing shoes must feel completely snug in your foot. There should be no spaces or dead gaps, which will lessen sensitivity. Spaces or gaps under the arch or in the heel can cause your shoe to slide and slip in when your cam your toes or heel hook into a splinter.
Try-ons should be done around the time when the feet is a bit bigger.
Pay attention to concise climbing shoes. The upper part will stretch; however, the shoes will not get longer as you get them in.
Keep your mind to the rear of the heel. Stand on your toes to ensure the shoe does not press devastatingly on Achilles tendon.
Every model or brand has its sizing. Begin with your standard shoe size down or up to get a comfortable fit.
Try on many different styles and brands. The best bouldering and climbing shoes are those which fits you perfectly. Therefore, take time and try out many pairs.
Unisex Climbing Shoes
A lot of bouldering shoes available on the market today are unisex. When the female’s specific version is on hand, the choices usually are less. Some manufacturers provide women version available in purple and pink color, whereas other manufacturers market a gender-neutral low volume option. Men have low volume feet and decided to buy bouldering shoes for women for a perfect fit.
Top Climbing and Bouldering Shoes Available
The best climbing shoe depends on your chosen fit, closure preferences as well as climbing styles. It is extremely hard to choose, so we have made it simple for you. Below are the top picks for the best climbing and bouldering shoes for 2020. Check this out!
This is among the top climbing shoes for 2020. After going a lot of shoe demo’s SCARPA figured out something interesting, first time climbers would attempt on the most progressive climbing climbing shoes and like those best, although they would be using those advanced shoes sized much too big.
Conventionally, beginner climbing shoes have been reasonably stiff without downturn and asymmetry. This is better when a climber is learning to climb outside on tall concrete walls. The stiff sole helped to feet keep on the smaller holds.
As of 2019 and 2020 however, many rock climbers start to climb at climbing gyms indoor. The holds there are usually much bigger and on overhanging walls— climbing shoes which are downturned and flexible help for these kinds of grips. Therefore, SCARPA made a shoe intended for this type of beginner climber. Also, they made a new last which will encourage climbers to acquire the right fit in this comfortable and softer downturned shoe.
For many years, Mad Rock has been creating compression-molded pieces in their climbing shoes, from three dimensional molded rubbers which cover big toe-patches to three-dimensional molded heel cups. At this point, the company has taken a big step and has created a climbing show with an outer layer that is 3D molded. This essential feature allows for a considerable reduction in wasted rubber. What is more, it also allows the designer to move the rubber easily if they want to make thinner and thicker parts on the shoe to make sure a right and comfortable fit. This results in a more comfortable shoe that performs well too.
To have a room for this rubber construction, there is an inner sock which will integrate the midsole. The inner sock offers either a hard or soft midsole option. It also comes with closure made of Velcro. Still, there are lots of special details to come like the price and the release date.
La Sportiva Cobra 4:99 is the first shoe ever made intended for speed climbing. This began from the La Sportiva Cobra, and the company cut down all the bulkiness. The 4:99 is extremely light as the sole rubber goes halfway. The rear has been stripped to have small structure because this is not needed for climbing the speed road. It also comes equipped with less heel pressure, super-soft heel for an ideal and comfortable fit. It also comes with non-sticky rand on the side to avoid catching on holds.
From the people who initially brought you climbing shoes, this La Sportiva Genius is indeed the result of climbing shoe technology’s many developments and ingenuity. More than just the advancement of the No Edge idea, this Genius model lends the best characteristics from the arsenal of La Sportiva for its style and design. The outcome is a climbing shoe which can edge with precision and support while providing edges as well as barely-there nubbins. On the other hand, this is also perfect for steep climbing.
A lot of shoes made for steep climbs are sensitive and soft but doesn’t have enough fit for its incredible softness when it comes to techy on-feet-styles. For La Sportiva Genius, it does outstandingly well at both.
Black Diamond is one of the best makers of climbing. In fact, they have been in the business for many years and recently released a new model, the Black Diamond Momentum.
This shoe is intended for beginners- providing an easy on and off style, flat shape design as well as superb breathability. It comes with exceptional knit uppers- helpful where you want is and loose when you want to breathe. It is made of synthetic materials which mitigates stretch. Therefore, sizing will be not a problem opposed to climbing shoes made with leather uppers.
Loop and hoop tabs make this shoe easy to get on and off. It comes with soft midsoles flex, which allows the wearer to get familiar with the sense of holds under the feet whether you are smearing or climbing . The outsoles come with Neofriction rubber, which provides for the same sensitivity and thickness. You can wear this climbing shoe all day without pressuring your feet.
It has Velcro closure that might not be perfect for all, however for a newbie gets the task done. It is cheap, which makes it appealing for newbie climbers who are buying their first-ever climbing shoe.
Are you searching for a climbing shoe which is not only convenient and high performing, but also available for a reasonable price? Then look no further than Butora Acro. A lot of climbers praise the box fit of this model. A lot of users are noting that there is a similarity with La Sportiva Solution. Butora integrates “F5 rubber sticky” to harden micro features as well as slabs to make it superb.
This shoe has unwanted space in the heel. Butora Across is not as sensitive as many of the boulder shoes available; on the other hand, the stiff integrated sole offers an excellent edging platform. No pain when climbing rocks!
For those starting rock climbing, La Sportiva Tarantula is the best choice. Few climbing shoes are reasonable at similar quality as well as versatility. A lot of advanced climbing shoes place your foot in a hostile position, which is painful as well as not necessary if you are only starting. Even if this shoe does not have the accurate style of the other expensive models, that can be a benefit. The La Sportiva Tarantula climbs almost everywhere; cracks, gym as well as multi-pitch routes.
Reading this guide emphasizes the idea of how to look for the best and perfect climbing shoes.
On the other hand, you have to ensure that you do a bit of research, as well. Keep in mind that climbing shoes are considered a big investment. Take a look at the nearest gym or crag. Ask climbing partners or friends what they are using and why they choose them.
You are encouraged to read previous clients’ reviews (climbing shoe companies provide customer reviews on their website) for the designs you are considering.
Buying climbing shoes is a time-consuming task. However, it will be worthwhile once you get the best pair.
If you talk about climbing and secrets to become good, one of the surprising things good climbers speak about a lot is skin. It seems that the condition of skin makes a big difference when climbing, which makes sense. It’s your main contact point to the rock (together with your feet). Skin injuries are common, and flappers are one of the most annoying injuries. A flapper is a large piece of skin ripping open on your skin, often caused by blisters opening up due to friction. They are painful, and the sensitive, open skin they expose make climbing painful. Typical advice is to tape them, but how to tape flappers to the palm if they happen? What’s the best way to keep the skin in a working condition – taking a break is sometimes no option. Read on for details.
This post is not (mainly) about healing flappers
Note that this post is not how you prepare your skin for fastest healing. Keeping climbing and making the skin heal in the fastest time are actually two very different things. And they contradict each other: Preparing to continue climbing might introduce further damage to your skin while preparing for healing requires rest at some point. Whenever you continue climbing with skin injuries, you risk extending the amount of time needed to heal up. You introduce the chance of more skin injury to the already soft, damaged, and exposed tissue.
Ask yourself the question: Do you want to continue climbing now, or make sure you heal up as fast as possible. And then act. I’ll present you some strategies to continue climbing in this post.
What is a flapper
You can get a flapper from most grips and holds, but they typically arise when you hold large jugs, etc. where lots of palm or finger area is involved.
Flappers usually occur because calluses on fingers or palm become too thick. While calluses are great, and the hardened skin protects from injuries, if the callus is too thick, it can get pinched between the hold and your finger, and eventually rip open.
You even feel this, when you put big forces on your grip on large holds. Make sure to grip properly when you hold big holds – aka use a shallow hold and try not to put a lot of force on your palm. This also trains your fingers more.
Longterm flapper prevention
Some words of advise: Long term it’s better to prepare your skin to prevent flappers as good as possible. You can do many things for your skin, but there are 3 things that are top priority:
1. Sand down your callused pads and fingers before climbing. Flappers come from climbing in large jugs, and gripping holds them with as much hand as possible. That’s why they rarely happen on routes with tiny handholds and often happen in bouldering gyms, where the easy routes consist of super big jugs. The smoother your skin is in terms of calluses, the less risk of flappers.
2. Harden your skin – climb a lot. By climbing a lot your skin hardens, and if you keep sanding down your calluses you will have very hard but “flat” skin, which minimizes potential surface for flappers to happen.
3. Keep your skin moisturized – chalk and rock climbing make your skin super dry. Super dry skin is also more prone to calluses and flappers, so make sure to use a hand balm. I love “climb on”.
Quick 2 minute routine before bed for Longterm flapper prevention
I usually sand down 2-3 calluses with 80 sandpaper for 3 minutes, until there is still hardened skin left, but the skin is not excessive. I then apply a good layer of the balm for the night. This quick routine helps two ways: I keep calluses small, minimizing risk for flappers. I also keep the hardened skin beneath the calluses in good condition, as to climb on works wonders to heal little abrasions and micro-cuts. By doing it before I go to bed, I also don’t have to worry about some of it spilling on my clothes, etc. – I can use a good portion, and overnight my hands will soak it in. Try it; your skin will feel really good in the morning.
When the flapper happens
Sometimes flappers happen, even though you try to prevent them. There are two options now: Skin is still hanging on your palm or skin came off. If skin came off, there’s not much you can do to tape it as it’s already gone. If there is skin left, it can make sense to cut it off too. Especially if you want to keep climbing.
Cut off edges
Try to cut off the edges of the flapper with a nail clipper or scissors, or even chew them off when you’re outside. This is crucial to prevent further tearing, as excess skin can keep tearing. It’s like a bag of candy – if you open it the wrong way, it tears down to the bottom. Dry the exposed fresh skin and apply some chalk to it if you want to keep climbing. Note: This will be painful, and it’s better to take a break and let it heal for the night. But sometimes, you need to keep going, take multi-pitches, for example. In this case, you can also apply the following techniques for flappers WITH some skin left.
Tape it up to keep climbing
If you intend on climbing more that day, then tape it up and go but once you’re done, take the tape OFF. Letting the air at your wound is one of the best things you can do speed up recovery.
If you wonder how to apply the tape exactly – the best way is to tape a long piece to your wrist, then go around your fingers and go back to the wrist. Go in a line that covers the flapper. This way the tape is anchored to wrist and finger and does not come off so easily. I made a photo of how you should apply the tape below.
Glue it up – the smart alternative to taping flappers
Gluing the open skin is another good method. While tape can come off, and it will do it even faster if you sweat, the glue holds much longer.
The skin under the flapper is ultra-sensitive; that’s why it makes sense to put another layer on top. You can use medical glue for this. This acts as a skin replacement and also seals off the wound. Medical glue comes in two ways: Made for human use and made for animal use. While the animal use is non-toxic too, it’s technically not FDA approved. That doesn’t mean its harmful; it just means there have been no human tests or the company had no money and resources to go through the excessive FDA approval process.
Stay away from household super glue
I would not recommend to use household glue
Don’t use Krazy glue or super glue. While Super Glue and medical glue are chemically pretty similar to each other, I would still stay away from Super Glue and Krazy Glue. They most likely have no damaging long term effects (and there are many climbers using them to glue skin and cuts, split fingertips, etc.), but they can irritate your skin and cause foreign body reaction. And their fumes have been found to cause liver damage and eye irritation. And they haven’t been tested for use on skin (neither animal or human use), nor have they been tested for human use. I would instead opt for either Dermabond or Vetbond.
Expensive: Get Dermabond or something similar
Dermabond is made to close wounds and skin abrasions as well as surgical incisions. It is approved and safe to use, but a package costs 150$+. If you have the money, go get a package, it’s great stuff.
Cheap option: Vetbond or liquid bandages
If you’re looking for a cheaper option, get some Dermabond. At least it’s made for animal skin!
Vetbond is made for animals, so it’s non-toxic for use on skin. It’s not FDA approved – so, I cannot give you medical advice. As the name says, Vetbond is designed for animal use. But the glue works well on both human and animal skin, keep in mind it works for pigs and monkeys – and pig and monkey skin is as close to human skin as you can get.
But as it’s not FDA approved for human use, it means it hasn’t gone through the long and tough process of the FDA. If you read about the topic, there are many people using it for human wounds too, including me.
A lack of an FDA approval does not mean it’s toxic. It just says the company didn’t want to go through the expensive process of approving it, which also includes approving the packaging and so on.
Let it dry out on the air when resting
Letting the air at it will dry it out, and that’s what you want for flappers like these. I find that often I can climb on it again even when the wound is only halfway healed because it’s so dry — it doesn’t hurt or get torn further.
How to use Skinglue like Dermabond and Vetbond for flappers when to continue climbing or bouldering
This is not a longterm treatment. But if you need a quick and dirty fix to keep climbing with a flapper, follow this method. It works decent and keeps you finish your day of climbing. But you should try to rest and heal up afterward nonetheless.
1. Clean the area around and inside the flapper
Make sure your flapper or abrasion is clean enough. Let blood push dirt and bacteria away; you can also use some wound disinfection.
2. Stop bleeding if there is any
Stop bleeding with gauze or tissue by applying pressure.
3. Keep palm skin slack while applying
Make sure your palm skin is slack, so don’t tense your hand.
4. Apply the first layer of glue
Line up the skin (if there is skin left) with the wounds outer edge and apply a layer of the glue to the exposed flapper. It will seal the wound directly and immediately. If you have no skin left, apply a patch of Vetbond over the exposed fresh skin – it will act as a skin replacement, and protect the sensitive skin below.
5. Let harden, repeat 2 times
Wait a few minutes, repeat the process 2 times, to have 3 layers of glue.
6. Keep glue away from wool, cotton, etc.
Make sure to keep the glue away from cotton, leather or wool. These materials will cause a heat reaction with the liquid glue, causing burns.
7. Use water or saliva to harden the glue
The glue hardens by contact with water and thus will harden when in contact with blood. If your flapper does not bleed, spit on it while gluing. You can also moisturize the area of the flapper with some water.
The glue will come off over the course of 5-7 days.
You can reapply it if you like.
We put 16 of the best climbing and bouldering pants on the market through the wringer for 2020. Prana Stretch Zion (women’s equal counterpart is the Prana Halle Pant) is our winner, closely followed by the AP pants of Mountain Hardware. We also included a low budget option to find the best climbing pants in 2020.
Climbing uniquely challenges clothing, especially once you climb on real rock. You basically use your pants in a way that would destroy regular clothing within a short time. An ideal climbing pants pair should be both very durable, breathable, and maintain mobility.
Our 2020 Review
These goals are usually going towards opposite directions, but thanks to excellent fabrics and smart design, there are many top-notch climbing pants for 2020. Our top 16 climbing pants of 2020 are mostly great picks, and if you stick to our recommendations you won’t go wrong!
Some of the pants we tested won’t be continued in 2020, but you can still get them at a huge discount online, and they offer the perfect opportunity for a bargain. We have marked these as discontinued, so you can go bargain hunting!
UPDATE
As new pants are released by the different brands, we reviewed these and continue to review new models, so this list will grow over time! That way you will always find an updated list of the top climbing pants in 2020 here. Some of the pants we tested have been on the market for some time but experienced minor or major improvements, so we felt it’s worth to retest them in their current version.
Choosing the perfect pair of climbing pants comes down to what type of climbing you are doing in which climate and under what circumstance, that’s why we included a little guide as well. Read more for details!
Use the quick list to directly jump to the review:
Prana Stretch Zion Pants /Women’s: Prana Halle Pants – 97/100
Short Facts:
Material: 97% nylon, 3% spandex
5 Pockets: 2 hip, 2 rear, 1 zip thigh
Weight: 385 g (13.6 oz)
A built-in belt that is adjustable
Leg snaps can be rolled up
Prana Zion pants are well designated and crafted with perfectionism. Being both functional and good looking, they have the potential to be the all-rounder pant for 2020. No matter if you go rock climbing, bouldering, traditional climbing or just hang out at the crag.
What we really liked about them is the stretchy material, which feels very polished and is abrasion-resistant. On top of that, it dries fast when it gets wet, which makes it perfect for spring and autumn climbing. They don’t cost a lot and are both warm and breathable.
And they come with ventilated inseam gusset, a built-in belt, five pockets with mesh inlay to store whatever you need and some roll up legs for more ventilation in the summertime.
Prana made a real candidate for the best rock climbing pant with the Zion, this doesn’t change in 2020. If you compare them to pants like the Arcteryx Gamma pant, they offer better value for the money
Pros
suitable for any type of climbing, bouldering
very durable and breathable
stretch a lot, thus comfortable
belt included
price is reasonable
dry quick, robust and abrasion-resistant
ventilation top notch
Cons
not as warm and insulating as some of the other pants
The best outdoor climbing pants of 2020: Outdoor Research Men’s Ferrosi Pant / Outdoor Research Women’s Ferrosi Pant
Short Facts:
Material: 86% nylon, 14% spandex
5 Pockets: 2 hip, 2 zip rear, 1 zip thigh
Weight: 345 g (12.2 oz)
Cuff closures with draw cords
A close follow-up to our top pick, the Ferrosi pants are a favorite of our testers. They feel ultra-comfortable, almost as if climbing naked. Thanks to the thin and light fabric, they offered perfect mobility and breathability.
They were the best pants in terms of breathability and mobility!
I personally would wear them even when relaxing on my couch in favor of sweatpants.
To our surprise, they also were pretty abrasion-resistant and durable, as well as protective. Weatherproofing was top-notch, and even when climbing outdoors in colder air, they felt warm and comfy. Ferrosi pants are reasonably priced too: If you can get them on a discount, they are a steal.
Plain and simple
Our only complaint is that they lack additional features. They do have a cinch system for the leg cuffs, but it works not so great, and the waist is non-adjustable, which means you need a separate. Some might consider this a plus, but the design was almost a little too simple for our taste. But if you prefer minimalistic, no-frills pants, Ferrosis are your go-to pants.
A debatable topic is their look – they are not very fashionable, but we think for a technical climbing pant, that should not be your main focus.
For the all-round best pant, the Ferrosis didn’t make it by an inch. But they are the best climbing pant for outdoor climbing, no matter if you boulder, sport climb or trad.
Pros
best for any type of outdoor climbing, bouldering
most breathable pants in the test
large thigh pocket
cheaper price
lightweight and comfortable, almost like wearing nothing
surprisingly warm
ventilation top notch
Cons
style is not super fashionable
Best looking and fashionable climbing pant: Prana Axiom Jeans
Short Facts:
Material: 99% organic cotton, 1% spandex
4 Pockets: 2 hip, 2 rear
Weight: 306 g (10.8 oz)
While the Mountain Hardwear AP Pant does look slick too, Pranas Axiom Jeans are still the best looking climbing pants.
Fitted, stretchy jeans are stylish, and there no way around it. And we have to admit that they excel in mobility too. It was almost surprising, but Prana somehow managed to blend denim with stretchy material. The result is pants that look like jeans but climb like every other good climbing pants. Thanks to the diamond gusset crotch, your legs are pretty movable too, and stepping high on a difficult boulder or when topping out of a route is easy and comfortable.
Their other big plus is the looks: If you take your time and try them on, they look pretty sharp thanks to their fitted cut.
Get the looks
The obvious additional strength is the looks. Appropriately sized, the Axioms have a straight but fitted cut that sits nicely and looks sharp. If you don’t know it, you will not even be able to pick them out from normal jeans.
As they are denim, however, they are not as comfortable as regular climbing pants. And if you have thick quads and calves, or are overweight, you need to size them one size bigger than normal.
Everyone else should size them one size smaller than normal, as they are cut pretty loose.
When it comes to outdoor climbing and weatherproof, they are not that suitable. While they are still comfortable to wear when hiking, as soon as things become humid or wet, the denim fabric is mediocre. And it is not as abrasion-resistant as some of the nylon blends. As such, we cannot recommend them as hardcore outdoor climbing pants. But if you need a versatile all-rounder to wear to the gym, bouldering and for the evening beer to your local pub, they are our top pick.
Pros
very flexible and stretchy material, although being denim
gusseted crotch area
best looking pants in the test
fitted cut is sharp and sizes well
lots of leg mobility
Cons
not so great weatherproofing, which is to expect for denim
abrasion resistance on the surface is only mediocre, although the inner part of the pants are durable
If you look for an eco-conscious pant, don’t look further than the Patagonia Venga Rock Pant. This one looks so good, you can even wear it when going to the pub, but comes with a breathable and stretchy finish. They are also good to climb in, although they lack an ankle cinch, which we think is a bit of a downer.
They do have a gusseted crotch, a toothbrush holding loop, and reinforced knees. Makes them an excellent choice for people who love to boulder and climb cracks, but not so great for long alpine routes due to the missing ankle cinch, which means you cannot close them.
Pros
Great mobility and flexibility
Reinforced knees
Good pockets
Gusseted crotch area
Breathable
Toothbrush holder loop is practical
Robust and comfortable
Cons
No ankle cinch
Pretty expensive
So Solid Leggings
Short Facts:
Material: 78% RECYCLED polyamide
No Pockets
Weight: 200 g (7 oz)
These eco-conscious pants are made of 78% recycled polyamide. So Solid makes Leggings for boys and girls. Granted, you have to be a bit of an extrovert to rock these pants as a guy, but this is something we liked.
When it comes to performance, it cannot get any better than against-the-skin tight – they so comfortable and stretchy, that it’s like you’re climbing naked. As stretchy and thin the material is, it’s still relatively resistant to abrasion, although you shouldn’t expect it to work like a thick pair of pants from jeans fabric.
With their gusseted crotch and breathability, they also give you a nice level of breathing. It’s up to you if you like the style and the colors, but these pants work!
Pros
stretchiest pant we reviewed
abrasion resistant for a leggings
you will make new weird friends when you wear them
gusseted crotch
warm for being so thin
suitable for indoor climbing and bouldering
Cons
a bit pricey
don’t wear if you don’t like attention
no pockets whatsoever
less warm and durable than the other “real” pants
Arcteryx Gamma Rock Pant
Arcteryx Gamma pant: Great but expensive
Short Facts:
Material: 84% nylon, 16% elastane
3 pockets: 1 rear, 2 hip
Weight: 362 g (12.8 oz)
These pants are a little bit heavier than some of the others but other than that they are fantastic. Water-resistant, flexible but warm and very breathable they tick many of the features we wanted.
The nylon material makes them also durable, and the designers cleverly implement features: A chalk bag loop, integrated belt, four-way stretch, gusseted inseam and lots of pockets work well in day to day climbing.
Thanks to the protective knee area, you have some protection here as well.
But they are expensive, and one pair of these pants cost you twice the amount of the other pants, so be aware.
Pros
Perfect for alpine and trad climbing
Mobility is great
Warmth is suitable
Gusseted crotch and integrated belt
Weatherproof
Chalk bag loop
Cons
very expensive
heavy
Mountain Hardwear Yumalino Pant
Best winter pants: Mountain Hardwear Yumalino pants
Short Facts:
Material: 88% nylon, 12% elastane;
5 pockets: 2 rear, 2 hip, 1 side
Weight: 550 g (1 lb 3 oz)
This is the perfect pant for autumn and winter climbing. They’re easily the warmest pants we tested, and are made with a super comfy soft fleece lining.
Thanks to the softshell exterior shell they’re also water repellent and great for cool weather outdoor climbing. The gusseted crotch makes them mobile as well, combined with the stretchy material. For further protection, MH reinforced the knee area.
But they are the heaviest pants in our test, and the material makes them unsuitable for summer climbing. If you’re looking for a cold-weather, durable and warm alpine and trad climbing pant these are perfect for you. If you have the change to spare, they’re pretty expensive.
Pros
best for trad and alpine climbing
very warm
comfy soft lining
durable weatherproof exterior
reinforced knees
Cons
too heavy and warm for summer climbing or bouldering
expensive
La Sportiva Talus Rock Climbing Pant
Functional and good looking: La Sportiva TalusShort Facts:
Material: 96% Nylon, 4% Spandex
4 pockets: 2 rear, 2 hip,
Weight: 420 g (14.8 oz)
La Sportiva’s Talus pants look awesome and are functionally designed.
Including protected knees, gusseted crotch and integrated sleeve for a toothbrush, they also sport a handy loop for your chalk bag.
Made from 100% synthetic material, they’re breathable and comfortable. As the elasticated waist has a string-tie included, they also fit really well with harnesses – no belt needed!
We liked these features a lot, but the pants are pricey, and the material felt a tad less high-performing compared to the Gamma, Venga or Zion pants from above. They also lack an ankle cinch.
Pros
comfortable
elastic and adjustable waist
integrated loops and sleeves for brush and chalk-bag
reinforced knees
gusseted crotch
Cons
expensive
no ankle cinch
La Sportiva Arco Pant
Roomiest pant we tested: La Sportiva Arco
Short Facts:
Material: 97% cotton, 3% lycra
4 pockets: 2 rear, 2 hip
Weight: 360 g (12.7 oz)
Our secret tip for 2020. They’ve not continued anymore, but if you can get them on a discount, they’re a hot tip. They have more flexibility and comfort than almost all of the other pants, and if you look for roomy pants, these are your best bet.
Coming with a foldable waist, reinforced knees, integrated toothbrush pocket as well as a gusseted crotch we think they’re intelligently designed.
Fit is super relaxed, offering maximum movement range, and it makes them very comfortable.
Thanks to the bottom hem cinch you can also adjust them easily and while they are not really warm and water-resistant, we still can recommend them to boulderers, gym climbers and summertime crag climbing.
If you look for alpine and trad climbing pants, these are not the best choice. They come in nice and bright colors too!
Pros
foldable waist
reinforced knees
toothbrush pocket
awesome ankle cinch
gusseted crotch
roomy and comfortable
breathable
Cons
not warm at all
not water-resistant
not great for trad and alpine climbing
Ucraft Xlite Climbing Pants
Reasonably price: Ucraft Xlite Climbing pants
Short Facts:
Material: 92% polyester, 8% Spandex
4 pockets: 2 hip, 2 side, zipped
Ucraft Xlite are a nice pair of pants, which are made from super light and stretchy material. They’re priced affordably, and although they’re not the most durable pants out there, our testers liked the features they had. For the money they pack a lot of nice extras: Elasticated waist, reinforced knees, zipped side pockets and breathy materials.
Ucraft also gave them a chalk bag loop and a sleeve for your toothbrush – a nice addition!
With the ankle drawstrings, you can also convert them to 3/4 length pants or even shorts in the summertime. We think these pants are solid all-round pants if you don’t want to go alpine climbing.
Pros
reasonable price
gusseted crotch
integrated chalk bag loop and toothbrush sleeve
stretchy material
breathability good
low price alternative to Gamma or Arco pants
Cons
not warm enough for cold-weather or alpine climbing
not really rugged materials, fabric peels of easily
front pockets a bit too shallow for our taste
Topo Designs Climb Pants
Topo Designs Climb pants
Short Facts:
Material: 98% cotton, 2% spandex
4 pockets: 2 hip, 2 side, zipped
Topo Designs’ Clim Pants are another solid all-rounder. We don’t see them perform on the same level as their competitors in terms of materials or stretchiness, but they are a bit cheaper too.
Features are good, with a gusseted crotch, lots of pockets, integrated belt and a nice chalk bag loop. Breathability and mobility are pretty decent too, but if you want to tackle really nasty boulder problems, you might want to look for other pants.
For long alpine and trad climbs, they are solid though, although they lack water repellency.
Pros
stretchy cotton-lycra blend
integrated belt with chalk bag loop
gusseted crotch
enough pockets
breathable and lightweight
warm enough for longer trad climbs
Cons
not as flexible as similarly priced competitors
not water repellent
Almost number one: Mountain Hardwear Men’s AP Pant / Mountain Hardwear Women’s AP Skinny Pant
Short Facts:
Material: 75% cotton, 23% nylon, 2% elastane
Pockets: 2 hip, 2 zip rear, 1 velcro thigh
Weight: 204 g (7.2 oz)
leg snaps to roll up
These pants are not winning any particular awards, but they were strong in all areas and really versatile.
They look excellent, and the fabric feels durable and pretty technical. They’re very warm and weatherproof and still look like slacks. In terms of fashionability, these are the close follow-up of the Axiom jeans. You can comfortably take a stroll around town in them.
Featurewise, they come with velcro thigh pockets, two zipped rear pockets. An exciting feature is the reflective stripes inside the calve area, which is really handy when you roll them up for cycling or hiking at night times.
Although they lack an adjustable belt, they still fit snug if you size them right.
Problematic is the stiffness, as it meant they sometimes rode up or down when climbing longer routes – we had to adjust them from time to time. Not a significant problem, but compared to the other pants, they were not as strong in terms of fit.
The fabric also felt a little less comfortable and breathable compared to some of the other pants.
Pros
excellent looking fabric, almost like wearing slacks
reflective stripes inside calves, great for cyclists when rolling them up
good weatherproofing
good warmth
velcro thigh pockets and zipped back pockets
Cons
mobility not as good as other technical pants due to stiffer material
fabric not super comfortable
E9 Rondo Slim
Personal favorite: E9 Rondo Slim
Short Facts:
Material: 97% cotton, 3% elastane
3 Pockets: 2 hip, 1 rear
adjustable waist with elastic band
cuff closures with cords, work well
E9 offers its classic Rondo pant as a slim version this year. They come with a chalk bag loop, 3 deep pockets, and offer premium flexibility. Despite the slim cut, they are still roomy enough to tackle hard boulder problems and challenging sport climbing routes.
They are not the warmest pants out their, although they are very breathable. And if you plan on climbing outside in humid conditions, stay away from them, as they are made from cotton and not waterproof.
But if you need a reasonably priced (they can be founder under 50$), boulder and sport climbing band with an awesome ankle cuff system and sporty slim-cut offering good mobility the E9 Rondo Slim might be the right pick for you.
Pros
great mobility and comfort
lightweight
breathable
cheap
ankle cuffs work really well
durable fabric
Cons
no closure on pockets, not so great for alpine or trad climbing
not really warm
not water repellent
Long-Term Test Notes
I, Arne Henricks, owned my personal pair of E9 Rondo for years. I actually have 3 pairs of them and wear them on any occasion be it in the alps on via ferratas or my local crags and to the gym.
They still hold up, even after years of abuse, and I haven’t treated them really good, tearing over rock, scraping on boulders or plastic. I love how they are super comfortable and get the job done without being pricey.
The deep pockets are tight enough to fit a phone snug, and while they’re not perfect for alpine climbing or wet conditions, they pretty much can do anything else. In winter I wear some thin panties to stay warm, it works for me. I even have a pair of shorts from E9.
Patagonia Men’s RPS Rock Pant / Patagonia Women’s RPS Rock Pant
Patagonia RPS Rock Pant
Short Facts:
Material: 52% nylon, 48% polyester
Pockets: 2 hip, 2 rear, 1 zip thigh
adjustable waist
cuff closures with drawcord that do not work however
We didn’t really know what to think about the Patagonia RPS pants.
Yeah, they might be comfortable, but Ferrosis way more comfortable. They are mobile, but the Zions were way more flexible and offered greater mobility. In terms of style, the Axioms and AP pants looked better.
The Patagonia RPS are not bad pants, they have good features and ar well designed. But they don’t excel in any area. They are protective and breathable, but they lack a good cuffing system. The cinch on the ankle could not keep our testers ankles free of dangling fabric.
And they are not cheap, so as a result, they range somewhere in the middle of our contenders. We cannot recommend them as the first pick for any category, however.
Pros
mobility good, but not perfect
breathability good, but not perfect
durable fabric
Cons
won’t really excel in any area
price is not really cheap
cuff system won’t work too well to keep cuffs away from ankles
Black Diamond Notion Pant – Men’s / Black Diamond Notion Pant – Women’s
Black Diamond Notion: Sweat Pants for climbers
Short Facts:
Material: 98% cotton, 2% elastane
Pockets: 2 hip, 2 rear
Drawstring elastic waistband
Elastic cuffs
Black diamond created a weird pant here, using soft cotton and a drawstring waist. There are no zip pockets, which makes them not suitable for longer outdoor climbing or hiking in our opinion, and the cuffs are simple one-size-fits-all elastic.
These pants want to live indoors. For gym climbing, the stretchy cotton is fantastic and offers great flexibility. If you want, you can also use them for yoga or any fitness class. Breathability: Check! Comfort: Top notch!
But that’s it, they’re neither waterproof nor warm, and we wouldn’t recommend to use them for longer trad or alpine climbing – the soft material would just rip – the Notions were the least durable pants in our review. And the missing pockets might be nice indoors when you don’t need them, but outdoors the lacking zip pocket is a real problem.
Pros
mobility really nice
comfortable
Cons
not really suitable for outdoor climbing – least weatherproof pants of the test
not really durable
cuff system won’t work too well to keep cuffs away from ankles
Budget Option: Carhartt Washed Duck Dungaree Work Pant
Carhartt Dungaree Work Pant: Not made for climbing
Short Facts:
Material: 100% cotton
Pockets: 2 hip, 2 rear, 2 utility, hammer loop
We included these work pants as a budget option, and in fact, you won’t need to buy them from Carhartt, but any other brand will probably work.
But to be honest: They are no match for the other pants. The fabric doesn’t stretch, the fit is not forgiving nor cut in a way that suits climbing moves, and they have no breathability.
Looks are not great either, with wide thighs and calves you will look bulky even if you’re athletic. They come with six pockets, which are all utterly useless as they have no zip, no closure and tend to loose whatever you store as soon as you go vertical or overhanging.
Since they are not particularly comfortable, their only strong suit is durability – as they are working pants, they won’t rip easily. The lack of a cuff system is annoying as well, given the wide cut on the calves.
If you look for climbing pants, don’t buy them. They might be good for work, but even for the price they come at we cannot recommend them as climbing pants.
Pros
cheapest pants
durable, as it’s a working pant
Cons
not that mobile, as they are not really made for climbing
heavy fabric does not stretch
fit is restricting motion
utility pockets are not really much use when climbing
no cuff system
Match your climbing pants to your climbing style
Sport climbing, bouldering, and indoor climbing
All the above types of climbing involve moves that are fast, dynamic, and athletic. And these moves require a greater range of motion from the climber and thus the pants. Pants for these types have a gusseted crotch and maximum flexibility by using materials with high elastane percentage.
Alpine and trad climbing
While you need flexible and stretchy pants when you go climbing alpine and traditional routes, these features are not the most important ones here. On long traditional or alpine climbing routes, you need warm, comfortable, and breathable pants. They can be a bit heavier but should feature closable pockets, maybe even microfleece lining and a durable, water-resistant finish.
Materials for the perfect climbing pant – things to consider
The materials decide how your pants will perform. Besides the cut and features like gusseted crotch area, materials are your number one thing to consider.
1. Flexibility
If you try to go cycling in a ballroom dress, you will fall. Same goes for climbing, if you wear the wrong pants, you won’t have a good time. Flexible pants are king, and if you have pants from a flexible material, it will allow you to make super stretchy moves. Levis 501 might look cooler but trust us: When you bomb your project because you lack 5 inches of movement on the last move, you’ll quickly consider climbing plants.
Stick stretch Cordura and lycra or elastane.
2. Breathability
Not just in summer, but also warmer spring days need breathable pants. If you’re on the wall on a longer route, things quickly become warm when exposed to the sun. Good climbing pants offer a high level of breathability and come with smart ventilation features.
3. Durability
In the past, you had to choose either heavy, durable pants or lightweight linen style pants that ripped easily. Today, this changed, and you have both lightweight and durable pants thanks to synthetic materials
But the general tradeoff of a stiffer, heavier and more robust or ultra-flexible and thin pant is still there. Trad and alpine climbers usually prefer less flexible but more durable pants, and boulderers and sport climbers like their pants more flexible.
4. Comfort
How comfortable your pants are, come down to the discussed points above as well as features like gusseted crotches, ankle cuffs, and elasticated waists. Another factor is built quality – wrongly placed reinforcements or seams can chafe your skin after long climbing sessions. In general, if you want comfort, go with stretchy pants.
5. Main materials of the pants we tested
All the pants we tested had a wide array of different fabric types and material blends used, and they behave differently. Most pants were however made from either nylon or cotton or some mix of both. It makes sense to discuss the differences between these two material types.
Nylon is the gold standard of outdoor clothing. It comes in all kinds of different proprietary mixes, but nylon fabrics usually offer low weight, excellent breathability, and a high level of elasticity. They also dry easily, and many are waterproof. It is a synthetic material, so this means it starts to smell if it’s not washed correctly.
Cotton, on the other hand, is natural and softer than nylon. It’s also very breathable and relatively durable, although there are many blends of nylon that offer supreme durability compared to cotton. Cotton is also heavier than nylon. You can also dry it in a commercial dryer, which is an advantage.
If you need breathable pants, you should try a lighter pant like the Ferrosi or Notion. If you need a very functional pant with lots of features and protection, you should try the Prana Stretch Zion or the AP pants.
Keep in mind that the fabric will also change the fit of the pants. If it’s possible, try the pants on in person, and refer to our fitting guide.
The warmth of the pants
Hypothermia sucks, even if you save some weight in your pants. Don’t skimp on weight if you tend to feel cold. Climbing outdoors is a serious sport, and hypothermia is no fun. If you go trad and alpine climbing in colder weather, stick with warm pants and forget about weight savings.
If you go crag climbing and bouldering, it’s ok to opt for thinner pants, but for alpine climbers, we recommend fleece-lined pants, unless you climb somewhere really hot. Mountain weather can change quickly!
Features on climbing pants
These handy features are nice to have and can be really helpful. Also if you still wonder why climbing pants are a good idea when you boulder or climb, read my post or watch this video.
Gusseted crotch
A gusseted crotch means added material in the crotch area, which is fantastic for male climbers – as it’s anatomically better. Especially when you do yoga moves or dynamic climbing moves.
Drawcord or ankle-cinch
This is needed to adjust the length of the pants, and you can also use it to convert them to shorts or 3/4 length pants.
Toothbrush holders/toothbrush pockets
A brush is perfect for cleaning footholds and handholds in a route, which is important on some more frequently climbed routes. A holder for your brush is handy.
Zippered pockets and/or closable pockets
If you climb alpine routes or multi-pitch you definitely want a closable pocket of some sort, be it zip, velcro or buttons. Searching for small items in your backpack quickly becomes cumbersome otherwise. All of the pants we tested to find the best climbing pants 2020 had at least two pockets in the hip area and one in the rear. Except for the leggings, but they kind of run in their own league.
While some of them had zippers on the pockets, this is actually a debatable feature, some like it, some hate it. We think closable pockets are a must for alpine or trad climbing pants.
What we find essential is the thigh pocket, this pocket adds safe storage for cellphones or keys by having a closure system. A feature all of our testers loved, as it keeps valuables safe and does not interfere with a harness.
Cuff system
A cuff system keeps loose and too-long fabric away from your ankles.
This can be to ventilate, but also if you want to avoid to step on your pants all the time when precise footwork is needed. And it’s also nice to see your feet without flaps of fabric blocking the line of view. Pants like the Zion, AP Pants and some others have cuff snaps. Other pants like the Rondo slim or the RPS and Ferrosis sport cinch systems, with is nice. Other pants have roll-up cuffs, but no closure system. While the Stretch Zion pants and the RPS pants have an integrated belt, some other pants have either elasticated waist or drawstrings.
If no fitting system is given, you need to try them on for exact fit.
Chalk bag loop
An integrated loop for chalk bags on the rear or the side is very nice, especially if you boulder or free climb without a harness.
How to find the Best Climbing and Bouldering Pants for Your Needs
Climbing and bouldering pants are no magic, the manufacturers usually take some very flexible and mobile pants which are made from a durable material. Then they add some pockets and things like loops and cinches and change parts of the pant like the crotch area for even more mobility.
We would choose a very mobile and flexible pair of pants with lots of freedom of movement over a stiff and clunky pair of pants any day. But the next priority should always be the comfort and good features. When it comes down to these aspects, there are some differences to keep in mind.
How We Test Climbing Pants
When we test pants, we usually wear them doing routes and problems in the gym. That’s our first line of testing, to see how the pant performs in a controlled environment but without the environmental influences like cold weather, rain, and real rock.
After the gym test, we wear them bouldering outside and doing some sport climbing and/or trad climbing. This is our test where we also test how warm the pants are if they are rainproof and how abrasion resistant they are when you do crack climbing etc.
We also wear them for other activities sometimes, such as hiking, walking, mountain biking, and yoga, to see how they perform in day to day activities. Then, after testing, we rate them in these three categories.
Freedom of movement & mobility performance
Could we move easily wearing the pants? Did they resist certain moves when climbing or bouldering? Was stretching the legs possible without the pant interfering?
Level of comfort and breathability
Were the pants comfortable even when wearing them for longer periods? Did they breathe, or did we feel clammy or stiff when wearing them? Did they cause rashes on certain parts like the crotch area, ankles, etc.?
Bonus features, versatility, and practicability
Good pants should be versatile, so we review and rate how easy you can use the pants for different styles of climbing, bouldering, and so on. Bonus points if they hike and approach well. We also adjust the rating if they make our live exceptionally easy or hard, for example, if they need special care when washed.
Summary
Here are the best climbing pants with their score:
Most of the new routes you tackle need training, and if you try hard routes you will almost never climb the first try. Look at the pros when they redpoint climb a route (unsure what redpoint means, read my article), they almost seem the flow through the route. Precise legwork and sequences of moves are not just coincidence, top climbers spend hours and days of work to study the route and perfectly execute every tiny move. I’ll write about some of the tips that have helped me in the past, to make projecting a bit easier for your future new climbing goals. If you’re unsure how to project most efficiently, read on.
Misconceptions about projecting a route
Working on a project route is not just trying the route time after time until you can climb it “somehow” to the top. Projecting a route is an art, and I’ll break the process in different phases and steps. A lot of the thoughts also apply to boulder problems, so feel free to apply the knowledge there too.
Climbing new routes and understanding that your resources are limited
If you climb, it’s all about how you manage your resources. Climbing is a big game of resource distribution and dedication after you understand the basic moves and trained them enough. Strength, energy and mental focus are precious and limited, and if you burn them up on the first feet of a route you’re doomed for failure. That’s why you need to allocate these resources in an effective way – it pays off! Some of these strategies took me a while to learn, but when I did it clicked.
Step 1: Learn the beta in order to learn how to project
Beta is all the knowledge about the route you can get. This does not necessarily mean to deliberately start scrambling and going full power to reach the anchor. Instead, it can be smarter to tie in toprope and have a look at some of the difficult sections. Think about how you would place yourself ideally for maximum efficiency. Are there any holds that could support these positions? If not, can you change a position a bit, to make it possible to hold it, sacrificing some efficiency but gaining a new way up the wall? Once you figure out a good position, find consecutive holds, maybe even write them down in a notepad. After a while, you will have a sequence which you can then link together with other sequences already found.
Whatever you do while researching a route, get rid of any false ego you might attach. This is research mode, there is no room for ego games or a false sense of pride. Use your clip stick, and possibly top rope wherever possible. When you approach a route this way, it will feel awkward initially. You will hang there in toprope like a beginner, but you need to escape from this feeling. After a while, you will check different ways to grab holds, connect moves and sequences, and your climbing will become more efficient. Make sure to take all the time you need in step 1, and don’t worry if you look stupid while you do it. Fewer people will care about it than you think, and if you send the route later on – it was worth it!
Step 3: When you have a sequence, work through it
If you find a sequence that feels good, try to climb it in one approach. Your route will actually consist of a sequence of sequences, divided by really tricky moves and rests. So, make your way through the sequences and use the rests to rest up.
If you completed this, and have a mindmap of cruxes, sections and rest points you can continue with step 4.
Pro tip: Take a break from your project
Continually working on single moves or hard sequences wears you down, not only physical. Make sure to take a break from your new project every now and then. Don’t be afraid to leave your project alone for some days. It’s better to stay away from a project for some days, then letting it destroy your optimism and fun.
Step 4: Success is a chain of small accomplishments
Every hard section in your project can be considered a route in its own regard. Begin with the easiest sections and work your way up, ending with the hardest parts. Once you can do all the sections isolated, try working on connecting them. Doing it this way keeps you in the loop for repeated accomplishments, and you stay motivated. And it’s easier to analyze failures too, as you see which part of the route is hardest for you.
You can then start optimizing your approach for that section.
Step 5: Divide the route into 2 parts and finish them isolated
If you can do all the single sections, and also worked on connecting them, it’s time to divide the route into two sections and do it this way. Only once you are able to finish the route successfully this way, you should move on to try sending it in one go.
Step 6: While you work on the send attempt, if you fall that’s most likely your personal crux
Since you are able to do the sections individually, and also in two parts, if you still fall while redpointing the route, this is your personal crux. You need to work on the section where you fall again. Chances are high that you need to work on endurance of mental focus, as you can tackle the section when climbing it isolated. The easiest way is by using overlapped climbing. This means you start below the crux, and make your way to the next rest, and then again to the top.
You also might need to find a more efficient way to climb it when doing the route in a redpoint attempt. What works for isolation mode or two-section split, might not work for redpointing.
When you finish the overlap climb, increase the overlap, that is starting from further below the hard part. The logic behind this approach is that you usually never start a hard section fresh, but with some built-up fatigue, so it makes sense to train that way. Continue to grow the overlap until your overlap starts from the ground – voila, you’re now redpointing the route.
Step 7: Isolation mode
If you need to work on an isolated part of the route, keep things like bodyweight placement in mind. Are you using the holds the right way? Should you flag instead of going frontal?
Step 8: Tackle mental issues and problems by freeing yourself from your beta – change is good!
Sometimes you can train and practice as much as you want, but you still fall in the section when trying the redpoint. This can have multiple causes, maybe something physical needs to be changed? Your beta might also not be correct for a redpoint, so step back and approach the route in a different way. Someone once said that a crazy person tries something the same way over and over but expects different outcomes. This is especially true for climbing and bouldering. You need to realize that your way of trying a route is not always the best. Some of your moves are only in your sequence because you started the route with certain moves. If you change your beginning, you might end up finding a smarter way up. This applies for the complete route, so stepping back from your tunnel-vision or “perceived the only solution”, talking to other climbers and just brainstorming will help you out of this rut.
More tips
Manage what you expect and relax
Don’t always expect to send a route. It’s about the process, not the outcome. If you master the process and get used to accepting the perfect execution of a smart process as a reward, ultimate success will come over time. Your goal should be to do your best to try and climb hard and smart. Relax into a redpoint attempt, nothing good ever came from overly stressed tryhard climbing. Instead, remember why you climb: To be outside, tackle hard problems and have fun.